

Microsoft Virtualization is one of the hot topics currently because Virtualization enables the potential cost savings on the investment on Physical hardware, Datacenter space, electricity, and Cooling cost. With Hyper-V, it’s easier than ever to take advantage of the cost savings of virtualization through Windows Server 2016 Hyper-V. Windows Server 2016 Hyper-v enables you to consolidate multiple virtual machines running multiple server roles to run on a single physical hardware with Windows Server 2016 Hyper-V installed.
In the Previous posts, We have look at the Installing Hyper-V Role in Windows Server 2016 and Configuring Windows Hyper-V 2016 along with the procedure to Add the Hyper-v Manager role in Windows server 2016 because we need to have Hyper-V manager role installed on the Windows Server to create the virtual machine. In this article I will explain to you the detailed procedure to Create Virtual Machine in the Microsoft Hyper-V Server.
Create Virtual Machine in the Microsoft Hyper-V Server
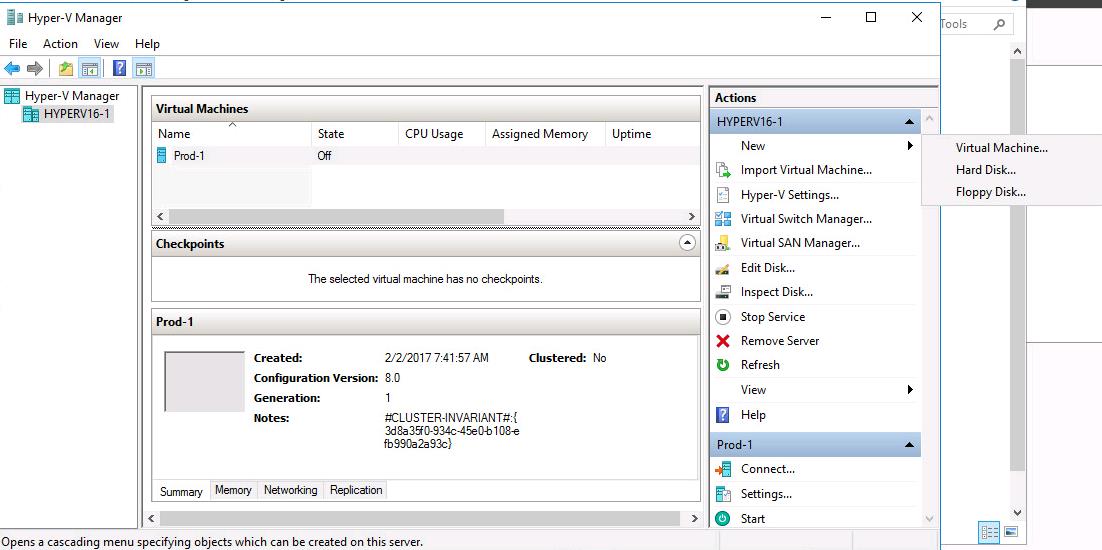
To Create Virtual Machine in the Microsoft Hyper-V Server, Click on Hyper-V Manager to open the Hyper-V management tool under Under Administrative tools. You can manage the Hyper-v role on the local server and also the remote Hyper-V Server on the Hyper-V Manager.
Right Click the Hyper-Server in the Hyper-V Manager and Click on New -> Virtual Machine to create the virtual machine on Windows Server 2016
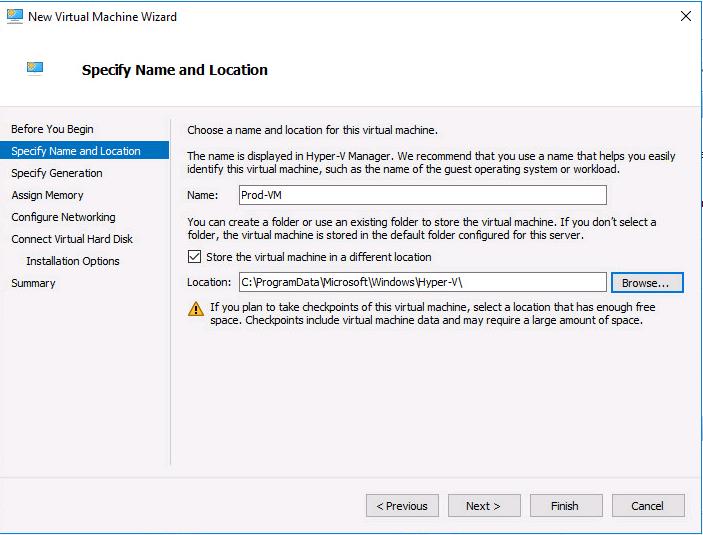
Specify the Name of the Virtual Machine. This name will be displayed in the Hyper-V Manager inventory. You can create a folder or use the existing folder to store the virtual machine. If you don’t select a folder, the Virtual machine will be stored in the default folder configured for this Hyper-v Server. Click on Next.
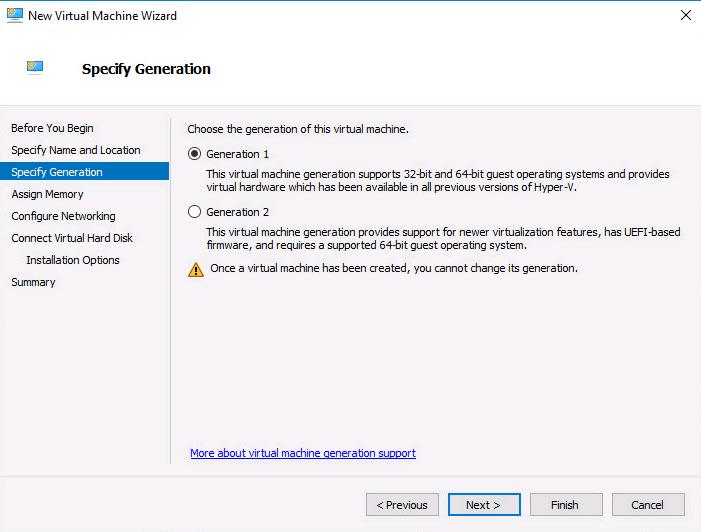
We have two choices of generation to create a virtual machine. Generation 1 and Generation 2. Generation 1 virtual machine supports 32-bit and 64-bit guest operating systems and provides virtual hardware that has been available in all previous versions of Hyper-V.
Generation 2 Virtual machine provides support for newer virtualization features, has UEFI based firmware and required a supported 64-bit guest operating system.
Below are some of the advantages of using generation 2 virtual machines:
- Secure Boot – This is a feature that verifies the boot loader is signed by a trusted authority in the UEFI database to help prevent unauthorized firmware, operating systems, or UEFI drivers from running at boot time. Secure Boot is enabled by default for generation 2 virtual machines. If you need to run a guest operating system that’s not supported by Secure Boot, you can disable it after the virtual machine’s created.
- Larger boot volume – The maximum boot volume for generation 2 virtual machines is 64 TB. This is the maximum disk size supported by a .VHDX. For generation 1 virtual machines, the maximum boot volume is 2TB for a .VHDX and 2040GB for a .VHD.
Please take look at the Microsoft article to understand more about Generation 1 and Generation 2 Virtual machines
Select the generation based on your guest operating system and click on Next.
Note: Once Virtual machine has been created, You cannot change its generation
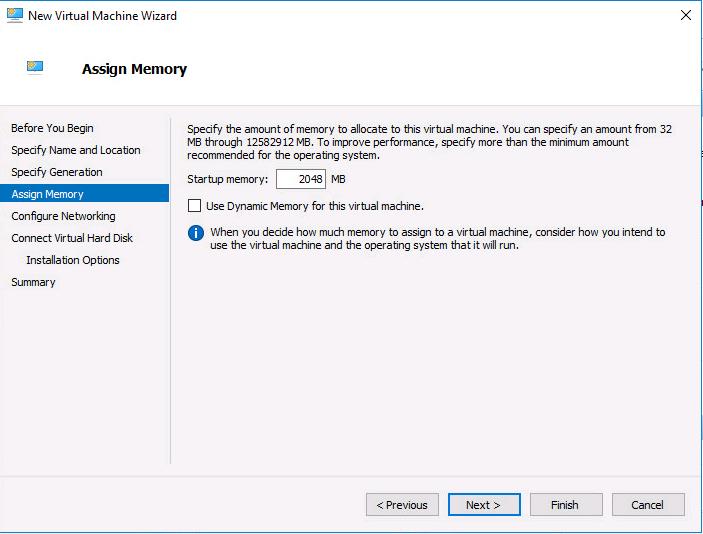
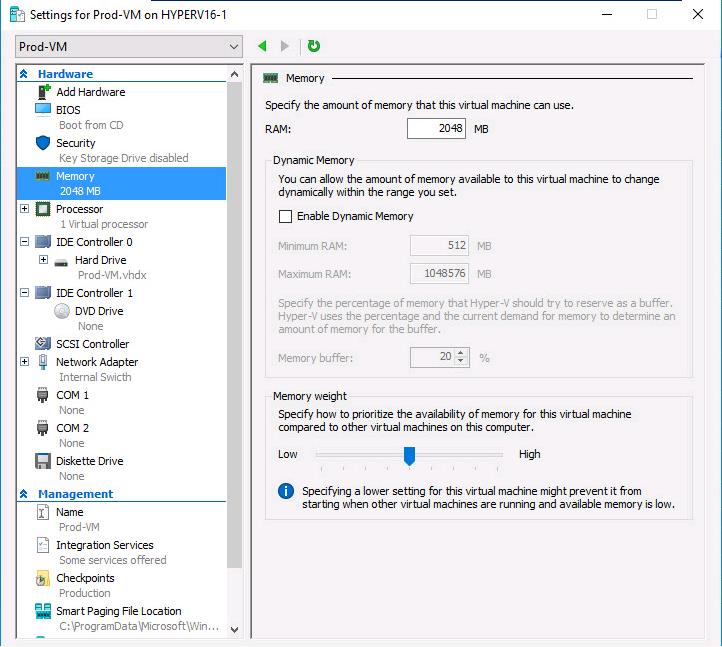
Specify the amount of memory to allocate to this virtual machine. To improve performance, specify more than the minimum amount recommended for the operating system.
Optionally You can also Select the Checkbox “Use Dynamic Memory for this Virtual Machine”,
You also have the option to enable Dynamic Memory. Dynamic Memory, introduced in Windows Server 2008 R2 Service Pack 1 (SP1), defined startup memory as the minimum amount of memory that a virtual machine can have. However, Windows requires more memory during startup than the steady-state.
As a result, administrators sometimes assign extra memory to a virtual machine because Hyper-V cannot reclaim memory from these virtual machines after startup. In Windows Server 2012, Dynamic Memory introduces a minimum memory setting, which allows Hyper-V to reclaim the unused memory from the virtual machines.
In Simple Terms, Dynamic memory reclaims the idle memory from a virtual machine and can re-allocates the memory to the other virtual machines, when needed.
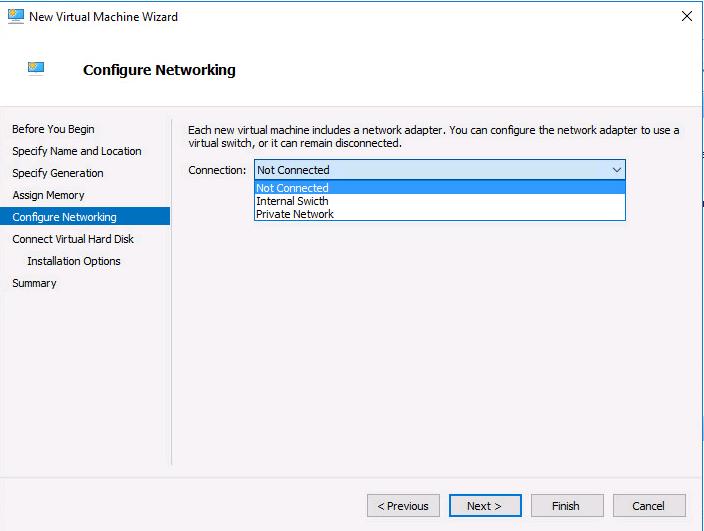
you’ll need to determine how to connect the virtual network adapter. of the virtual machine, You can leave it at Not Connected, which means the virtual machine will startup without any network connectivity.
You can also connect it to any Virtual switch or even Private Network. I will explain in detail about the networking concepts in upcoming posts. Click on Next.
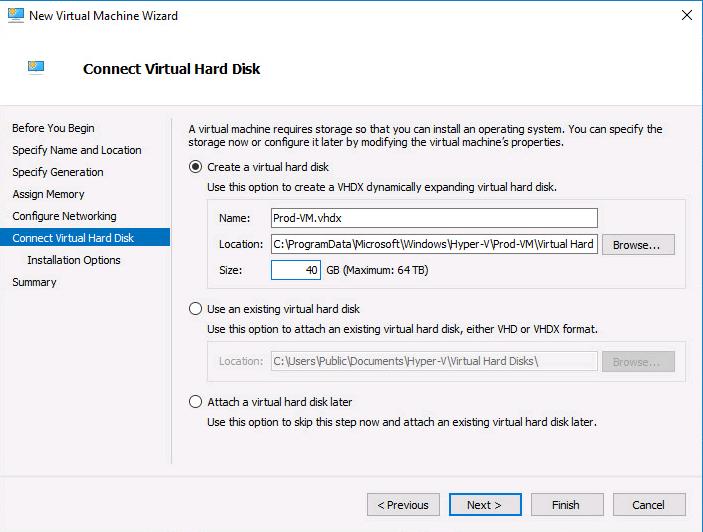
In the Connect Virtual Hard disk page, We have 3 options:
- Connect a virtual disk: Use this option to create a New VHDX dynamically expanding virtual machine. Virtual hard disk will be automatically named as “VM-Name.vhdx”. Specify the location and size of the virtual disk.
- Use an existing virtual hard disk: Use this option to attach an existing virtual hard disk to this virtual machine. Existing harddisk can either be in VHD or VHDX format.
- Attach a virtual hard disk Later: Use this option to skip this step now and attach an existing virtual hard disk later.
Select the option based on your requirement and click on Next.
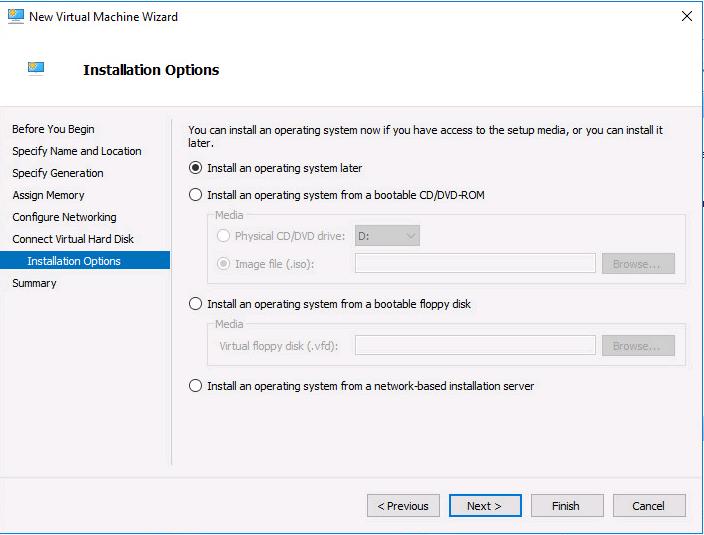
In the Installation options, We have 4 options to choose with
- Install an operating system later
- Install an operating system from a bootable CD/DVD-ROM. You can browse the ISO image of the Guest operating system to start the installation.
- Install an Operating system from a bootable floppy disk. Floppy disk format is .vfd files
- Install an operating system from a network-based installation server
Select the appropriate options and click on Next.
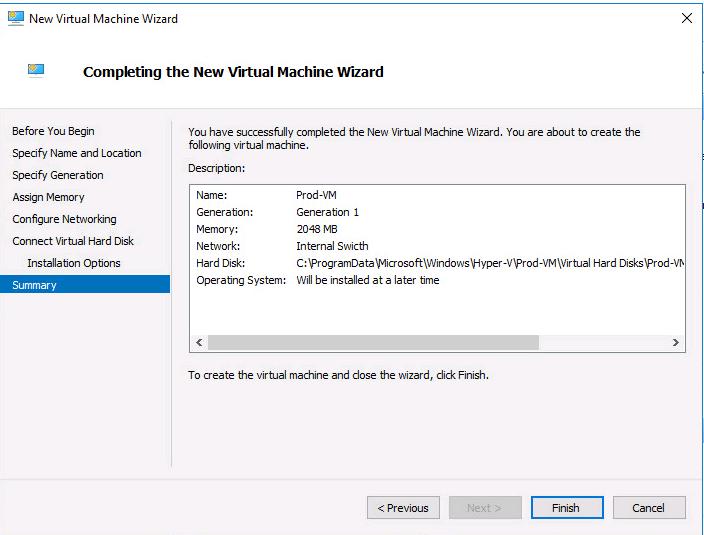
Review the selected virtual machine settings page. Click on Finish to start the virtual machine creation on windows server 2016 Hyper-v.
Once Virtual Machine is created, it will start to appear under the virtual machines list in Hyper-v Manager. Right-click on the virtual machine to manage and configure the virtual machine.

You can Right-click the virtual machine -> Settings to edit the virtual machines.
That’s it. We have completed the procedure to Create Virtual Machine in the Microsoft Hyper-V Server. I hope this is informative for you. Thanks for reading!!. be social and share it in social media, if you feel worth sharing it.