

VMware RDM (Raw device mapping) is a mapping file that provides direct access to a LUN on an iscsi or fibre channel storage system for a virtual machine. As we discussed in the earlier post, There are two types of RDM Disks (Virtual Compatibility RDM and Physical Compatibility RDM). We have explained the detailed 11 differences between RDM physical vs virtual Compatibility Mode. Physical compatibility mode allows direct access of the SCSI device for those applications that need lower level control. With the VMware RDM in physical compatibility mode, all the physical characteristics of underlying hardware will be exposed. I have already explained the step by step procedure to create virtual compatibility RDM disks. In this article, We are going to looking at the detailed procedure to create VMware RDM disk in Physical Compatibility Mode (RDM Physical).
2 Ways to Create VMware RDM Disks in Physical Compatibility Mode
There are 2 simple ways to create Physical compatibility RDM disks. First one is via vmkfstools command (CLI) and the second one is via vSphere Web Client
1. Create Physical Compatibility RDM Disk using vmkfstools
Creating RDM disk Physical compatibility mode using vmkfstools also performs the same operation as what we do it in the Web client. The only advantage of this method is you can create the physical compatibility RDM mapping file inside any specific folder of the datastore. This will be extremely useful when you have multiple virtual machines sharing the same RDM disks. You can create a specific folder to create the RDM mapping file. This simplifies the operation and troubleshooting.
To Create Physical Compatibility RDM, you need to know the NAA ID of the physical LUN which we are going to add it as RDM disk to the virtual machine. CD towards the specific folder where you want to keep the RDM mapping file and execute the below command
vmkfstools -z /vmfs/devices/disks/naa.XXXXXXXXXXXXXXXXXXXXXXXXX diskname.vmdk
![]()
TIP: You can specify the disk name of RDM mapping file in a meaningful way so that it will be easily identified during the maintenance of the LUN’s or disk. You can use something like VMname-LunID.vmdk. Example, testvm–LUN05.vmdk
You can validate the RDM mapping files are created using “ls” command in the specified directory. You can see 2 files (diskname-rdmp.vmdk & diskname.vmdk) rdm.vmdk is for virtual compatibility RDM and rdmp.vmdk is for Physical compatibility RDM disk.

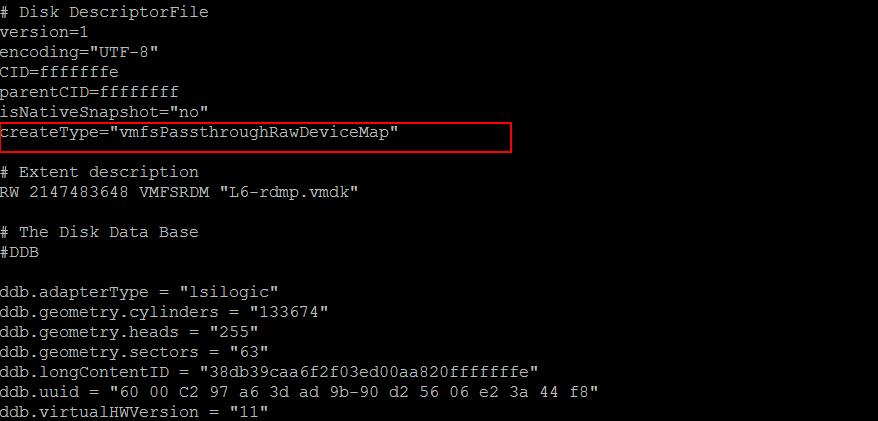
You can read the descriptor file “L6.vmdk” contains the information about the RDM mapping file. You can see the CreateType as “vmfsPassthroughRawDeviceMap” which is nothing but VMware physical RDM disk.
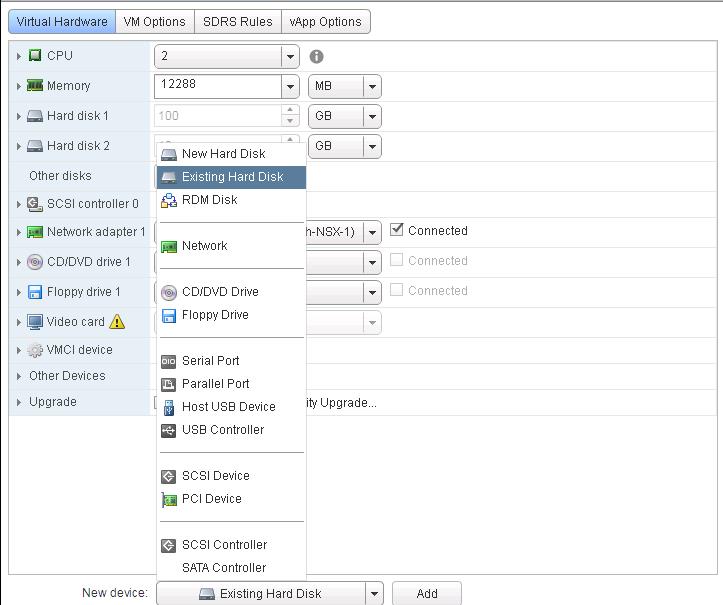
Once the VMware RDM mapping file is created using vmkfstools. You can Edit the virtual machine properties -> Select “Existing Hard Disk” from the New Device drop-down. Click on Add.
Browse towards the folder in the datastore in which we have created RDM Mapping file. Select the VMDK and Click Ok.

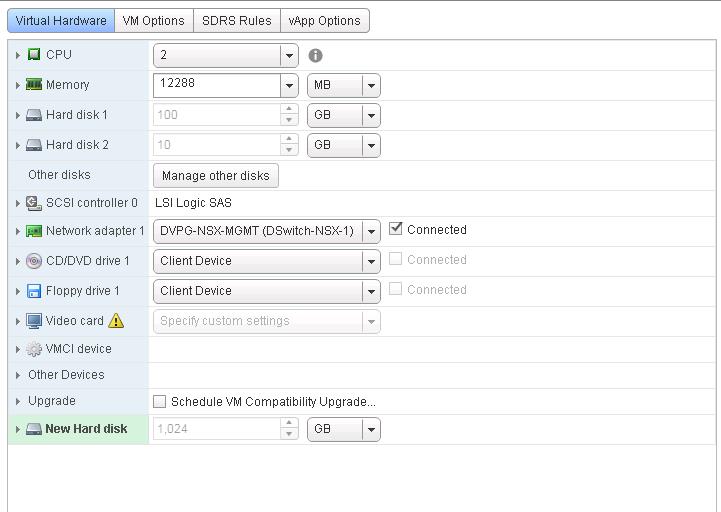
Click on Ok to add the RDM disk to the virtual machine
2. Create Physical Compatibility RDM Disks using vSphere Web Client
Once the RAW LUN is allocated to the ESXi cluster, Follow the below procedure:
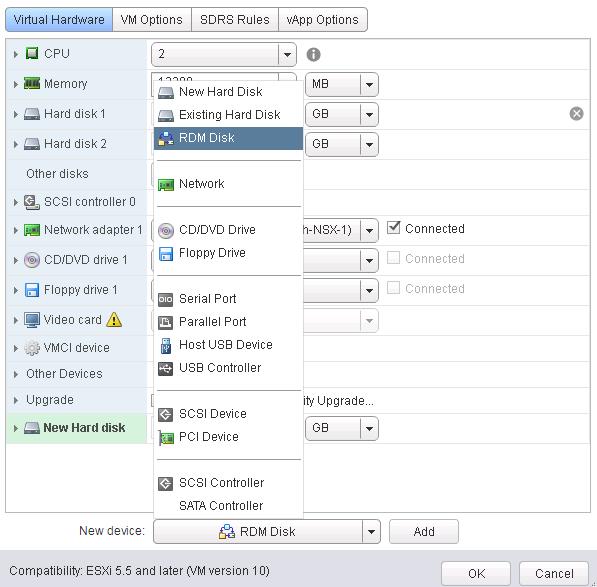
Log in to vCenter Server using vSphere Web Client. Select the virtual machine in the vCenter Server inventory -> Edit Settings. Select RDM Disk from the New Device Dropdown
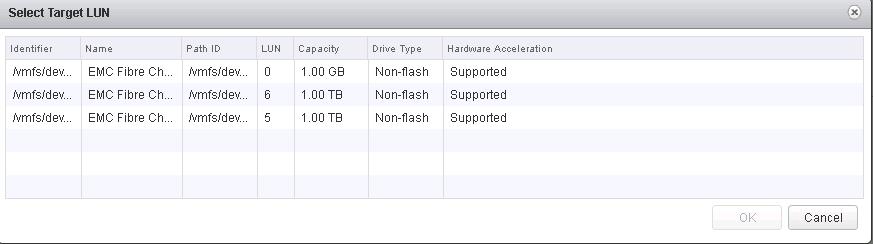
Select the respective LUN to create it as RDM disk in the virtual machine and Click on Ok.
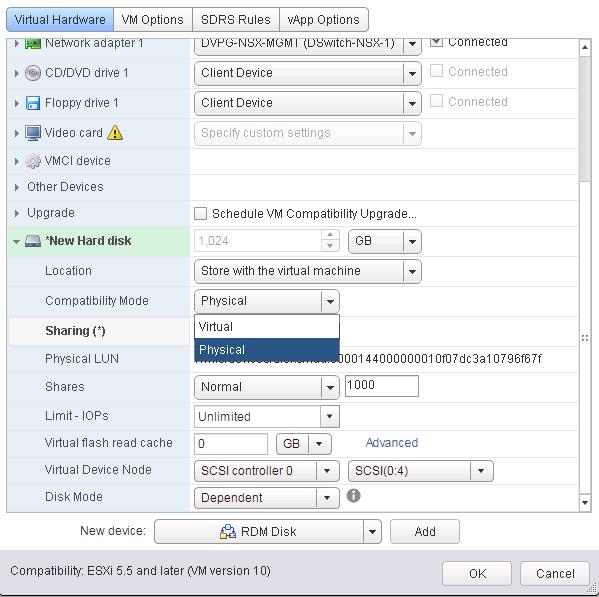
Select “Physical” under Compatibility Mode and also you can specify the location of the RDM Mapping file. You can choose either store with the virtual machine or select any specific datastore. Click OK.
That’s it. We are done with creating physical compatibility RDM disks in two different methods such as vmkfstools and also using vSphere Web Client. I hope this is informative for you. Thanks for reading!!!. Be social and share it with social media, if you feel worth sharing it.