

VMware NSX-T Data Center provides an agile software-defined infrastructure to build cloud-native application environments. NSX-T Data Center is focused on providing networking, security, automation, and operational simplicity for emerging application frameworks and architectures that have heterogeneous endpoint environments and technology stacks. NSX-T Data Center supports cloud-native applications, bare-metal workloads, multi-hypervisor environments, public clouds, and multiple clouds. In this article, we will take a look at setup by step procedure to deploy the NSX-T Manager unified appliance.
VMware has simplified the deployment and configuration of NSX-T as compared to NSX-V. Take a look at my article to understand the difference between NSX-V and NSX-T When it comes to NSX-V, separate appliance and deployment are needed for NSX Manager and controller. With NSX-T, VMware has combined bot the NSX Manager and NSX controller into a single virtual appliance called “NSX unified appliance” which can be run in a clustered configuration.
Deploy NSX-T Manager Unified Appliance
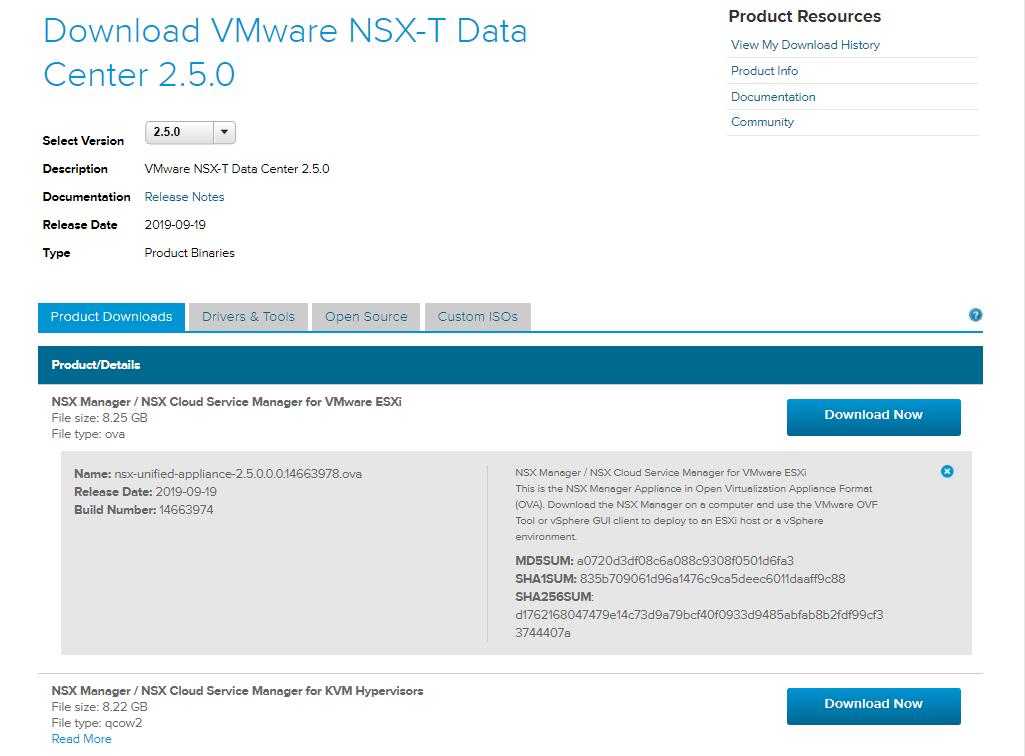
To configure the NSX-T Management and Control plane for your infrastructure, we need to first deploy the NSX-T Manager combined appliance. To deploy the NSX-T Manager unified appliance, download the NSX-T Data Center Manager unified appliance 2.5 for VMware vSphere. The .ova file size of the NSX-T manager unified appliance is around 8.25 GB. Download the ova file and saved it into the local computer from where you want to connect to the vCenter server using the vSphere HTML5 client.
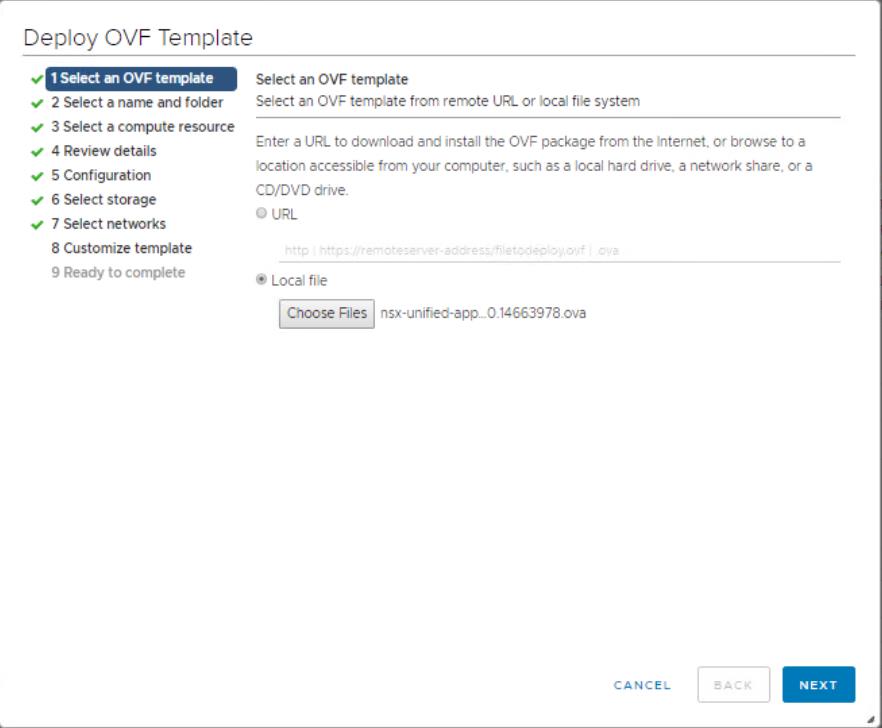
Connect to the vCenter server using the HTML5 client. Select the cluster where you want to deploy the NSX-T manager and select Deploy OVF Template. Select the local file and browse towards the directory where the ova file of the NSX-T manager unified appliance is downloaded. Click Next.
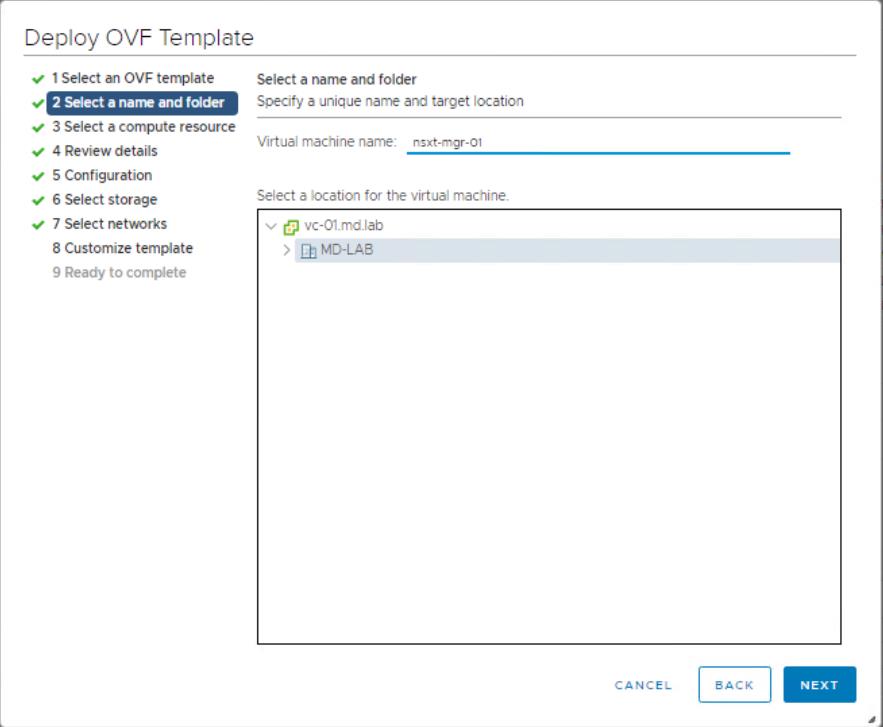
On the “Select a name and folder” screen, enter the virtual machine name for NSX-T Manager. This VM name will appear in the vCenter Server inventory. For NSX-T manager deployment, it is recommended to have 3 NSX-T Manager. You could consider naming the appliance with the numbering format at the end. For example, the first appliance can be named “nsxt-mgr-01” and the second one can be named as “nsxt-mgr-02” and similarly for the third appliance. Click Next.
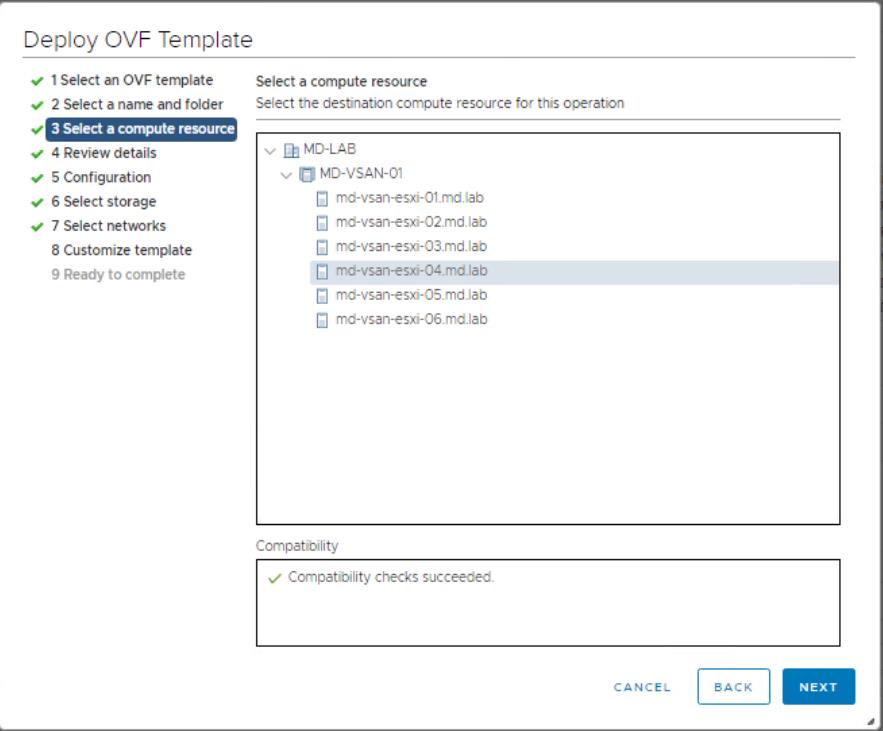
On the Select a compute resource page, Select the compute cluster or ESXi host to deploy the NSX-T manager appliance. Click Next.
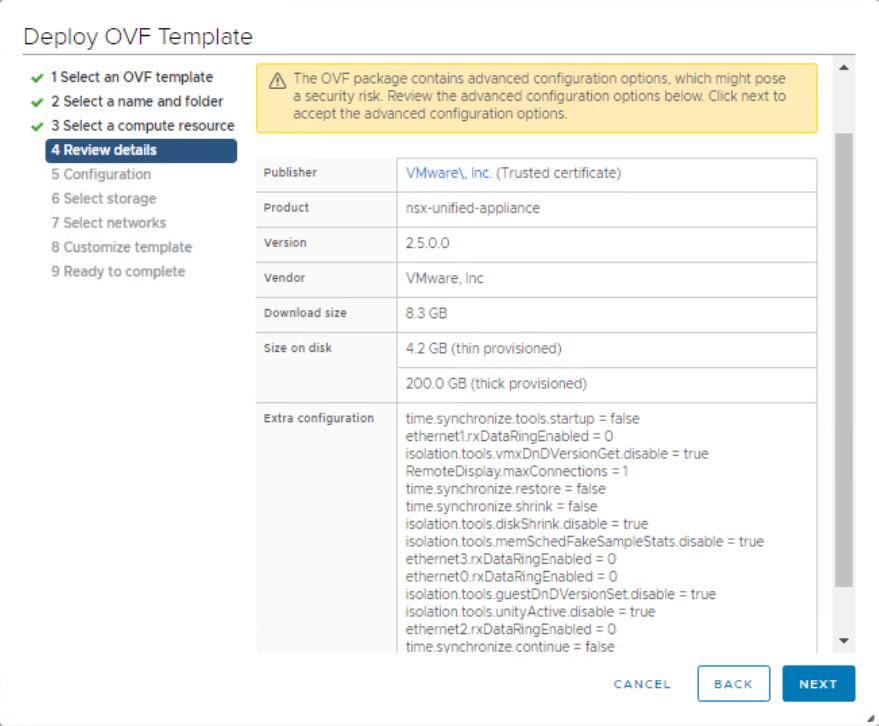
Review the OVF publisher, product and version details of the OVF package of NSX-T Manager unified appliance. Click Next.
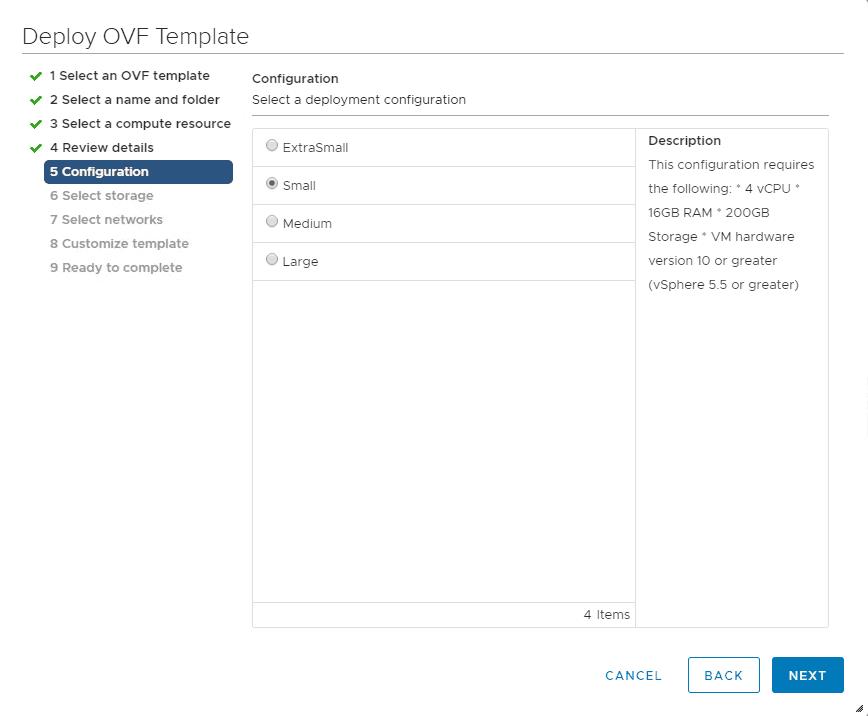
Select the deployment configuration size for the NSX-T manager unified appliance. Extra small size is only used for the Cloud services manager. Select the deployment size suitable for your infrastructure size. Click Next.
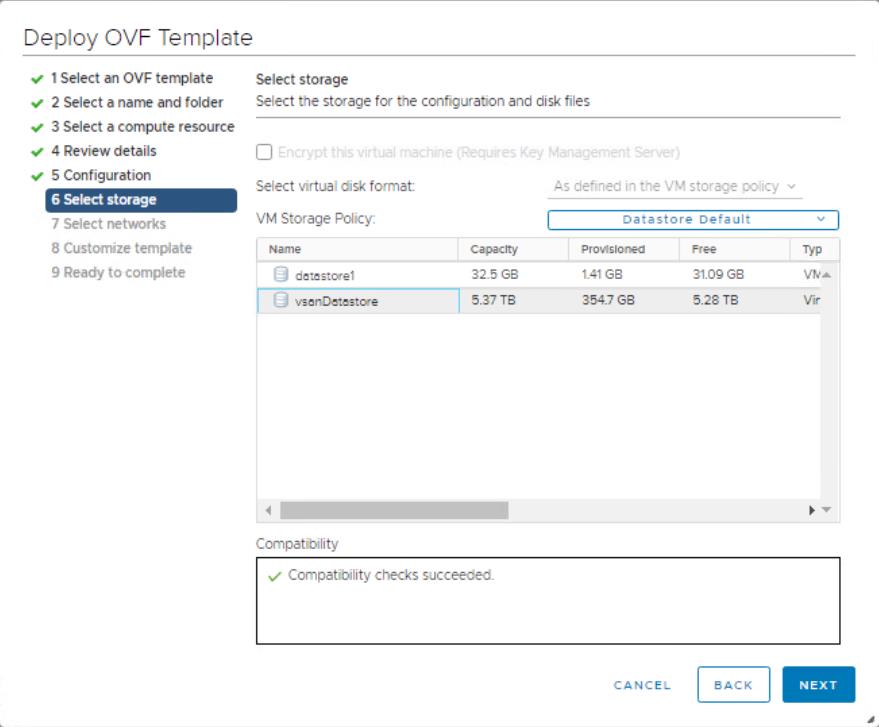
select the datastore where you want to store the NSX-T manager VM files and disk files. Click Next.
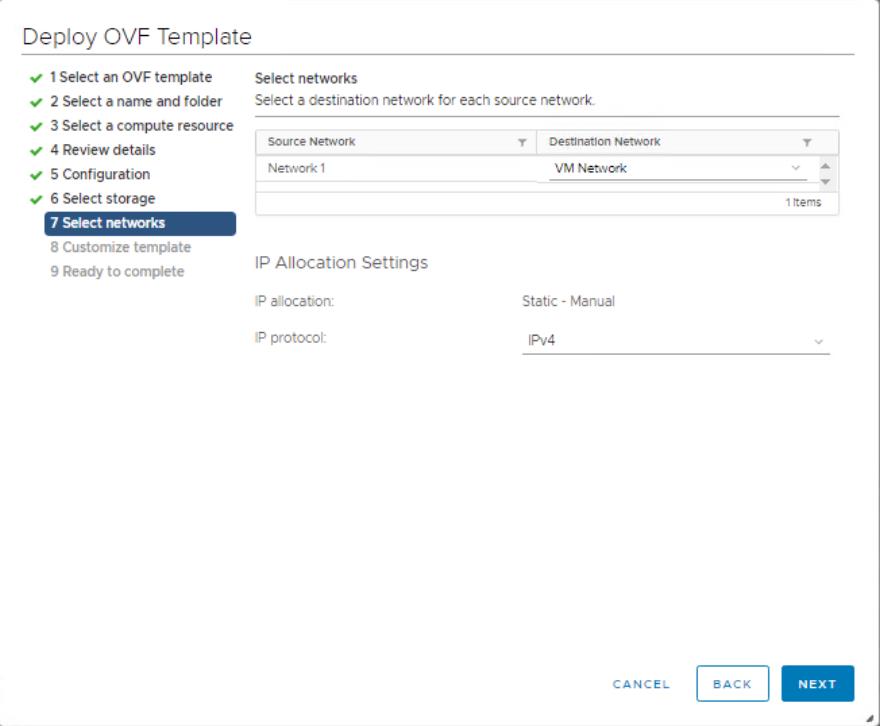
On the Select Networks page, choose the destination network for the OVA appliances. This page has you select the port group from the drop-down which is available as part of a selected cluster or ESXi host. Select the IP protocol whether IPv4 or IPv6. Click Next.
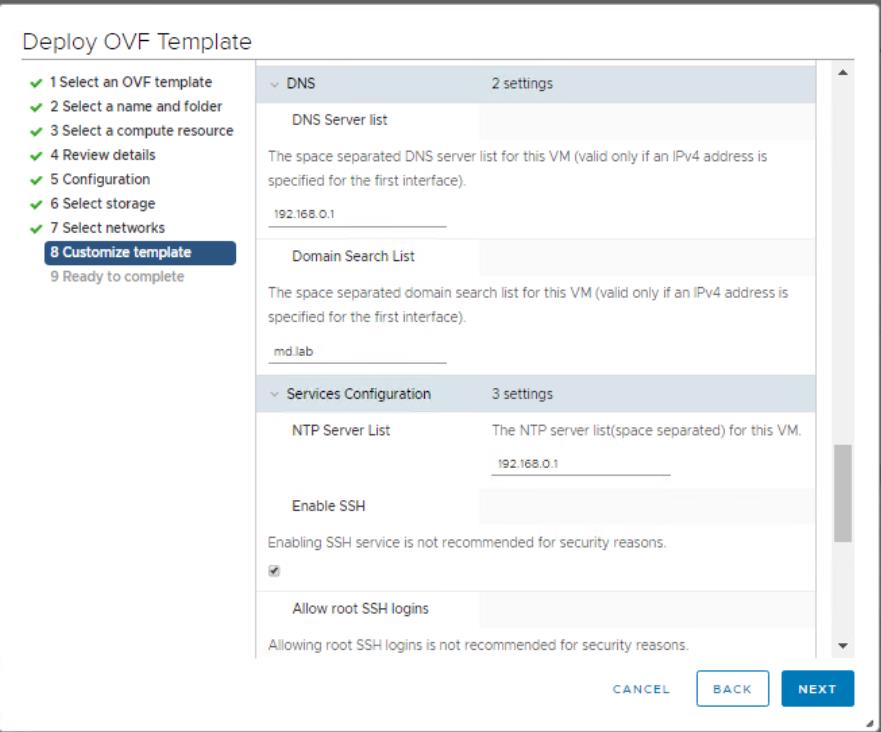
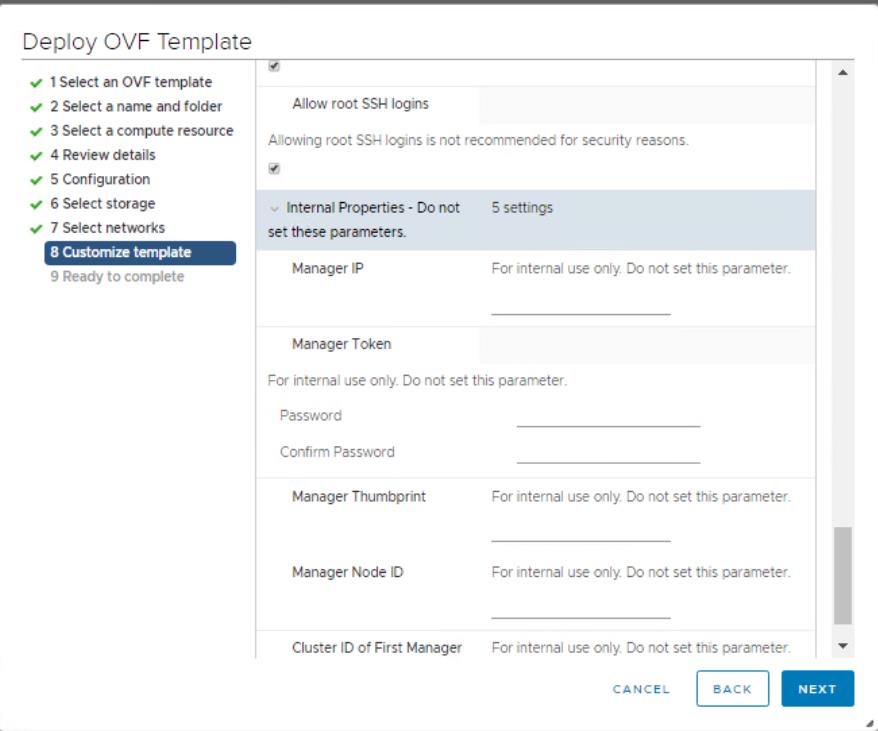
Configurations specified under the “Customize template” page is very important for the deployment of NSX-T Manager appliance This screen enables setting a number of configuration parameters, including:
- Passwords for root, CLI admin and audit user account
- Username for admin and audit user account
- The IP address configurations including hostname, IP address, gateway, netmask, and DNS server addresses
- SSH options and NTP server configuration, etc.
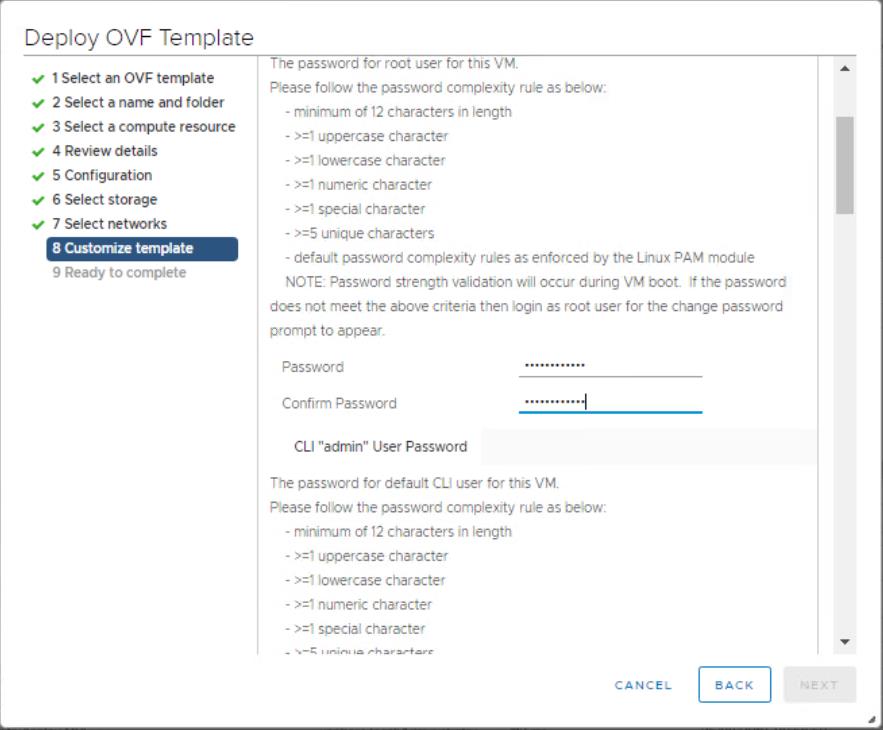
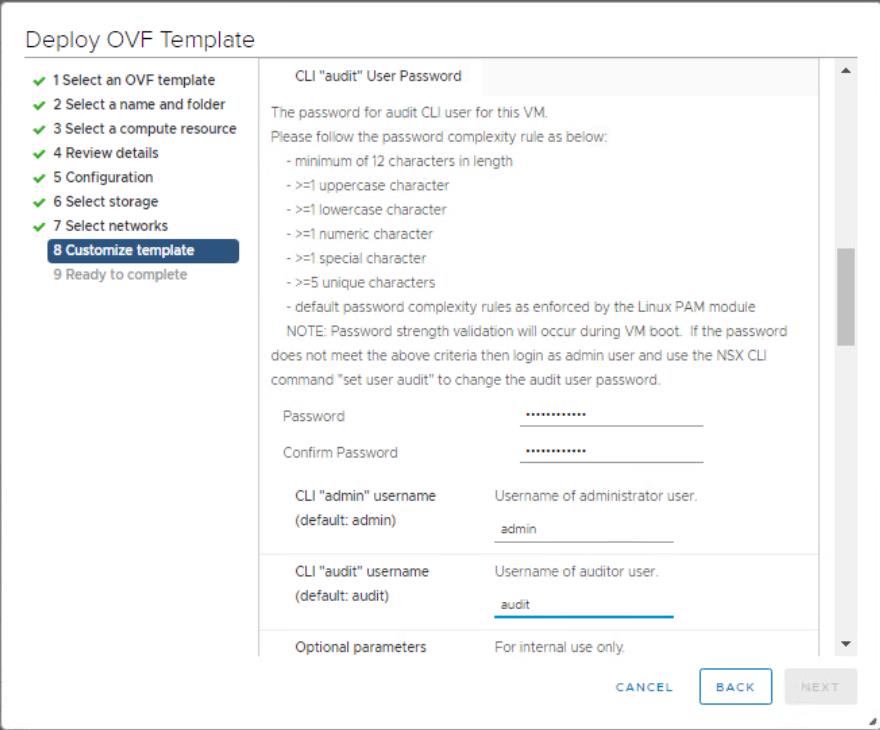
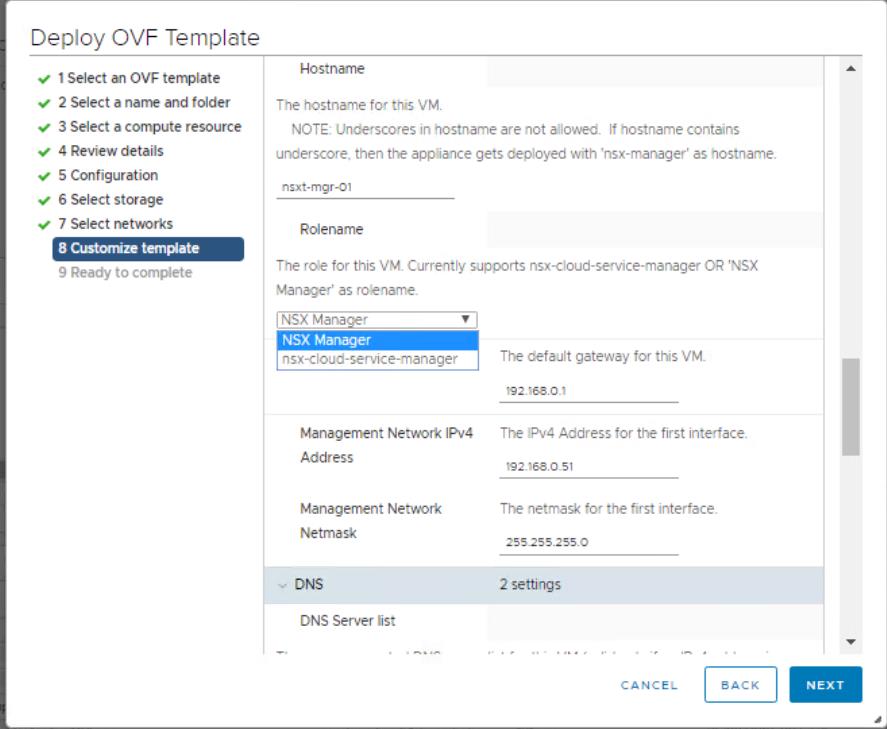
Do not set the parameters for Internal Properties section under the “customize the template” page. Click Next.
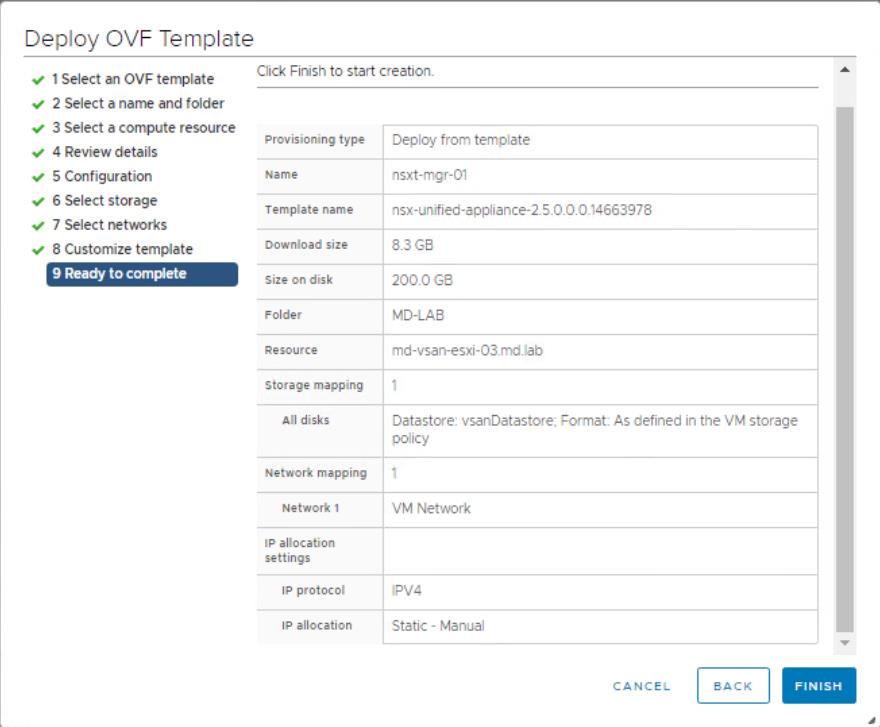
Review all the configurations specified during the NSX-T Manager unified appliance deployment wizard and click Finish to start the deployment of NSX-T Manager.
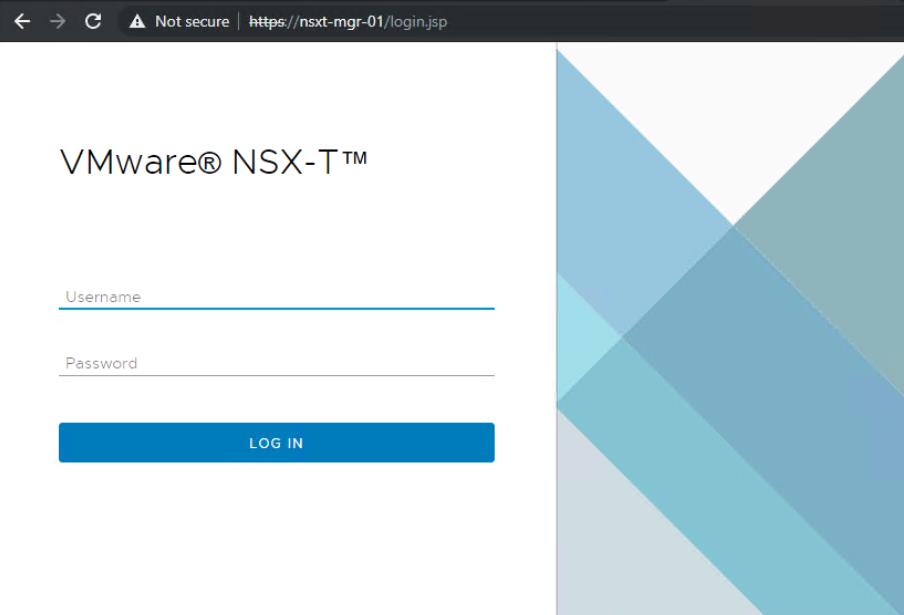
Once the deployment of the NSX-T Manager unified appliance is completed. Open up the web browser and type the URL https://<nsxt-mgr-name>. Log in with the username admin and password specified during the deployment.
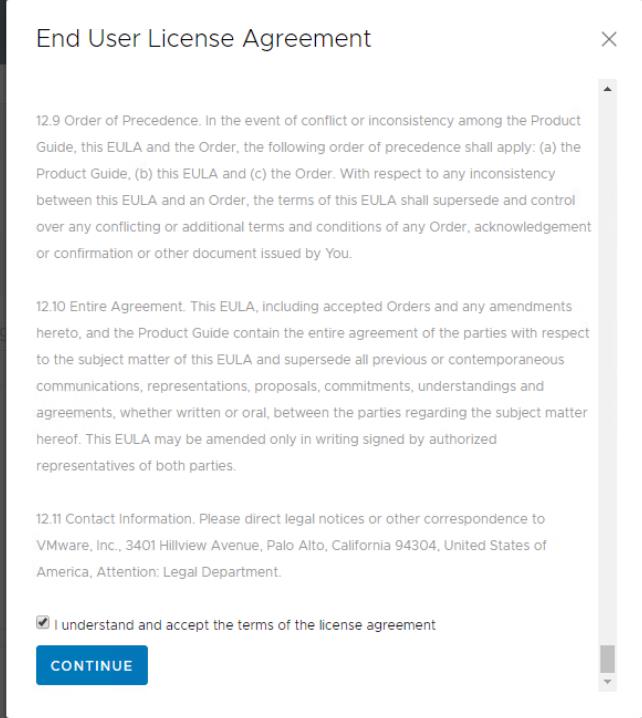
The first time when you log in to the NSX-T manager, read the End-user license agreement and click on Continue.
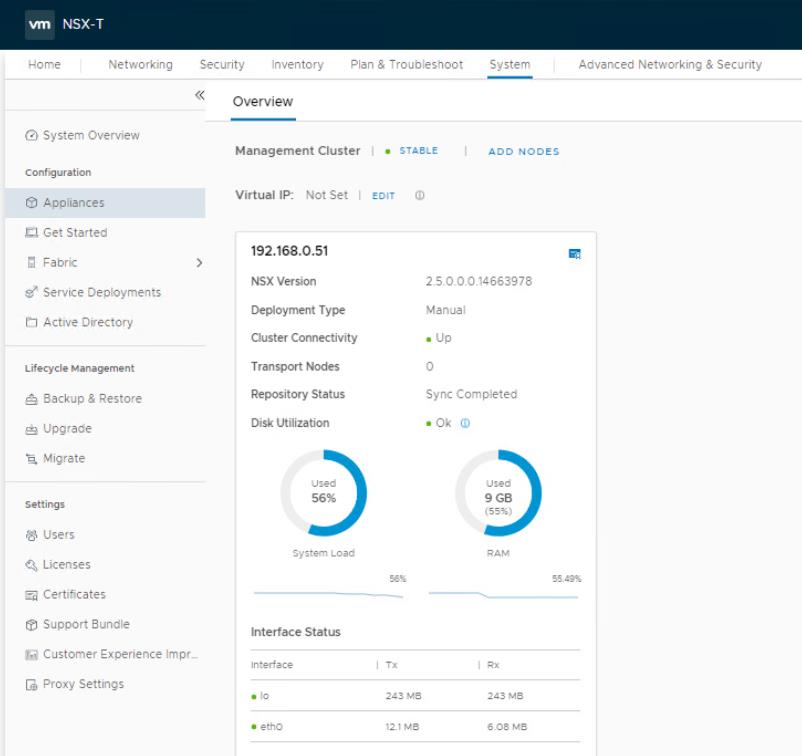
On the Home page, Under Overview -> appliances. You can see the details about the first NSX-T manager unified appliance along wit the system load and disk utilization information.
That’s it. we are done with the deployment of our first NSX-T Manager unified appliance manually. In the upcoming posts, we will how to add NSX-T computer manager and start deploying the additional NSX-T managers to confirm the NSX-T management cluster along with other deployments and configurations of NSX-T. I hope this post is informative for you. Thanks for reading !!!. Be social and share it in social media, if you feel worth sharing it.