

On March 15 2016, VMware released vSphere 6.0 Update 2. VMware VSAN 6.2 is also released as part of vSphere 6.0 Update 2. Please take a look at my post What’s new with Virtual SAN 6.2 released with lot of exciting features like deduplication and compression. In this post, We are going to learn the step by step deployment procedure for deploying vCenter server appliance (VCSA) 6.0 update 2. vCenter Server Appliance (vCSA) is a Security hardened base Suse (SLES 11 SP3) operating system packaged with vCenter server and vFabric Postgres database. vCSA appliance supports Oracle as external database. vCenter Server Appliance contains all of the necessary services for running vCenter Server 6.0 along with its components. As an alternative to installing vCenter Server on a Windows host machine, you can deploy the vCenter Server Appliance. It helps you quickly deploy vCenter Server without spending time to prepare windows operating system for vCenter server Installation. vCSA now supports most of the features which is supported with windows version of vCenter server.
vCenter Server Appliance 6.0 Update 2 Deployment
1. Download VMware vCenter 6 Update 2 Appliance from VMware download site and save it on your Windows server.
2. Mount ISO in Virtual cdrom or extract files from ISO.
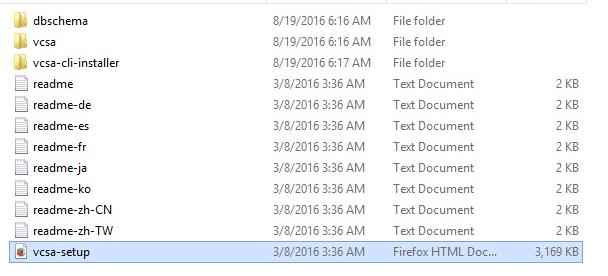
3. Once you mount ISO or extract files you can see list of installation files.
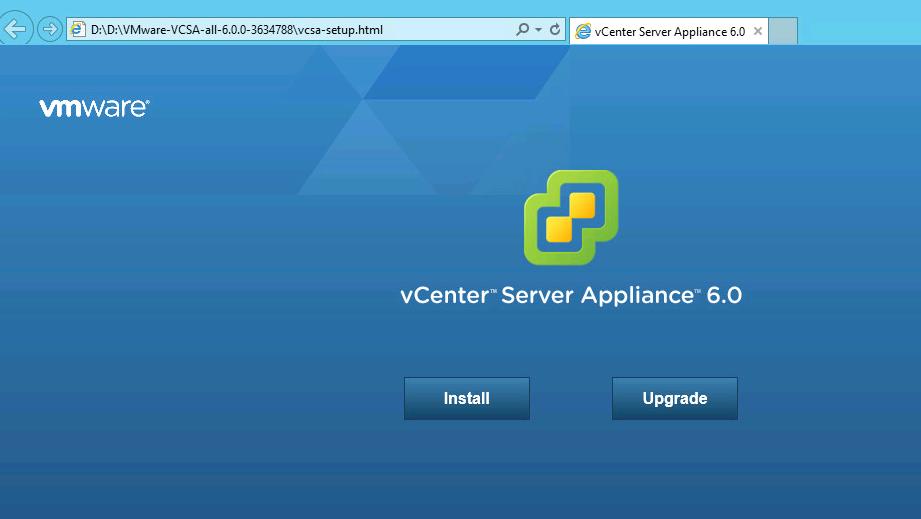
4. If you don’t have client integration plugin installed on the server. Go to the VCSA folder and install the Client integration plugin. Go back to the parent folder, Open “vcsa-setup” html file with your browser of your choice (Chrome, Firefox or IE). Click on Install option to start the deployment of vCenter server appliance 6.0 Update 2.
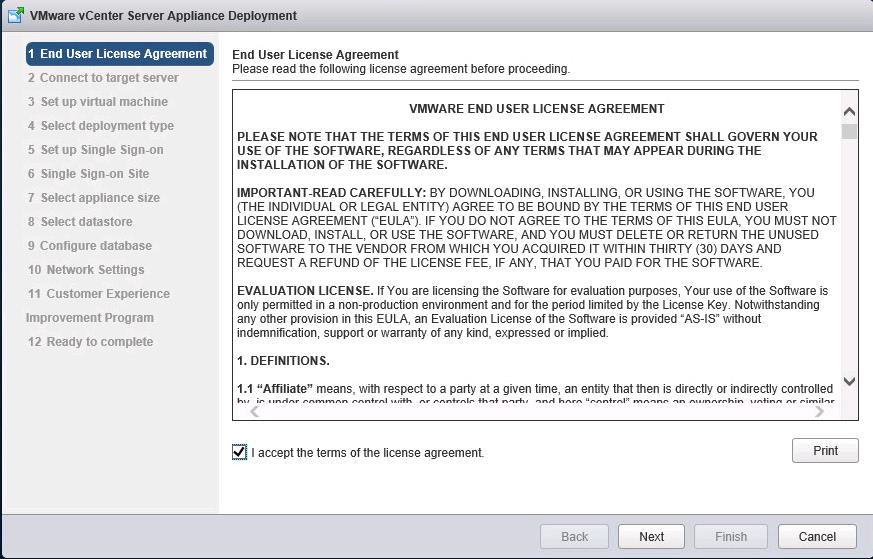
5. Select the checkbox “I accept the terms of the license agreement” to accept the end user license agreement and click on next.
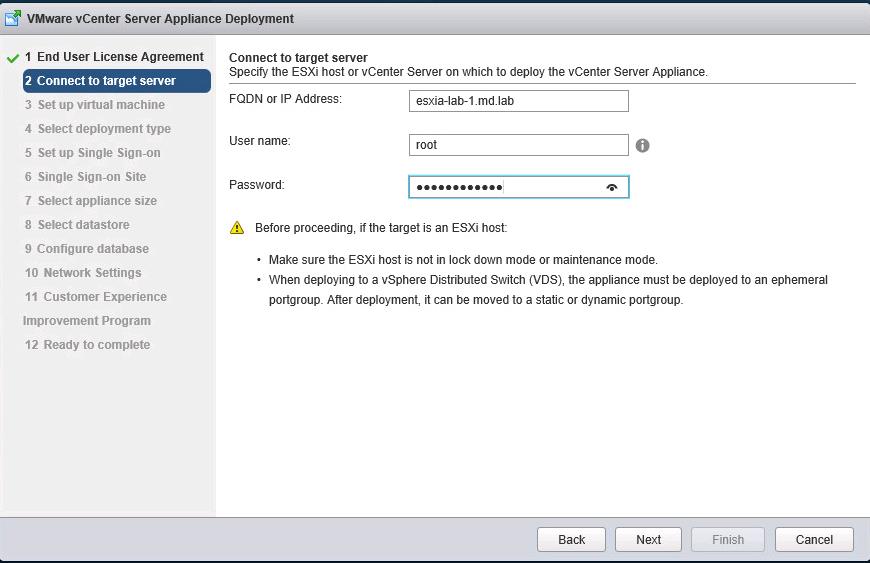
6.Provide the FQDN or IP address of the target ESXi Host or vCenter server details, where you want to deploy vCenter Server appliance 6.0 u2. I am deploying vCenter appliance in one of my ESXi Host. Provide the credentials for that target ESXi host. Click on Next to proceed with the next installation steps.
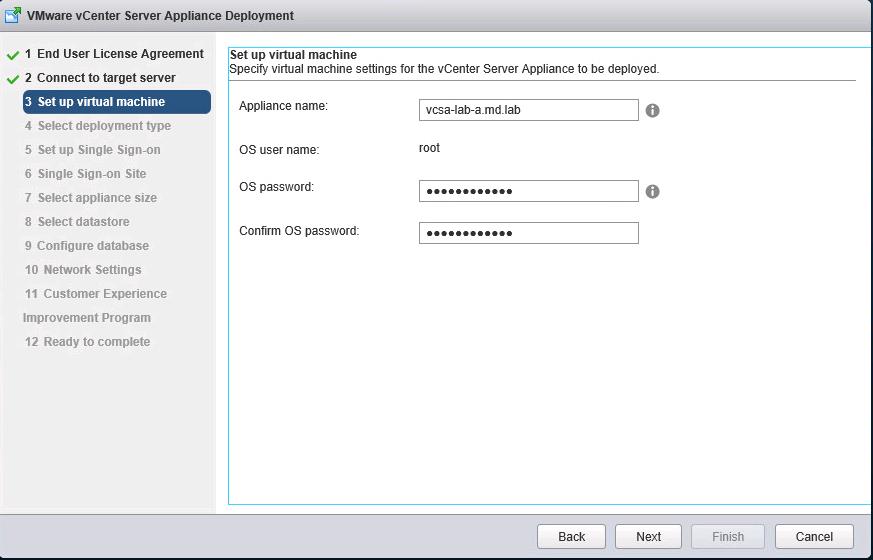
7. In the virtual machine wizard, Provide the name and password for the vCenter Server appliance and click on Next.
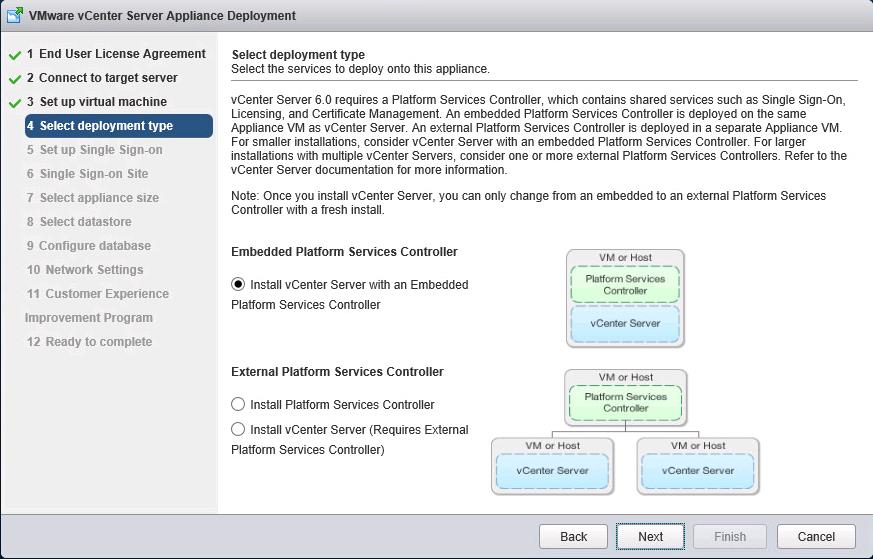
8. Under the Deployment type, select the option Install vCenter Server with an Embedded Platform Services Controller. This will install all vCenter services and PSC in same alliance. Click Next. There is other deployment method called “External Platform Services controller”. It requires 2 appliance to be deployed to operate.
- Install Platform Services Controller – this option will only deploy Platform services controller on appliance
- Install vCenter Server – This will deploy only vCenter Services on the appliance, during deployment you will need to point vCenter server to existing PSC server
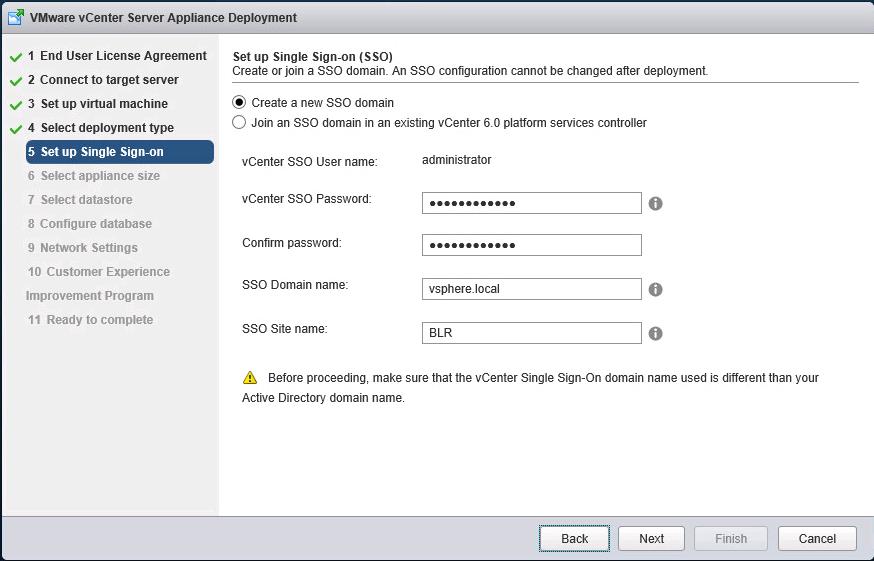
9.In the setup single sign-on (SSO) page, Select the option Create a new SSO domain. Provide the credentials for SSO administrator user account and SSO domain name. You need to ensure that vCenter SSO domain name used is different than your Active Directory domain name. Click on Next.
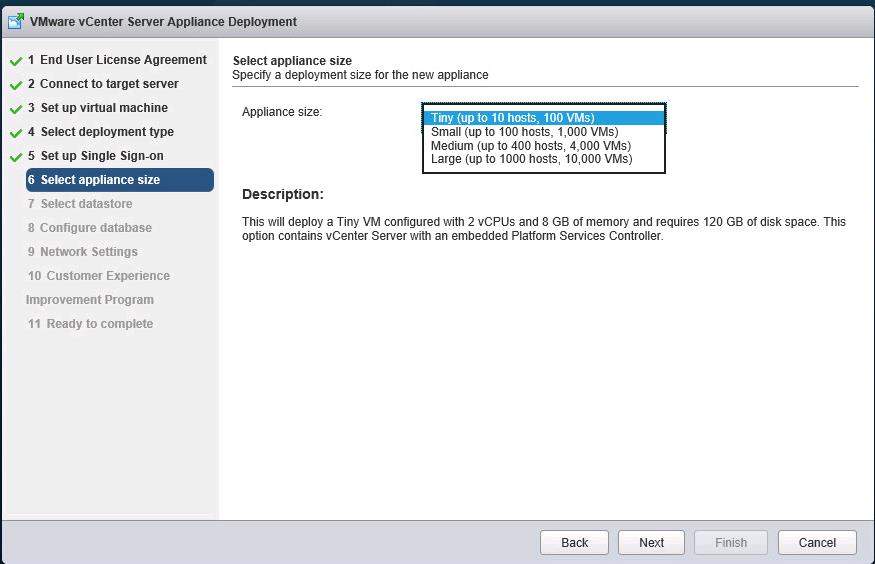
10. Select the appliance size based on your inventory size. Since this is my lab environment, I have selected appliance size as Tiny (to manage upto 10 ESXi hosts and 100 VM’s). Based on the appliance size, appliance memory, CPU and disk size vary. Click on Next.
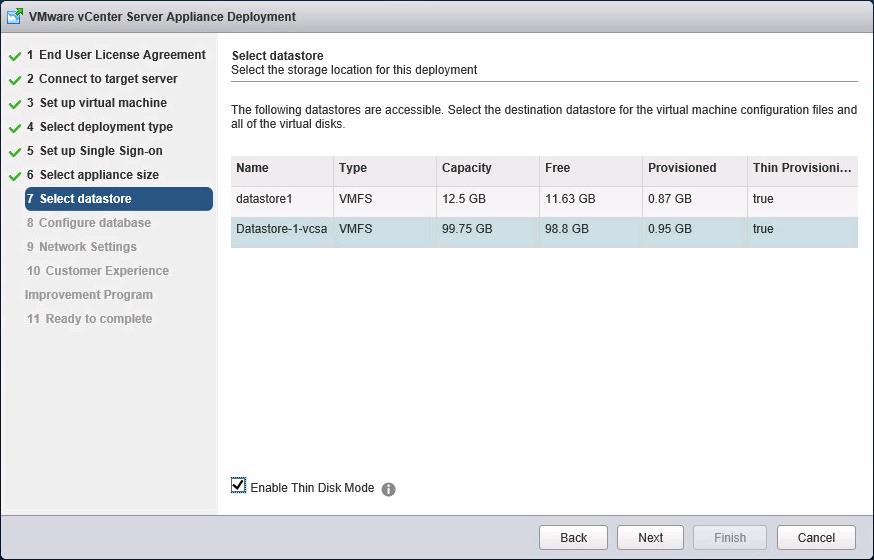
11. Select the Datastore from the list to deploy the vCenter Server appliance 6.0 Update 2. Click on Next.
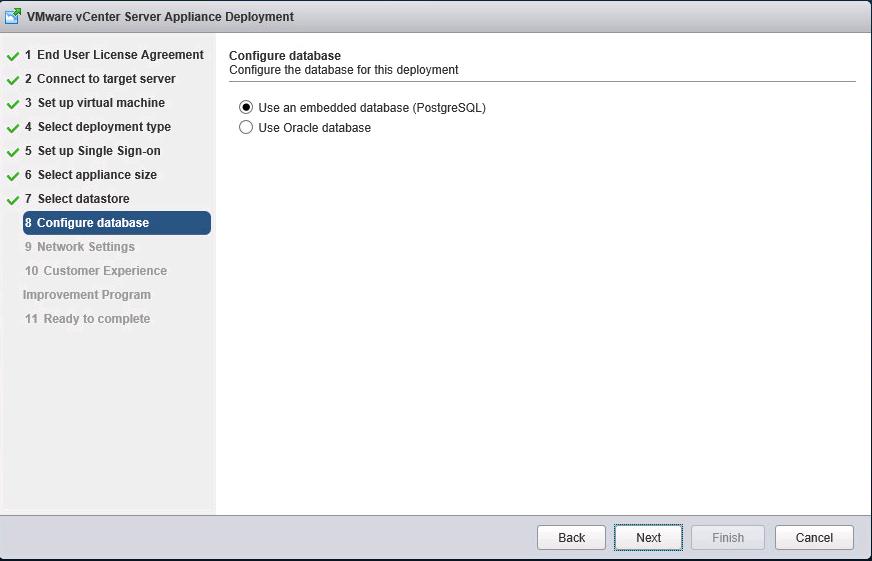
12. vCSA deployment supports two options for database. First one is embedded database (postgreSQL) and also it supports external database as Oracle database. In my environment, I am going ahead with Embedded database. Click on Next.
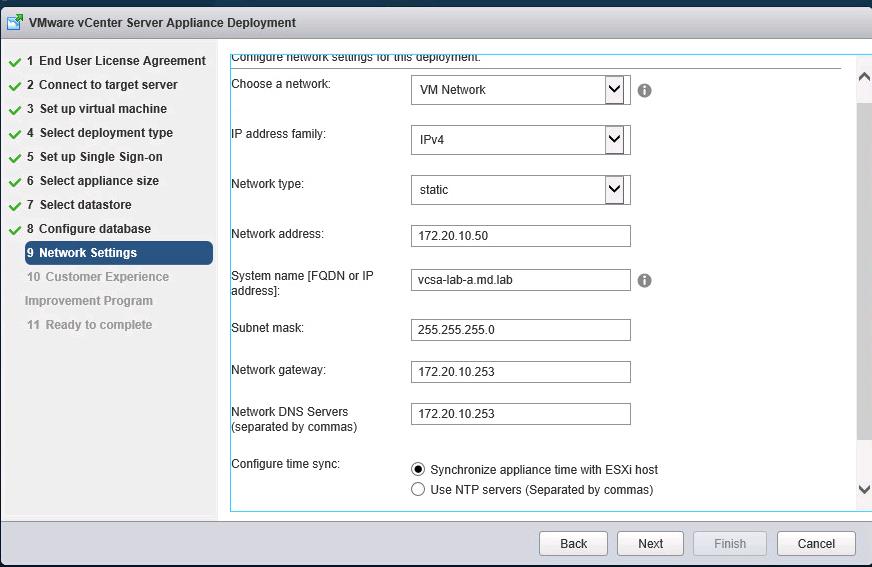
17. Under the Network Settings Page, Define the below settings:
A.Select the Virtual machine PortGroup from the drop down under Choose a Network
B.Select IP Address family – IPv4 or IPv6
C.Network Type – Select Static or dynamic
D. Network Address – Type the IP Address to be assigned to the vCenter Server appliance
E.System Name – Enter fqdn name or IP address for your vCenter Server appliance. Ensure you have created the DNS forward and reverse lookup record.
F. Enter subnet mask and Gateway address
G. DNS servers – Enter IP address of DNS servers separated by commas
H. Configure time Sync – Provide the IP address of your NTP servers or sync time with ESXi host. Make sure ESXi Host sync time with NTP server.
I. Select Enable SSH – Enable SSH for troubleshooting purposes to connect to vCenter server appliance.
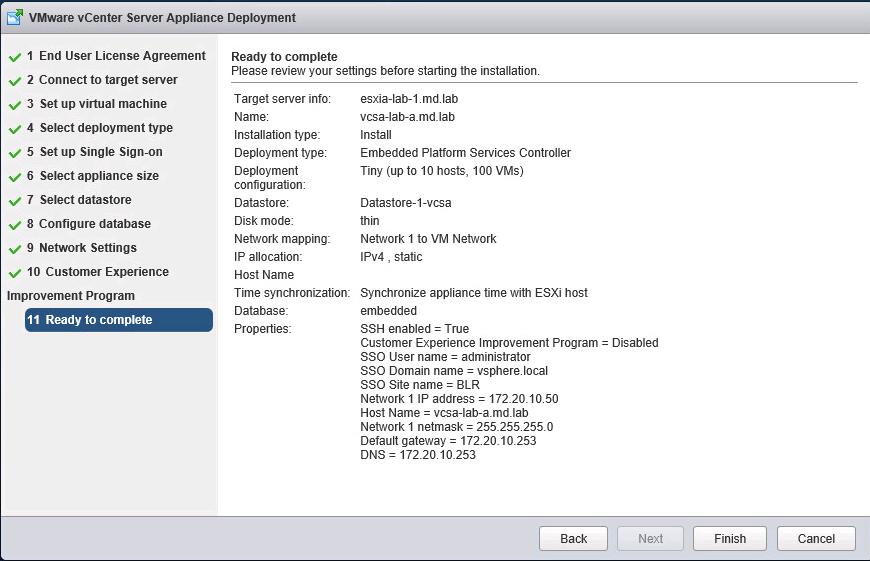
18.Review the appliance deployment configuration under ready to complete section, Click on Finish to start the vCenter Server appliance 6.0 update 2 appliance.
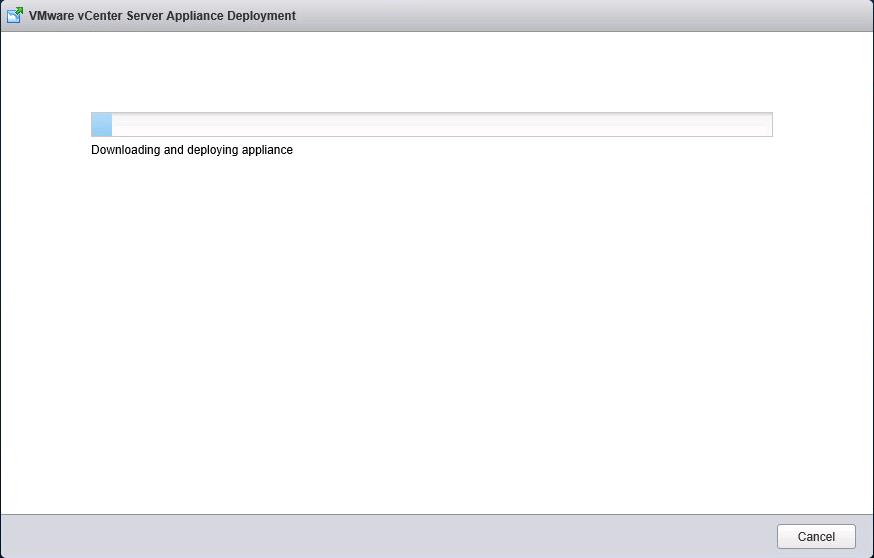
19. vCenter installer will download the OVF file on ESXi host and then start the deployment. watch for the progress of the deployment.
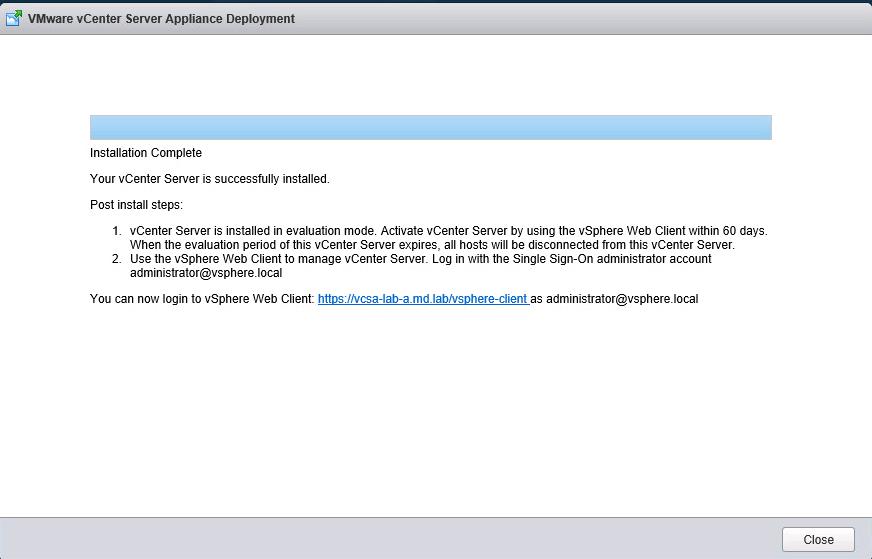
20. Installation is completed. You can now login to vSphere web client and start building your vSphere inventory.
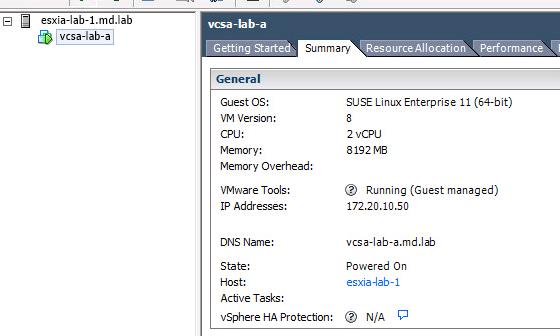
21. You can notice your vCenter Server appliance 6.0 Update 2 up and running under the my ESXi hosts.
That’s it. We are done with the deployment of vCenter server appliance 6.0 Update 2. I hope this is informative for you. Thanks for Reading!!! Be social and share it in social media, if you feel worth sharing it.