

This Post describes the step by step procedure to install ESXi 5 server on VMWare Workstation. Basically for Lab purposes, we cannot afford a dedicated server or hardware for running ESX/ESXi server. So The alternative is to start playing with ESX server running it in your Laptop or desktop. This installation of ESXi 5 is tested on my Laptop with the below configuration
Dell Latitude
Core i5 processor and 3 GB RAM.
Windows XP Professional OS
VMware Workstation 8.0.0 build-471780
There Are few options to test your hardware/Server/laptop is capable of running ESX Server either directly or running as a virtual machine inside VMware Workstation.
1. VMware CPU Identification Utility
Refer my blog post on how to test CPU Identification Utility on VMware Workstation
2. Intel Processor Identification Utility
Refer my blog post on how to run Intel Processor Identification Utility to test CPU for ESX Install as Virtual Machine.
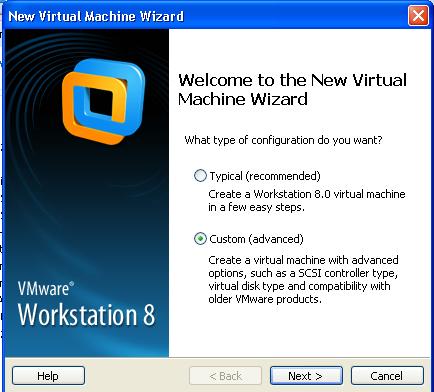
Open the VMware Workstation and goto File -> New ->Virtual Machine.
Select the Custom radio button and click on Next
Select Hardware Compatibility as “Workstation 8.0” and it displays the compatible products and Limitations of this hardware compatibility. We are capable of running ESXi 5.0 with Workstation 8.0.

Click on Browse to attach the ESXi 5.0 ISO image to attach with this installation and click on Next.


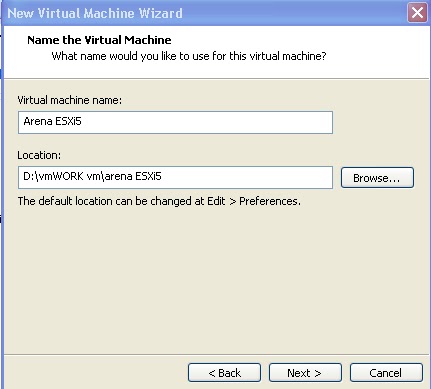
Provide the Name for the virtual machine and location on the local disk to store the virtual machine files like vmx, vmdk, etc.
Accept the default Processor configuration as below and click on next.

Minimum memory requirement to power on the ESX/ESXi server 2048 MB (2 GB). So make sure you have selected memory more than 2 GB.

Select the Network connection type as per your convenience and click on Next. I have selected “Bridge Networking” to give the guest OS direct access to an external Ethernet network.

Accept the default controller type. LSI Logic is the recommended and click on Next.

Select ” Create a new Virtual disk” for ESXi server installation.

Select the disk type. SCSI is the recommended type and click on Next.

Specify the Disk capacity and select store virtual disk as a single file.

Specify the Disk file. By default it will be stored with the virtual machine location. If you want to specify the different location for virtual disk file, we can define it by clicking on Browse.

Virtual Machine is ready to create and click on customize hardware to remove unwanted devices before proceed with the ESXi installation.

Remove unnecessary devices like Floppy, USB controller and click on Close.

Virtual Machine is created and Next step is to proceed with the ESXi installation.
Please refer my blog post Install ESX/ESXi Server on VMware Workstation – Part 2 for the ESXi installation step by step procedure.
Thanks for Reading!!!!