

As vSphere admins, Our responsibility is not only limited to managing hypervisor and virtual infrastructure. vSphere admins were also responsible for troubleshooting the server hardware which is installed with ESXi hosts. We would have received many related hardware issues related to specific hardware parts like CPU fault, Memory DIMM issues, Network adapter failure, cable failures, etc. which would have caused PSOD issues also to the ESXi hosts.
In many instances, We may notice PSOD shows hardware errors. After the Reboot, we won’t see any hardware errors in ILO or IDRAC. Even though no errors reported in any hardware parts after the reboot, we need to be 100% sure that we have validated the server hardware health before we place the host back into production. Otherwise, it may cause another outage.
There are many ways we can ensure the hardware health is by opening the support ticket with the hardware vendor by generating the support logs and ask them to analyze the cause for the PSOD or Hardware Failure. Before Opening the support request, we would also run the hardware test such as Hardware Diagnostic to test the hardware for any errors. In this article, I will focus on how to run Dell Hardware Diagnostics for the Dell Server hardware.
Dell computers include a diagnostic software tool that tests your computer’s hardware for errors. You can choose to run this application when you boot up the computer. This software is useful when you have errors on your computer and are unable to figure out what the problem is. The Dell Diagnostics tool helps you troubleshoot and pinpoint problems with your system
How to Run Dell Hardware Diagnostics
To run the Dell Hardware Diagnostics, Log in to the Dell iDRAC for the server and Open the Console. If it is ESXi host, Kindly ensure the ESXi host is placed into maintenance mode.
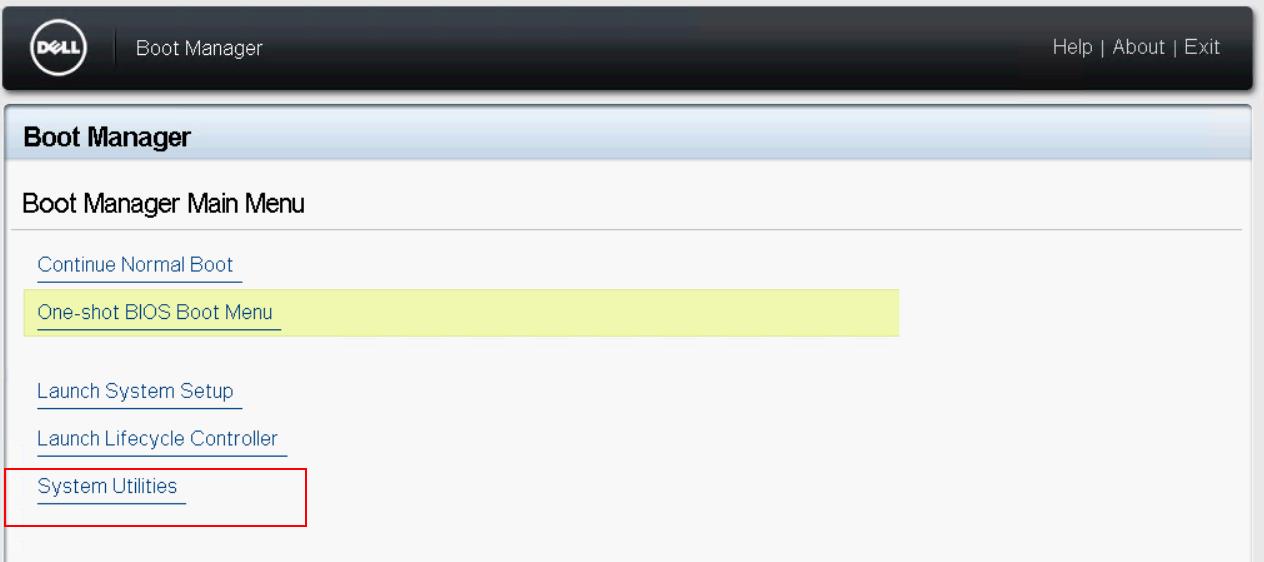
Press the “Reset” button to reboot your Dell Server. Press the “F11” key to boot into BIOS Boot Manager. The BIOS Boot Manager menu will startup. You will want to select System Utilities at the bottom by clicking on it.
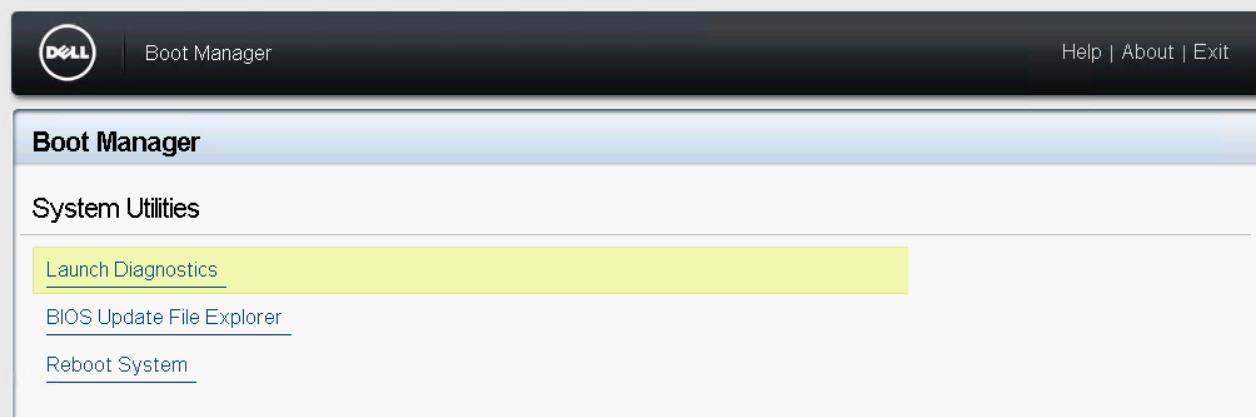
In the System Utilities Menu -> Click Launch Diagnostics
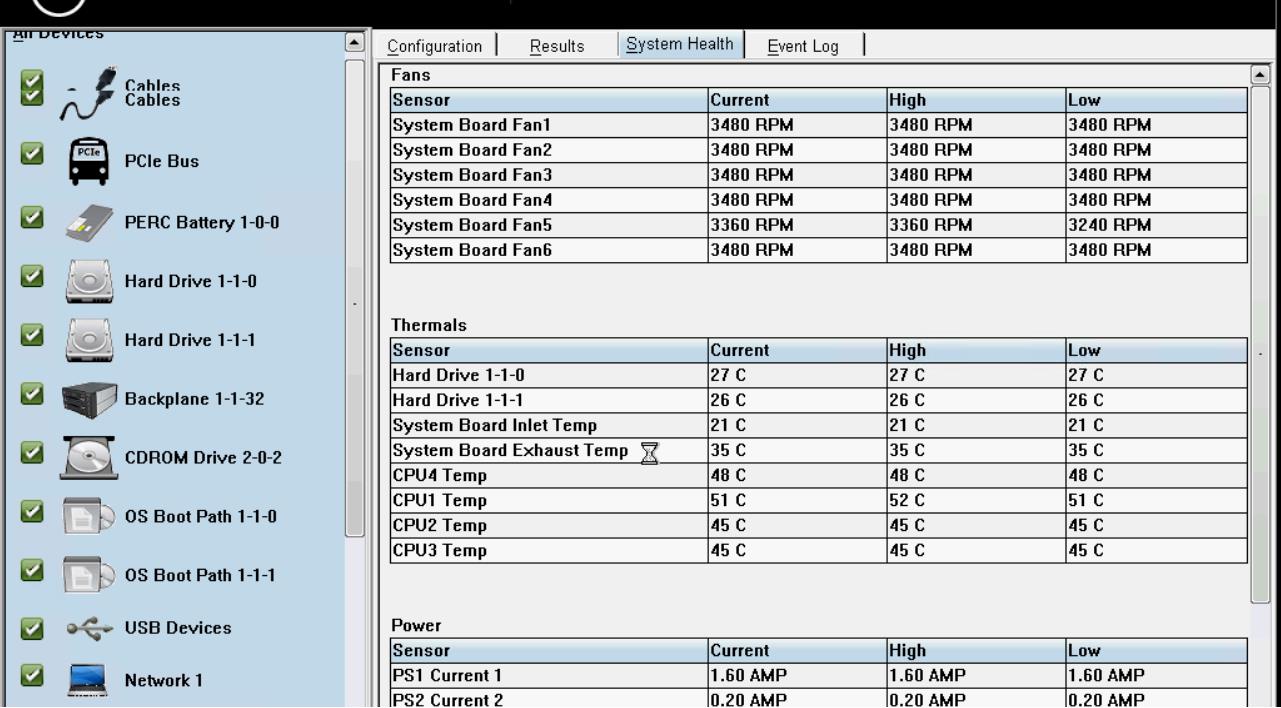
After a few seconds, the Pre-boot System Assessment utility will run and begin to automatically test all major components of the Dell server. The left-side column lists the various components and current testing status. The right side column will list details regarding the Fans, Thermals, and Power.
You can see Green check Mark if the hardware part is healthy.
Green Checkmark -> Hardware Component passes all Dell baselines for acceptable ranges
Blue Circle = The utility is currently testing that Hardware component
Red X = Component has failed Dell baseline
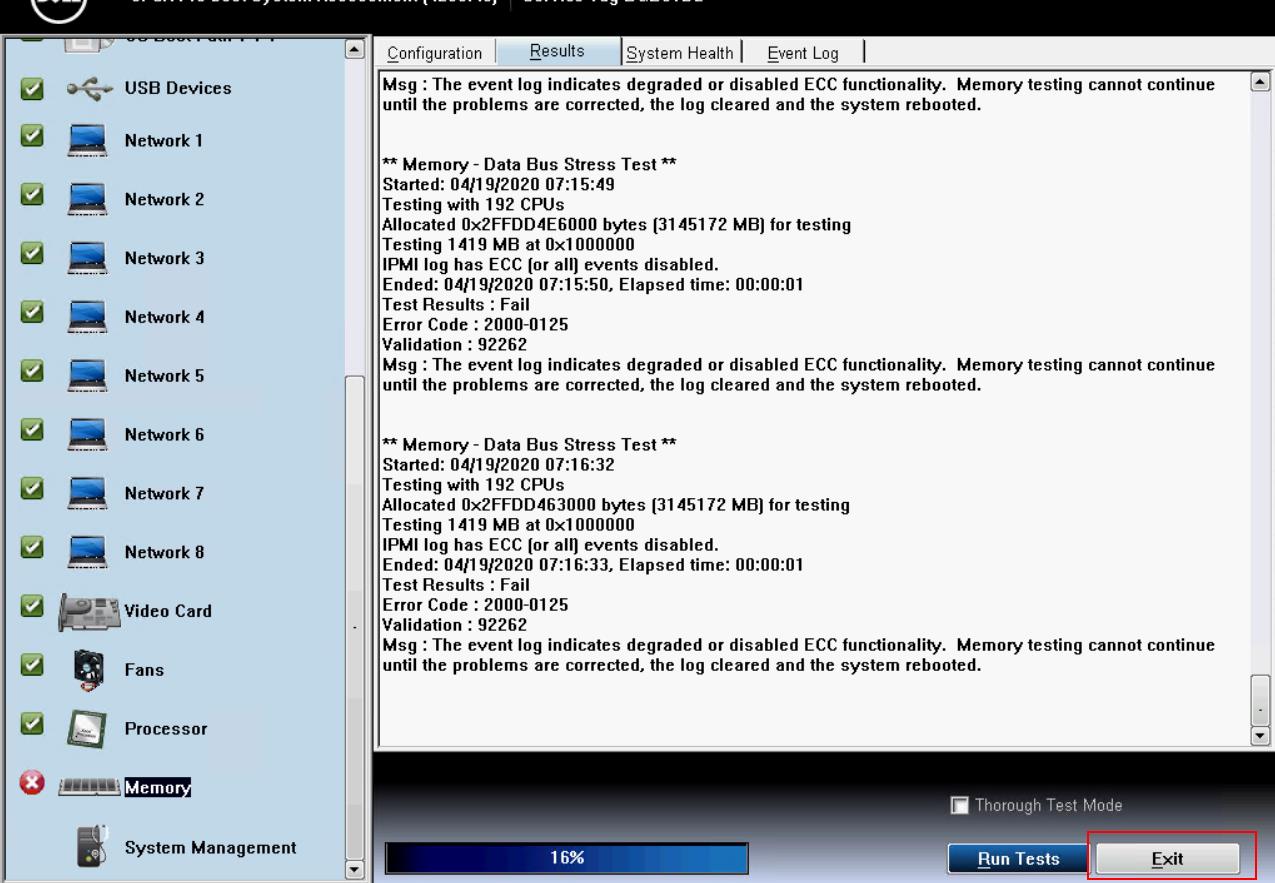
The final portion of the diagnostic tests is the memory test, the server memory will be tested. This process can take several minutes to complete.

In my case, My memory test is failed with RED X. It shows the error that Memory testing cannot continue until the problems are corrected. It seems my server is having issue with Memory. It is not recommended to place the host into production until we fix the memory error or replace the faulty memory DIMM.
I recommend to open the Dell Support request and fix the issue. Click Exit to from the Dell Hardware Diagnostics.
Click ok to exit from Dell Hardware diagnostic utility and reboot the server.
That’s it. This simple article will help us to understand the step by step procedure to run Dell Hardware diagnostics to identify the hardware errors in the Dell Server hardware. I hope this is informative for you. Thanks for Reading!!!. Be social and share it with social media, if you feel worth sharing it.