

1. Open VMware workstation and Select the Virtual Machine. Make sure virtual Machine is powered off.
2. Click on VM tab and Select Properties and click on Options tab
3. Select Shared Folders and check “Always Enabled” to enable the feature.
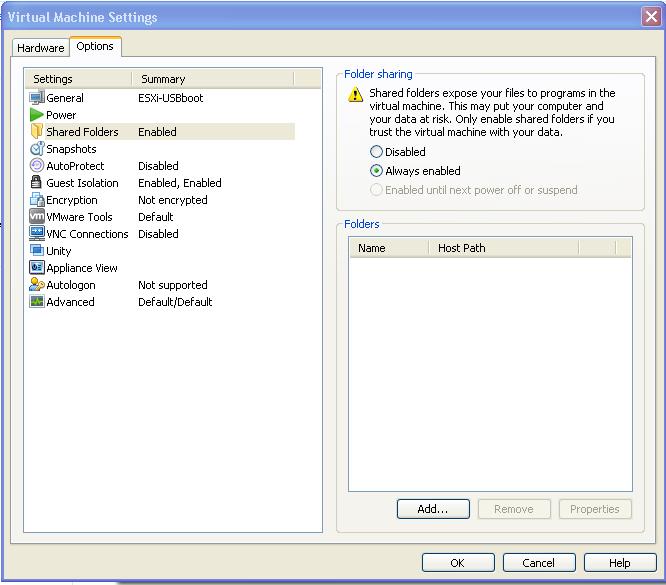
4. Click on Add to add the shared folder to the Virtual Machine

5. Browse the path for the folder and select the folder to share and click ok. Provide name for the shared folder to appear inside the virtual machine.

6. Click on Next and Select Enable this share. you have been given a option to even choose the folder as Read-only inside the Virtual Machine. Click on Finish.

7. Now shared folder is added. If you want to add multiple folders from the local drive as shared folders to virtual machine perform the same steps by click on Add button.

Power on the Virtual Machine .Now. You will be able to access the shared folders inside the virtual machine.That’s it. You are Done. I believe this is informative for you. Be Social and share this post in your social media if you think it is useful.