

Blueprints define the resources and attributes associated with the provisioning of a virtual, physical, or cloud machine. Blueprints are configured for any machine (VM, vApp, Physical, Cloud) or a combination (multi machine blueprint) that will be available for provisioning in the portal. A unique Blueprint has to be created per platform (vSphere, vCloud, EC2, Hyper-V, XEN, Physical, etc). Here we will create a vSphere (Virtual) blueprint.Blue print will be visible as item in the service catalog to end users. where they can use to request virtual machine, physical machine, application or anything else. Let’s take a step by step look at creating and publishing Blueprints.
Log in to the vCloud Automation Center Console as tenant administrator or business group manager.
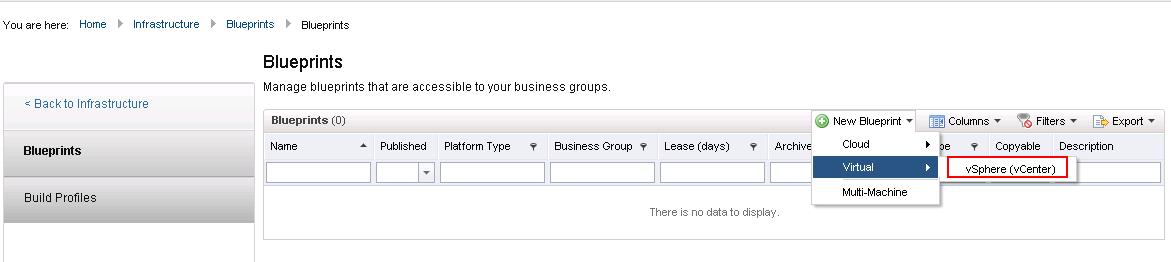
Navigate to Infrastructure ->Blueprints -> Blueprints. Click on New Blueprint -> Virtual -> vSphere (vCenter)
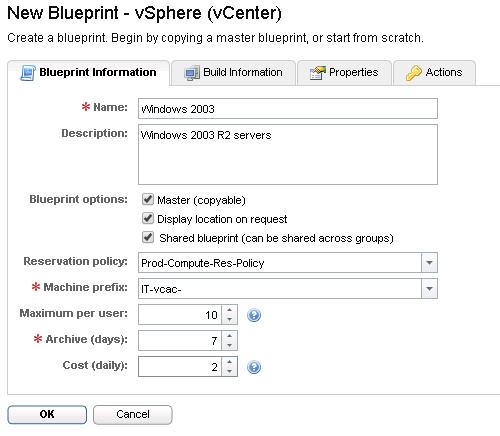
 Provide the Below information to create the blueprint
a. Enter the name and description for the blueprint
b. You can Select the Options of your choice for Blueprint options (Master, Display Location on Request and share Blueprint). The display location will make a user choose a datacenter instance of where to deploy the application.
c. Select the Reservation Policy and Machine Prefix for this Blueprint
d. Enter the maximum number of Per User setting. Specify a number for the max provisioning amount will only allow a single user to provision from this blueprint
e. specify the number of days to archive machines provisioned from this blueprint.
f. Enter the additional costs for chargeback purposes. These costs will be Added to anything that is set in a cost profile.
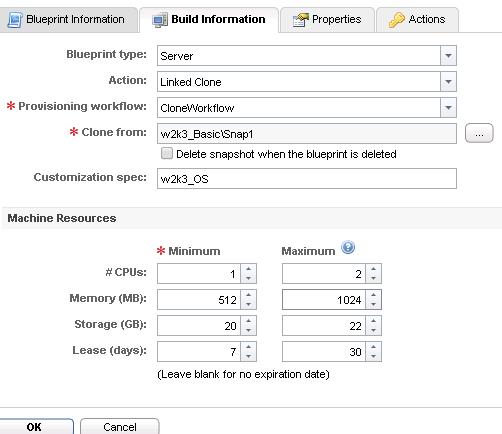
Click on the ‘build information’ tab, I am going to Use LinkedClone. So select LinkedClone form the action menu.Select the Clone Workflow from the provisioning workflow. You need the Select the VM to clone from. Click on … Icon.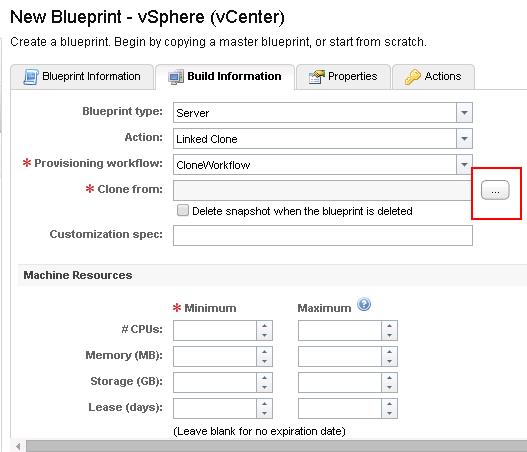 Select the Virtual Machine to clone and Click on Next
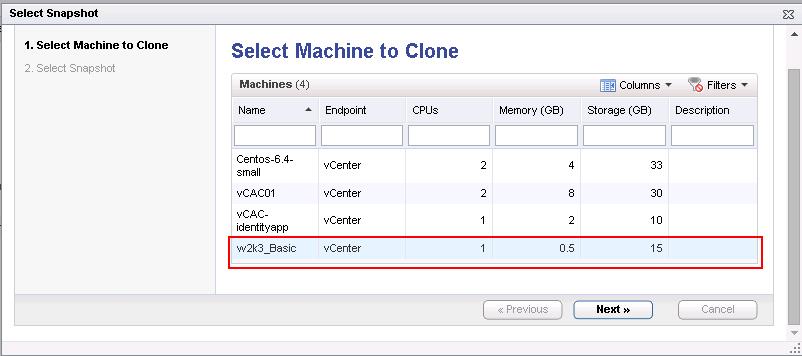 Since I have Selected LinkedClone as action. I have to Select the Snapshot of the virtual Machine. You need have atleast one snapshot to be used as linked Clone VM. Select the Snapshot and click on Finish.
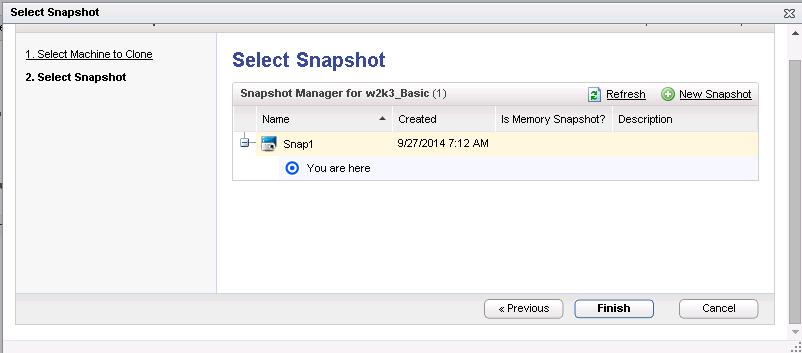 Verify the snapshot selection and Click on Ok.
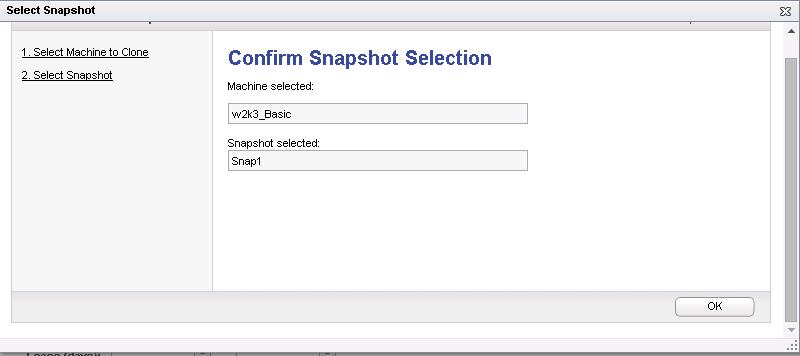 if you have a customization specification already created in vCenter Server, Type the exact name of the customization specification and also Specify the Minimum and Maximum of Machine Resources like CPU, Memory,storage and Lease that can be assigned to this blueprint. Click on Ok to create this blueprint.
This is the Customization Specification i have created for Win2k3.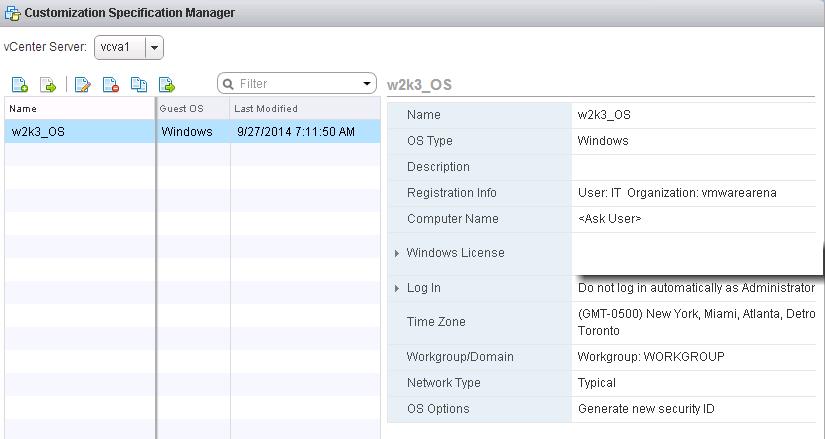
Right Click the newly created Blueprint and Click on Publish.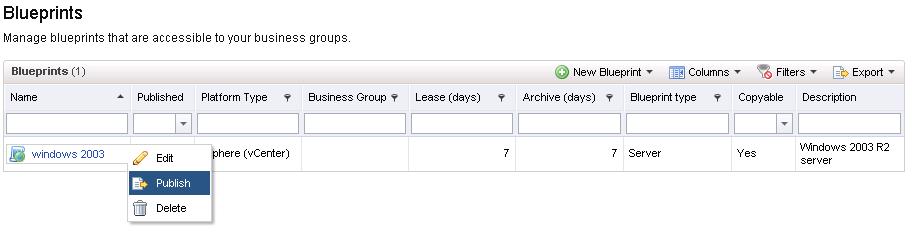 Click on Ok to confirm the Blueprint Publish.
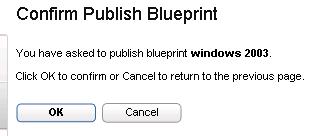
That’s it. We are done with Creating and publish the Blueprint. We will take a look at detailed step about Adding this published item to Catalog and deploy VM from it in upcoming posts. Thanks for reading. I hope this is informative for you !!. Be Social and share it in social media, if you feel worth sharing it.