

Prior to vSphere 6.0, we were not allowed to perform the live migration between the vSphere Distributed Switches. It was only limited within the dvswitch. After vSphere 6.0, vMotion is allowed across vSwitches and even vCenter Servers. vMotion across vCenter server allows you to simultaneously change the Compute, Storage, Networks and management. It leverages the migration with unshared Storage. When using the vSphere Web Client, both vCenter Server instances must be in Enhanced Linked Mode and must be in the same vCenter Single Sign-On domain so that the source vCenter Server can authenticate to the destination vCenter Server. If the source and destination vCenter is not part of same SSO domain, you can make use of vSphere APIs/SDK to vMotion the VMs between vCenter servers. As we always know, VMware Fling produced a lot of excellent tools to save our day to day jobs. VMware Fling also released the GUI utility called Cross vCenter Workload Migration Utility. This Fling allows users to easily migrate virtual machines in bulk from a graphical user interface between vCenter Servers using the Cross-vCenter vMotion feature. In this article, We will take a look at using the Cross vCenter Workload Migration utility to vMotion VMs between vCenter Servers.
Requirements for Cross vCenter vMotion
- The source and destination vCenter and ESXi hosts must be running version 6.0 or later.
- The cross vCenter Server and long-distance vMotion features require an Enterprise Plus license.
- Both vCenter Server instances must be in Enhanced Linked Mode and must be in the same vCenter Single Sign-On domain to migrate VMs using the vSphere Web Client
- Both vCenter Server instances must be time-synchronized with each other for correct vCenter Single Sign-On token verification.
- To migrate VMs between vCenter Server instances in separate vSphere Single Sign-On domains, you need to use vSphere APIs/SDK to migration
VIDEO – Deep Dive into Cross vCenter vMotion under 20 Minutes
vMotion VMs between vCenter Servers using Cross vCenter Workload Migration utility
Cross vCenter Workload Migration utility fling allows users to easily migrate virtual machines in bulk from a graphical user interface between vCenter Servers using the Cross-vCenter vMotion feature.
To use the Cross vCenter Workload Migration utility, Download Cross vCenter Workload Migration utility from VMware flings website. Extract the contents of the Zip file in your local computer. To run the utility, Open the command prompt in your windows machine and navigate to the directory where xvm-2.2.jar resides. You need to have Java Runtime Environment 1.8-10 to run this utility.
Execute the following command in your windows machine to initialize the utility
java -jar xvm-2.2.jar
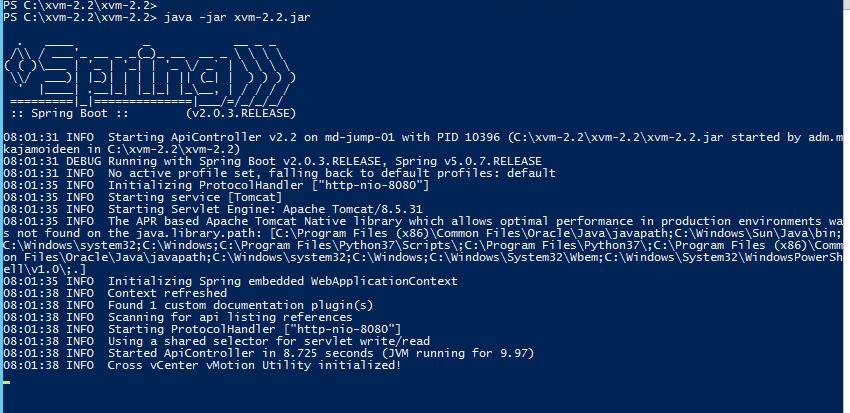
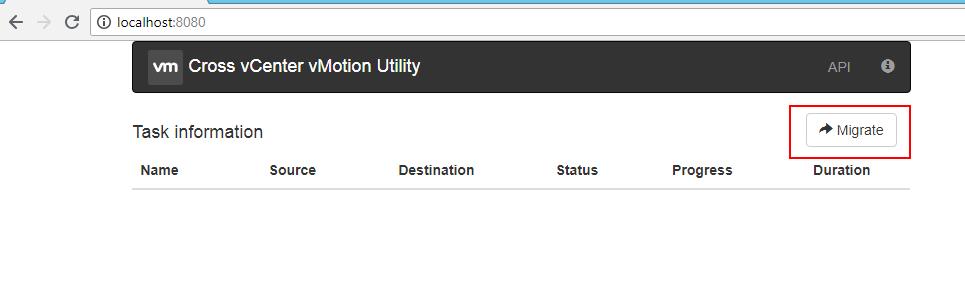
Once the Cross vCenter Workload Migration utility is initialized, Open the web browser and access localhost with port 8080 (http://localhost:8080/). Cross vCenter Workload Migration utility will be loaded into your web browser. Click on “Migrate” to supply the required information for migration.
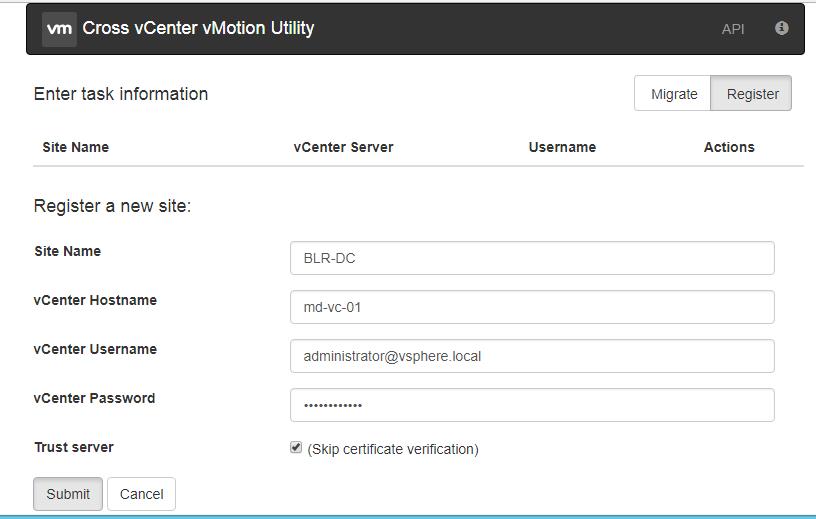
 Before initiating the vMotion VMs between vCenter Servers, We need to register the source and destination vCenter Servers. Click on “Register” to register the source and destination vCenter Servers. Provide the Site Name, vCenter Server Hostname, Username and password for the vCenter server. Click on Submit. Similarly, register the destination vCenter server using the same procedure. You can add multiple vCenter Servers under this Cross vCenter Workload Migration utility.
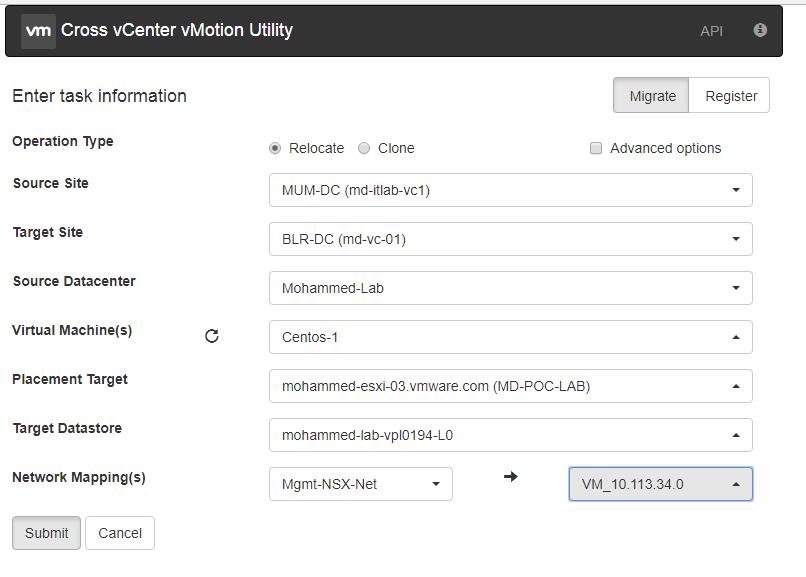
Once vCenter Servers are registered, Click on “Migrate” Option to start the vMotion VMs between vCenter Servers. Select the option “Relocate” to migrate the VM’s between vCenter or Option “Clone” to clone VM from source vCenter to destination vCenter Server. Once the vCenter Servers are registered, This utility has complete visibility towards the inventory of the registered vCenter Server.
Specify the Migration information from the drop-down for each of the options. Select Source Site (Source vCenter), Target site (Destination vCenter), Virtual Machine Name (You can select multiple virtual machines), Placement Target (Destination ESXi host), Target Datastore and Network Port group Mappings for the VM in destination vCenter Server. Click on Submit.
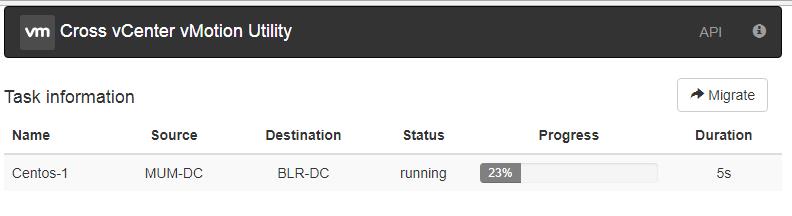
Migration of VMs between vCenter Servers will be started once you click on Submit. You can concurrently migrate multiple VMs between registered vCenter Servers using Cross vCenter vMotion utility. Monitor the progress of the migration from the utility itself.
That’s it. We are done!!!. I hope we are clear now with the procedure to vMotion VMs between vCenter Servers using Cross vCenter vMotion utility. Thanks for Reading!!!. be social and share it with social media, if you feel worth sharing it.