

In the Previous post “VSAN Setup in VMware Workstation Part 1 – Initial Lab preparation” , We have explained about the detailed step to setup procedure to build basic VSAN lab using vCenter Server Appliance and ESXi hosts along with the configurations of VMware Workstation. This lab configuration is not a best practice or recommendation but it is model lab setup using VMware Workstation to the VMware Administrators who want to setup and test the VSAN future in their home lab or on laptop or desktop.
Once the initial setup has been completed as per the previous post and Configure the initial network settings for ESXi host and vCenter Server Appliance.
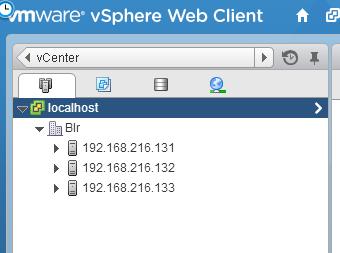
Connect to your vCenter Server using vSphere web client and add all the 3 ESXi hosts into your vCenter Server inventory.
Once All the 3 hosts has been Added into vCenter server inventory. You need to configure the vMkernel network for vSAN.
Configuring VSAN VMkernel Network
You can either use Standard switch or distributed switch to configure the VSAN VMkernel network for your ESXi host. Below step needs to be configured on all your 3 ESXi hosts.
1. Connect to vCenter server using vSphere web client. VSAN VMkernel network will be available only to configure when you connect to your vCenter using vSphere Web Client.
2. Browse towards your ESXi host in Host and Clusters View
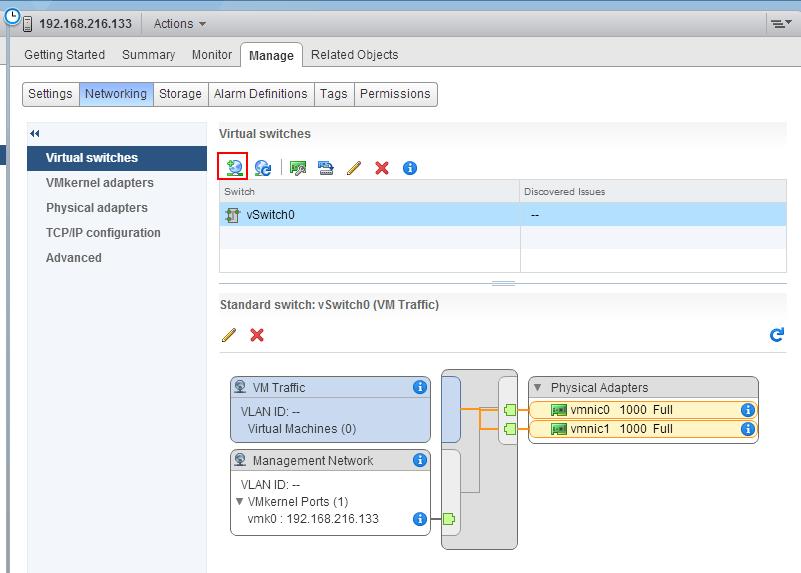
3. Select the ESXi host to configure network ad click on Manage Tab
4. Select Networking option and click on Add host networking
If have an existing vSwitch called vSwitch0 with VMkernel network “Management Network” used for the Management purposes and one Virtual Machine network called “VM Traffic”.
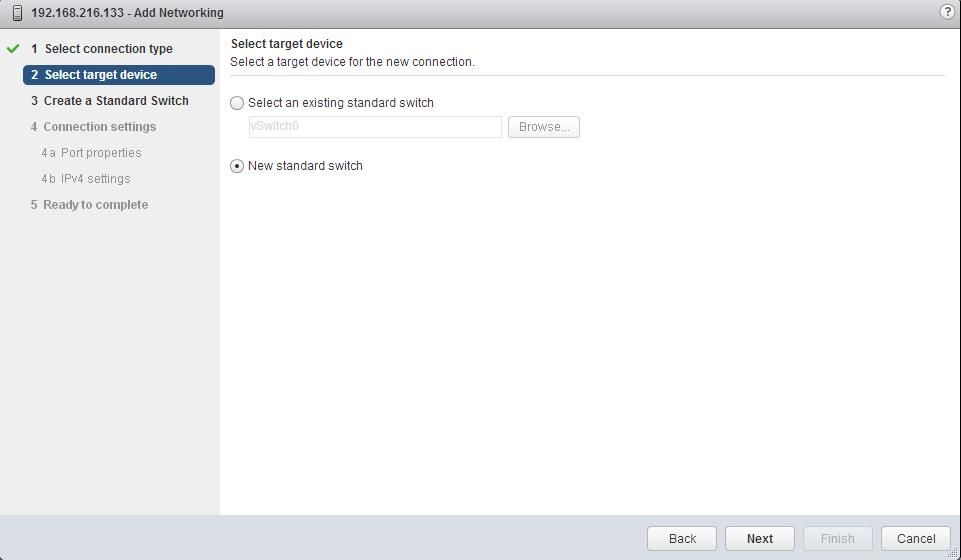
I am not going to disrupt the existing vSwitch “vSwitch0” and network adapters configured for Management network. It is always recommended to separate the traffic for different networks such as vMotion, Mgmt Network, iSCSI and VSAN network. So i am going to create a VMkernel network for VSAN called “VSAN_Net” on the new vSwitch “vSwicth 1” with dedicated 2 vmnic (vmnic2 & vmnic3).
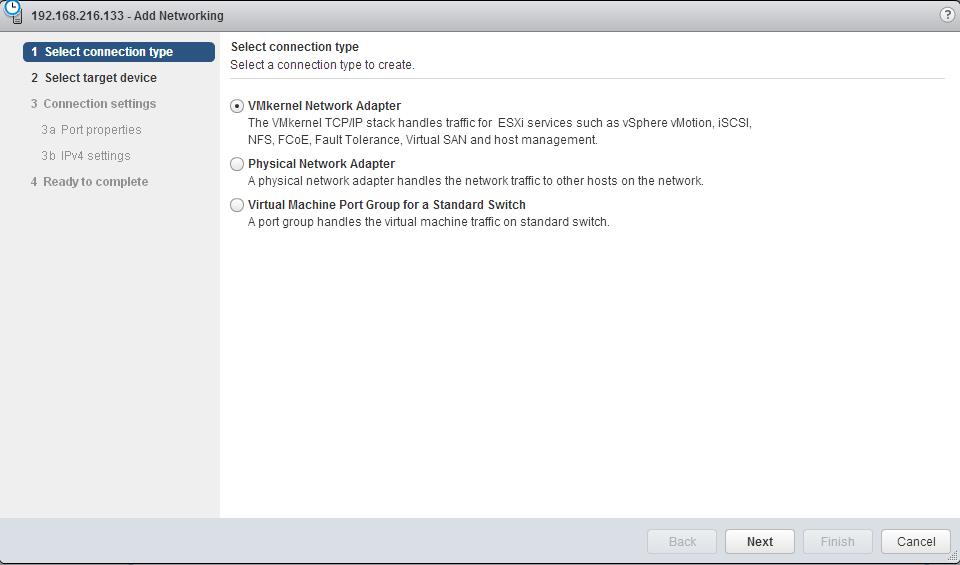
5. Select VMKernel Network Adapter and click on Next
6. Select New Standard Switch and click on Next
7.Click on + symbol to assign the network adapters to the vSwitch “vSwitch1”. I have assigned 2 Network adapters(vmnic2 and vmnic3) for the vSwitch1. Click on Next.
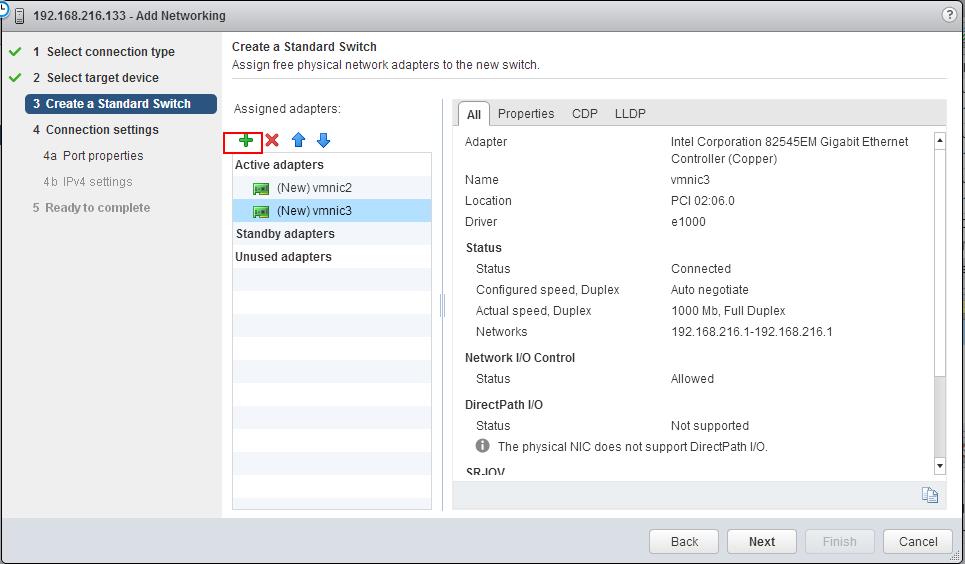
8.Enter the Network Label for VMkernel network and Select “Virtual SAN traffic” option under enabled services. It is very important to enable the Virtual SAN traffic in the VMkernel adapter for the VSAN. It is one of the very important pre-requisite of the VSAN configuration. Click on Next.

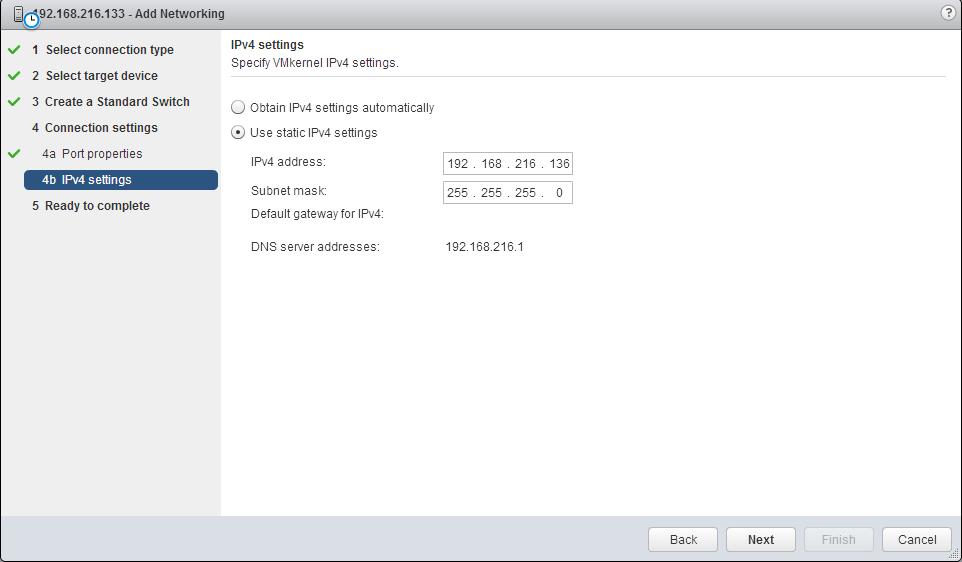
9.Select “Use IPv4 Setting” and assign IP address and Subnet mask. Click on Next.
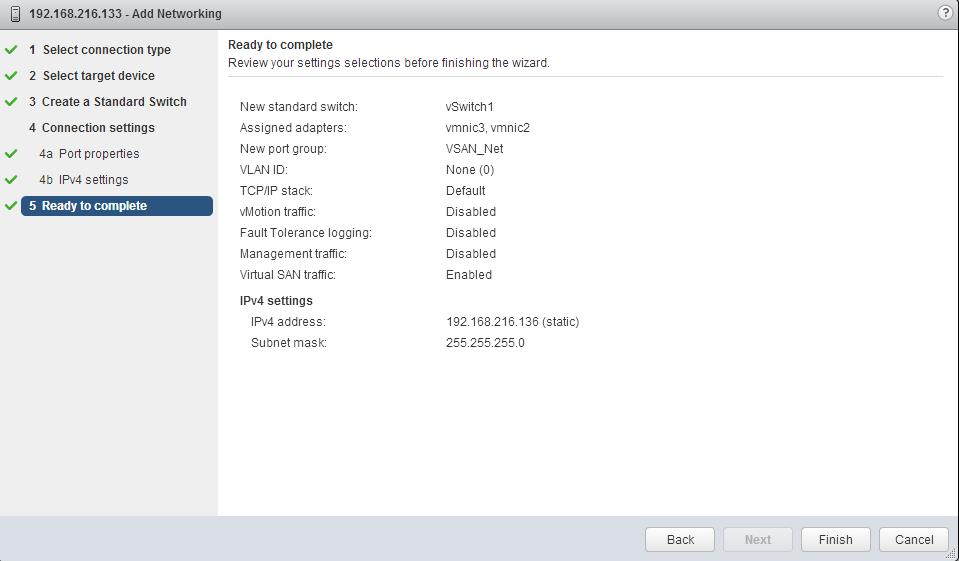
10.Review the options selected and Click on Finish to complete the creation of VSAN VMkernel network.
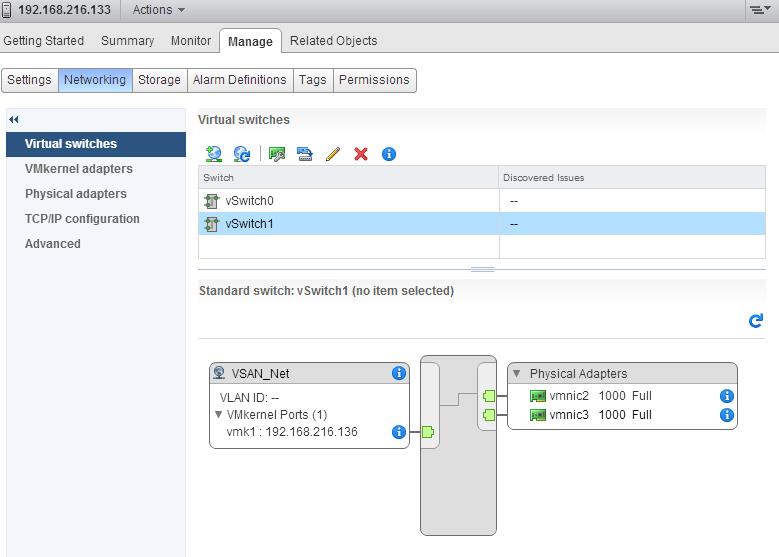
Configure the Virtual SAN VMkernel network on all the 3 ESXi host exactly as same configuration other than IP address.
That’s it . We are done with configuring VMKernel network for VSAN traffic. We will look at other preparation tasks related to disk and cluster in the upcoming posts. I hope this is informative for you. Thanks for reading!!!.