

VMware vSAN Stretched Cluster supports the use of a vSAN Witness Appliance as the Witness host. vSAN Witness can be run in both physical and virtual appliance. Keeping a dedicated a physical ESXi host as witness host will need a license, Power consumption, and hardware maintenance and data center space, etc as all condition applies to run a workload in the physical server as compared to virtualization. In my previous post, we have discussed how to deploy virtual vSAN Witness appliance in the vSphere cluster. In this article, Let’s understand how to configure vSAN witness appliance virtual machine.
The vSAN virtual appliance is nothing but the virtual machine running ESXi host. It is pre-configured and licensed. You don’t need to provide a license for ESXi (vSAN witness appliance). Unlike a general purpose ESXi host, the witness appliance does not run virtual machines. Its only purpose is to serve as a vSAN witness. We need to configure the networking for the Witness host via DCUI which is very familiar for all of us.
Configure vSAN Witness Appliance Management Network
Log in to the vCenter server where the witness appliance is deployed. Open the console of the vSAN Witness Appliance to configure networking information, such as IP address and DNS, for the management network.
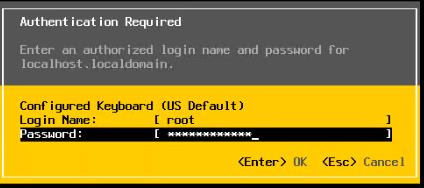
Open the console of the vSAN witness appliance virtual machine. Press F2 to customize the system and login with the root credentials
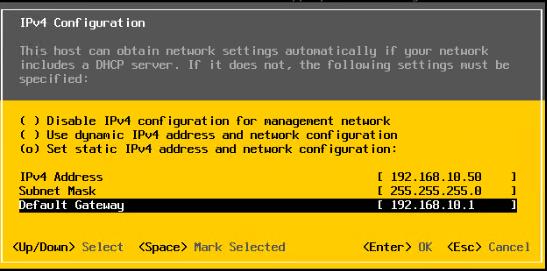
Select the Network Adapters view. There will be two network adapters, each corresponding to the network adapters on the virtual machine. Configure the management network. Specify the IP address, subnet mask, and gateway for the management network. Press “Enter”
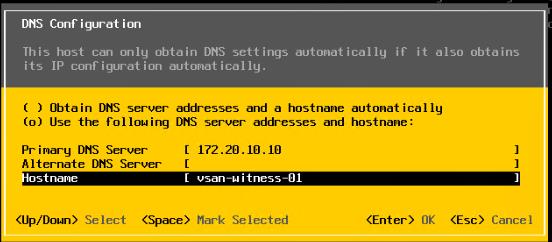
The next step is to configure the DNS. A primary DNS server should be added and an optional alternate DNS server can also be added. The FQDN(fully qualified domain name)of the host should also be added at this point. Enter to configure the settings.
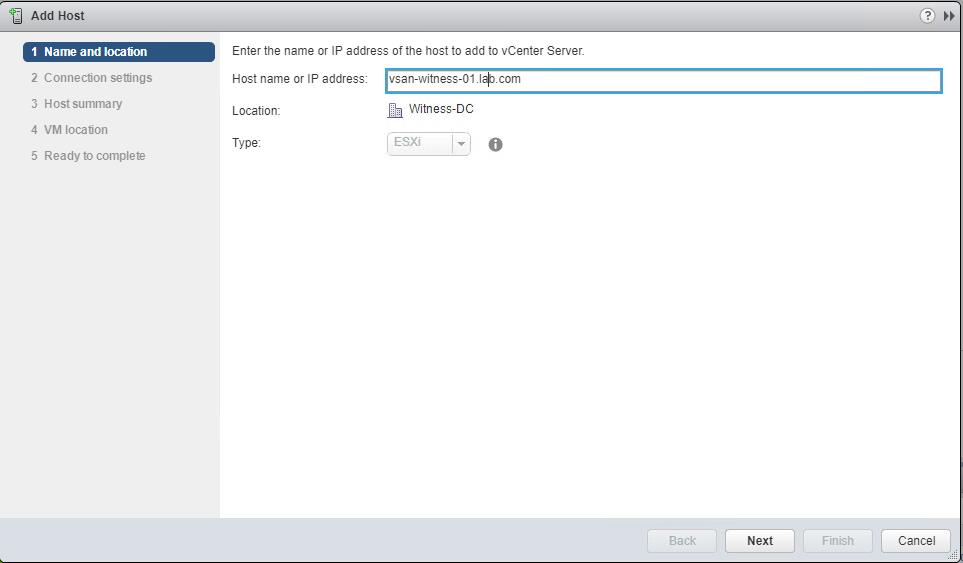
Once the management network is configured for the vSAN witness appliance. We need to add the witness appliance (ESXi) into the vCenter Server.
There is no difference in adding the vSAN Witness Appliance ESXi instance to the vCenter server when compared to adding physical ESXi hosts. However, there are some interesting items to highlight during the process. The first step is to provide the name of the Witness. In this example, the vCenter server is managing multiple data centers, so we are adding the host to the witness data center (Witness-DC). Click Next.
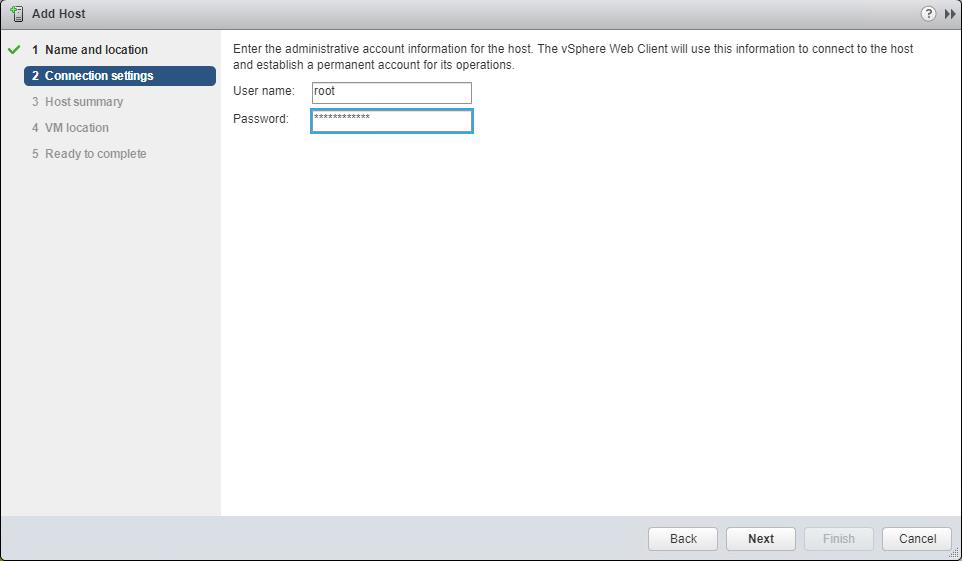
Specify the root username and password to add the vSAN witness appliance to vCenter server inventory. Click Next.
Follow other wizard instructions as same as adding ESXi hosts into vCenter inventory. Click on Finish.
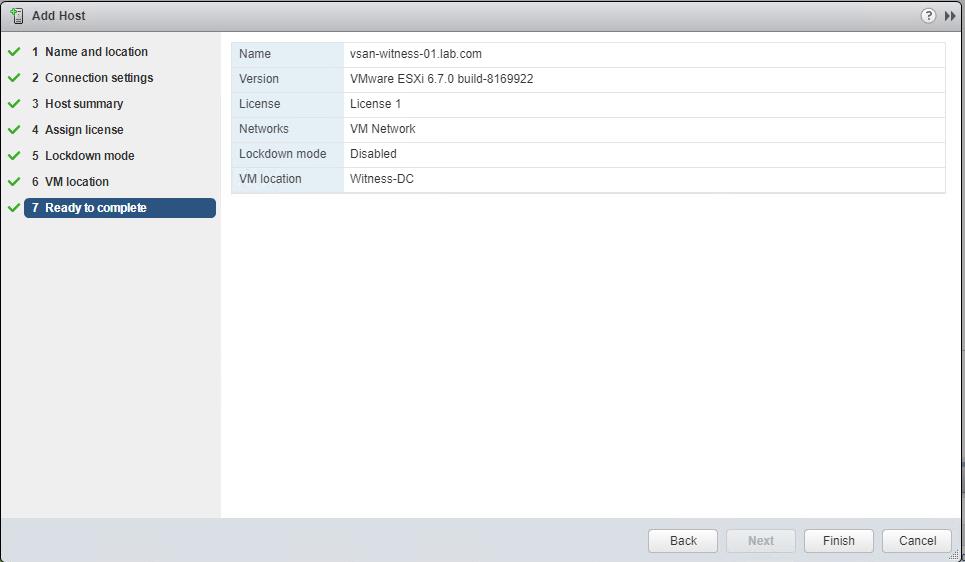
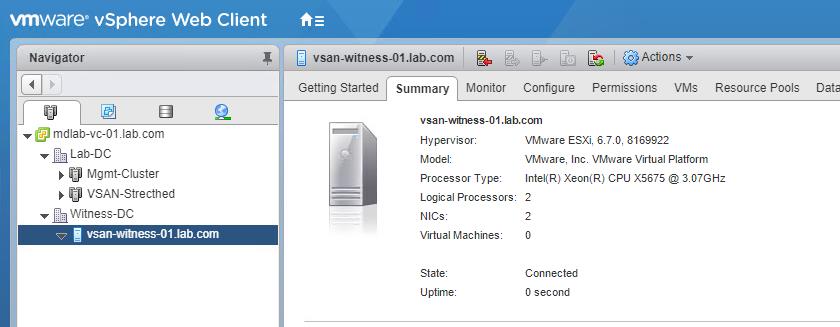
vSAN witness appliance is added into vCenter inventory. you can see the difference in the appearance of the vSAN Witness Appliance ESXi instance in the vCenter inventory. It has a light blue shading, to differentiate it from standard ESXi hosts.
Configuring vSAN Witness Appliance Networking
We have configured the management network of the vSAN witness appliance. The next step is to configure the vSAN network correctly on the vSAN Witness To configure, Select the vSAN witness appliance, navigate to Configure > Networking > Virtual switches as shown below.
The Witness appliance has a port group pre-defined called witnessPg. This VMkernel port to be used for vSAN traffic is visible. If there is no DHCP server on the vSAN network (which is likely), then the VMkernel adapter will not have a valid IP address. we need to configure the IP address for the VMkernel interface
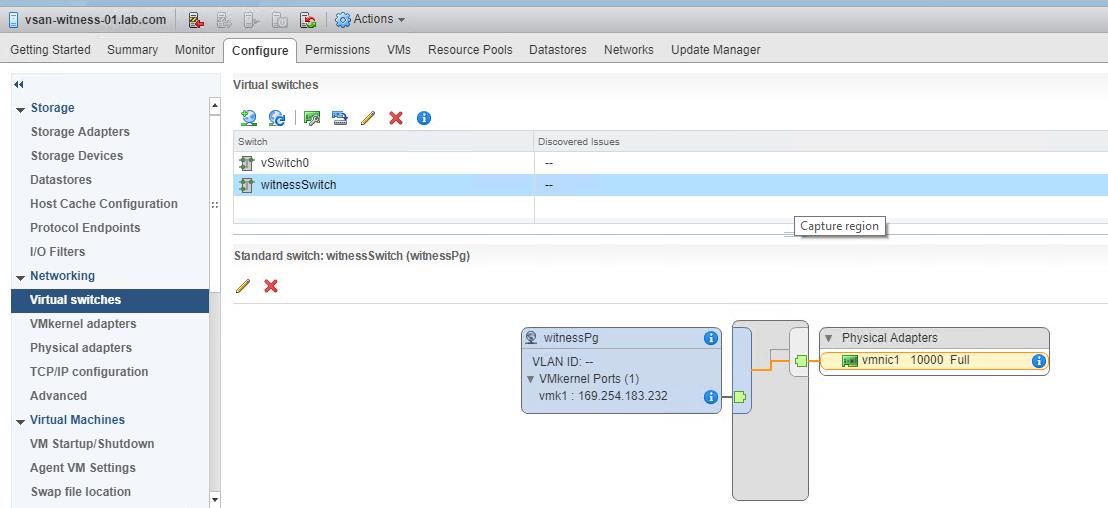
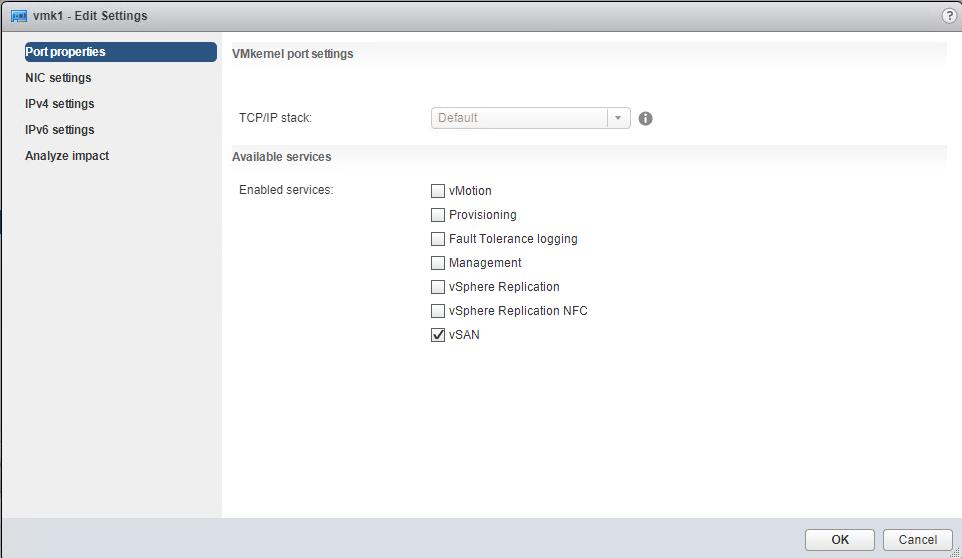
Select VMkernel adapters > vmk1 to view the properties of the “witnessPg”. Validate that “vSAN” is selected under the enabled services.
Click on next and assign the IP address for the Witnesspg vmkernel interface. The vmk1 interface cannot be configured with an IP address on the same range as that of vmk0. This is because Management traffic and vSAN traffic use the default TCP/IP stack. If both vmk0 and vmk1 are configured on the same range, a multihoming condition will occur and vSAN traffic will flow from vmk0, rather than vmk1.
Once we have configured the IP address of both vmk0 and vmk1, we are done with the procedure of configure vSAN witness appliance networking. We are ready to create the vSAN stretched cluster. We will take a look at it in the upcoming posts. I hope this article is informative for you. Thanks for Reading!!. Be social and share it in social media, if you feel worth sharing it.