By default, NSX-T appliances have only two built-in users: admin and audit. In the larger organization, we need Role-based access control to access any application. The same applies to NSX-T as well. We can integrate NSX-T with VMware Identity Manager (vIDM) and configure role-based access control (RBAC) for users that vIDM manages. With VMware Identity Manager, you can set up and manage authentication methods and access policies, customize a catalog of resources for your organization’s applications and provide a secure multi-device managed user access to those resources. To setup Role-based access for NSX-T, we need to integrate NSX-T with VMware Identity Manager. Before we integrate NSX-T with VIDM, we need to configure the directory services integration with the VMware Integrity manager. In this article, we will discuss in detail how to add Active Directory server to VIDM.
How to Add Active Directory Server to VIDM
In our previous article, we have deployed and configured the initial setup of VMware Identity Manager. After the initial configuration, Login to Identity Manager using the URL https://<hostname or IP of VIDM Manager> using local admin credentials.
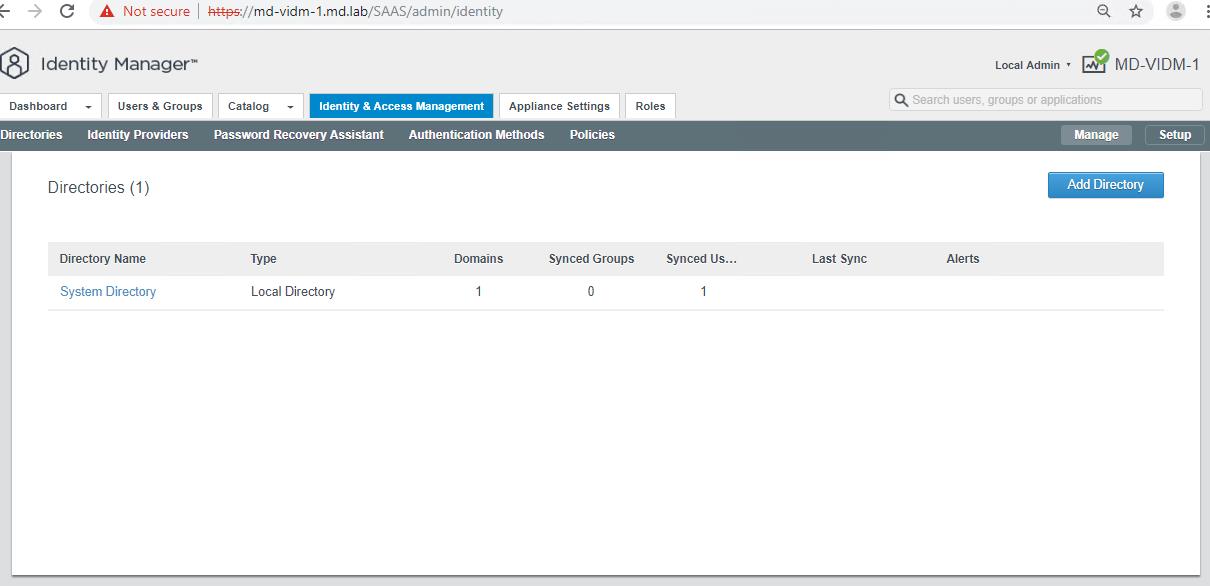
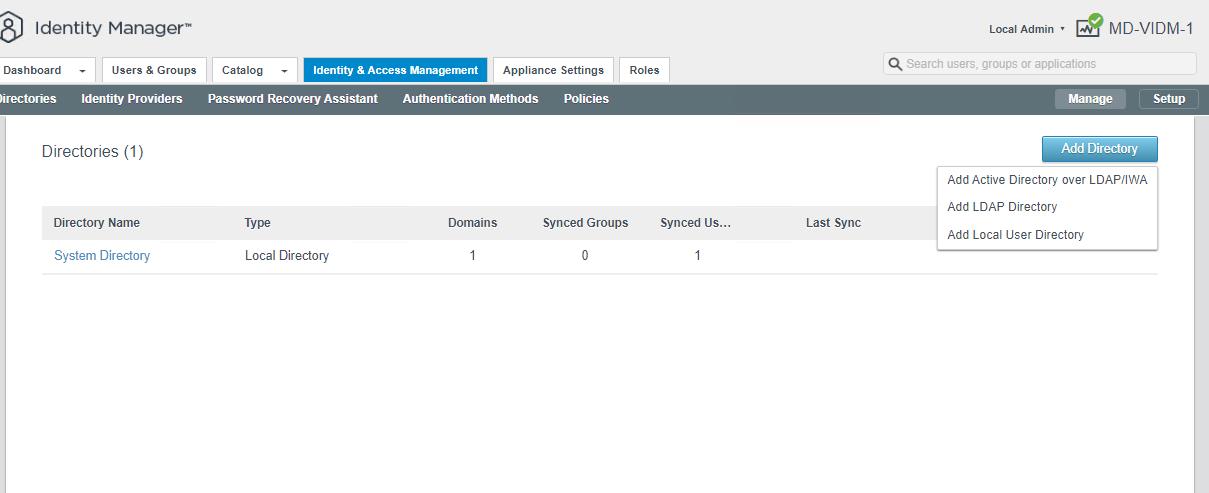
Click on the Identity & Access Management tab. Click on the Add Directory button.

select Add Active Directory over LDAP/IWA from the drop-down menu under Add Directory.

Provide the Directory Name to identify the AD server. Select the option Active Directory (Integrated Windows Authentication). Select the VIDM server from the drop-down in the Sync connector and leave the default option for the Authentication option.

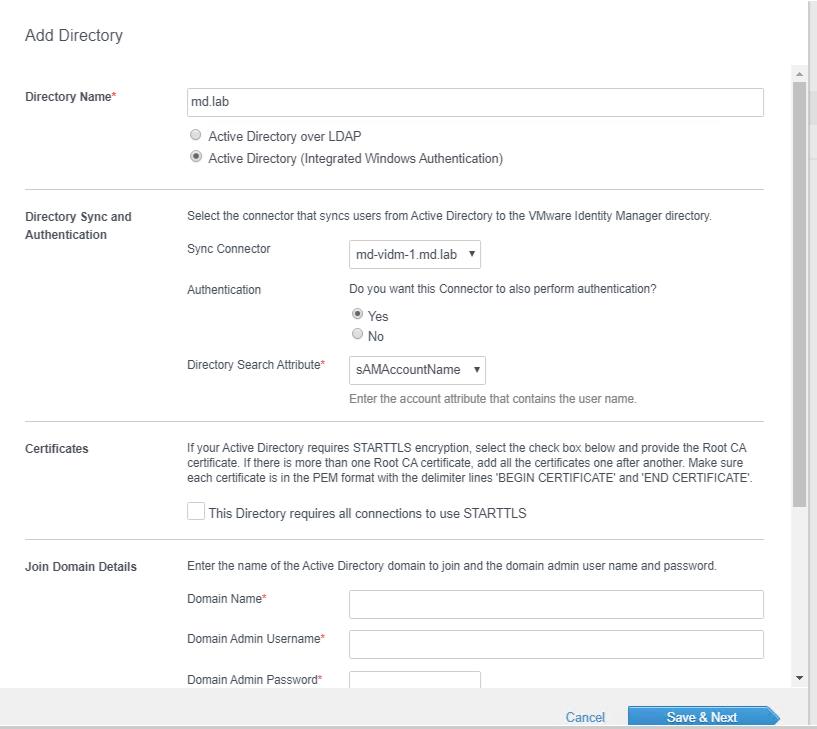
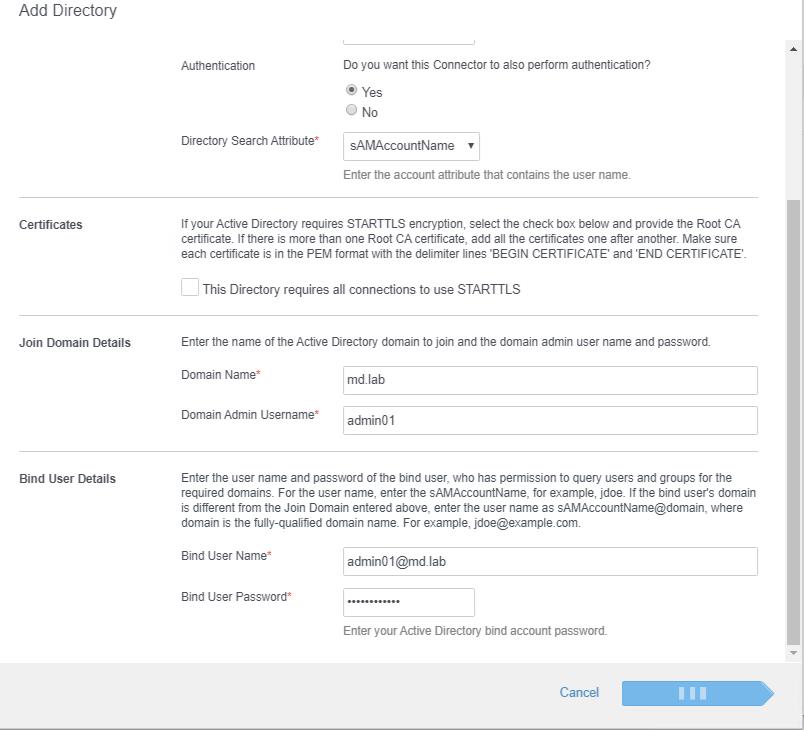
In the Join Domain Details section, specify the domain name and domain admin username. Also, specify the Bind username and password. Bind user should have permission to query users and groups from the required domain. Click Save and Next.

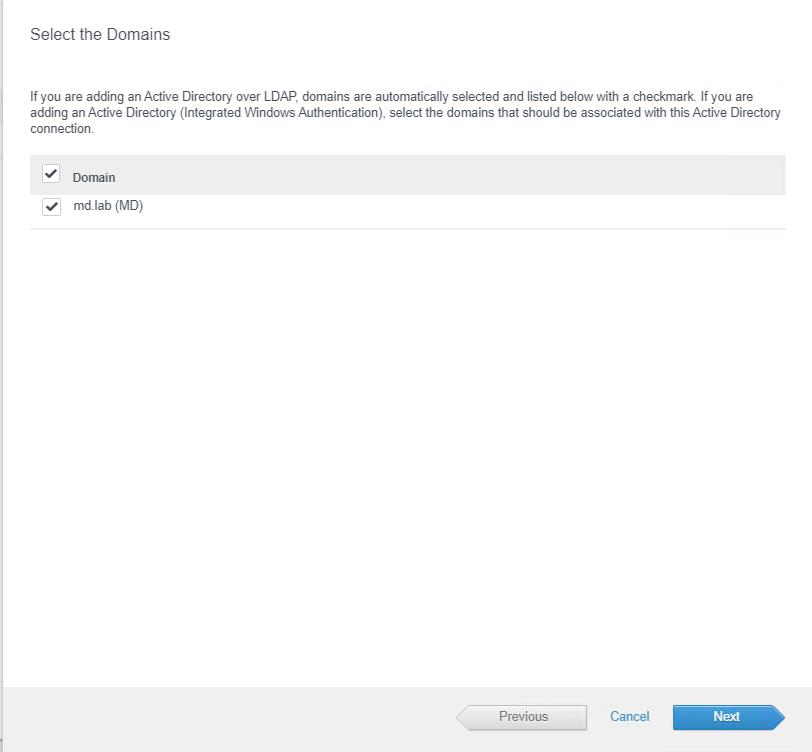
if you are adding an Active Directory over LDAP, domains are automatically selected and listed below with a checkmark. If you are adding an Active Directory (Integrated Windows authentication), select the domains that should be associated with this Active Directory connection. Ours is the second option, so select the domain name. click Next.

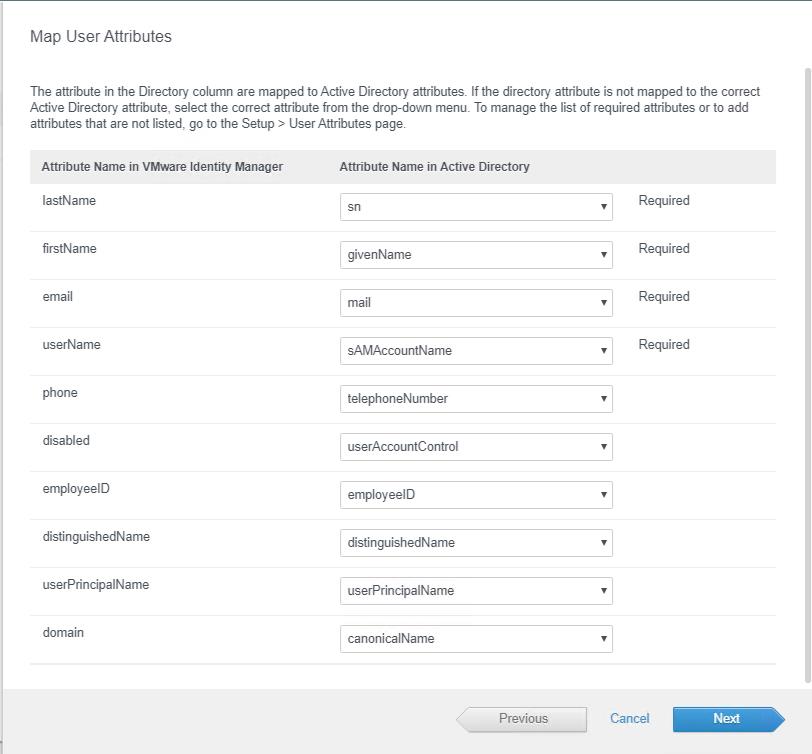
On the Map user Attributes page, you can choose to modify the mapping of user attributes. Defaults should work for most of the cases, so you can click Next.

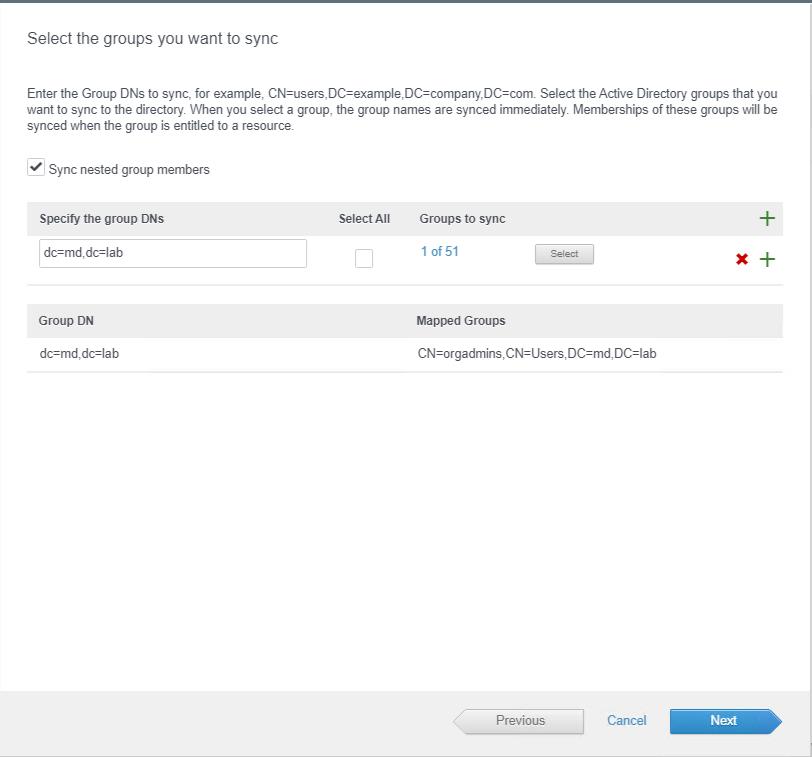
Specify the Distinguished Name (DN) of the groups to be synchronized and click on Find Groups. In the below example, I have added the active directory groups called “orgadmins”. Click Next.

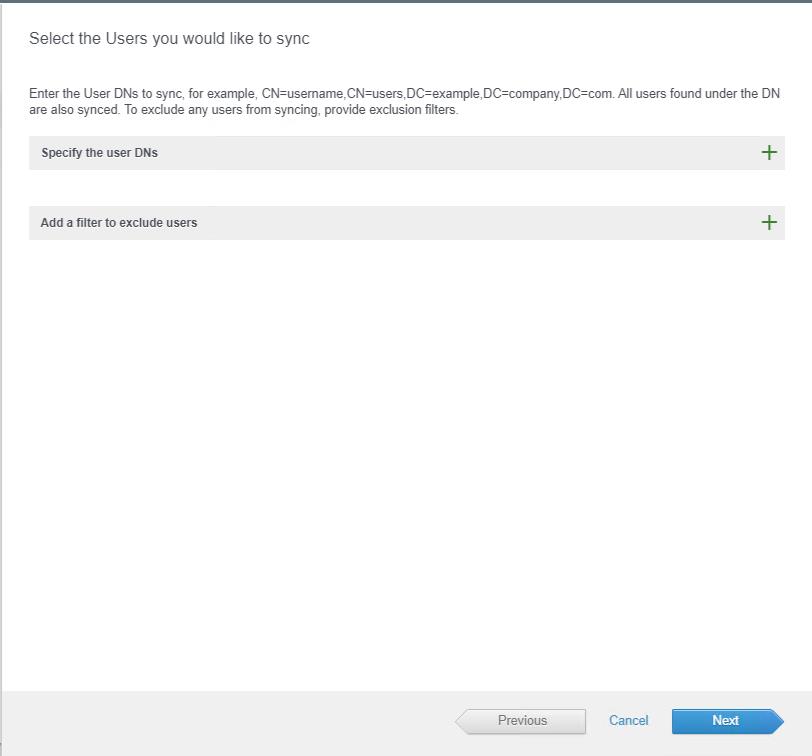
If you want to add the users DN to sync. you can specify the user account as well. I am not adding any individual users here to sync. Click Next.

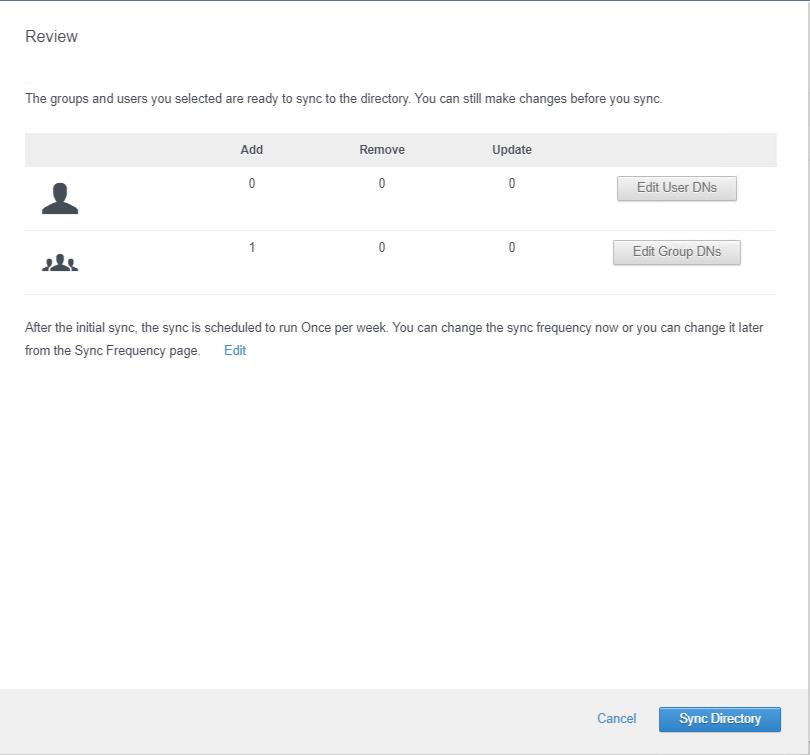
Review the groups and users you selected are ready to sync to the directory. I have added one group called “orgadmins” to sync in this example. Click Sync Directory.

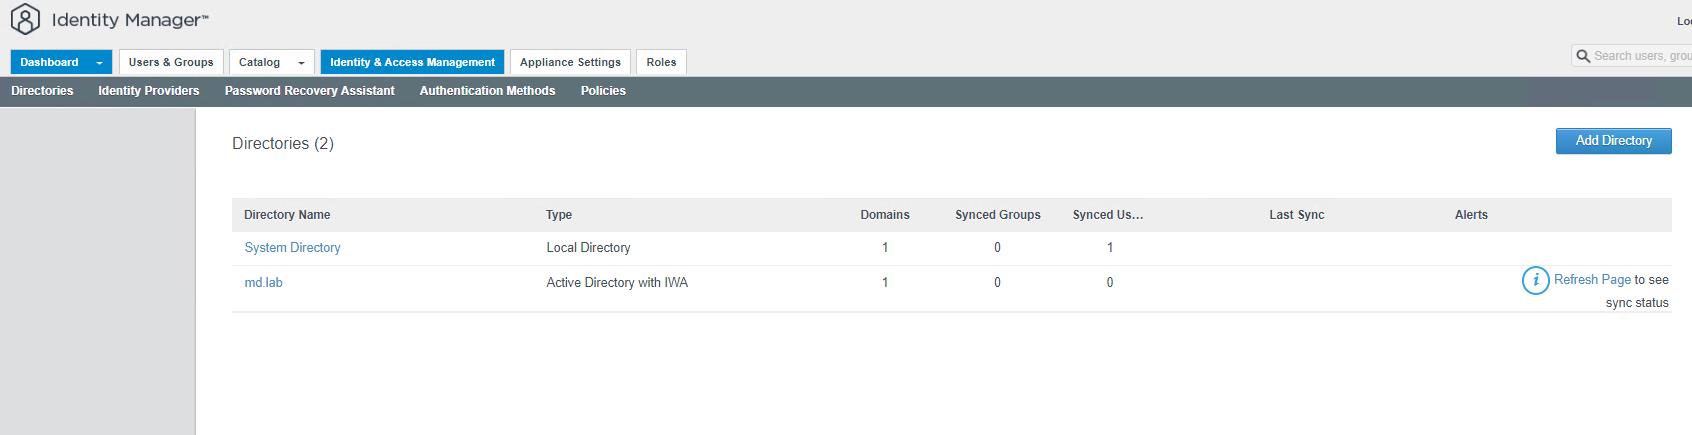
Once the Active Directory has been added to the VMware Identity Manager, You can see the Active Directory domain name appears under the Directories. You can click Refresh Page to see the sync status.

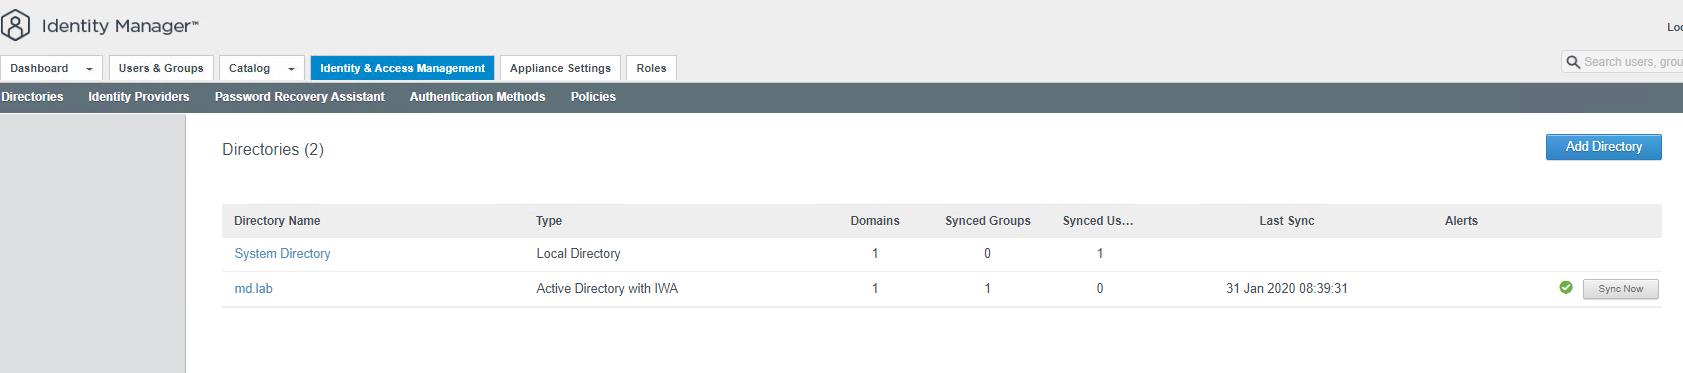
Active directory group sync is completed. I can see 1 group under the synced groups.

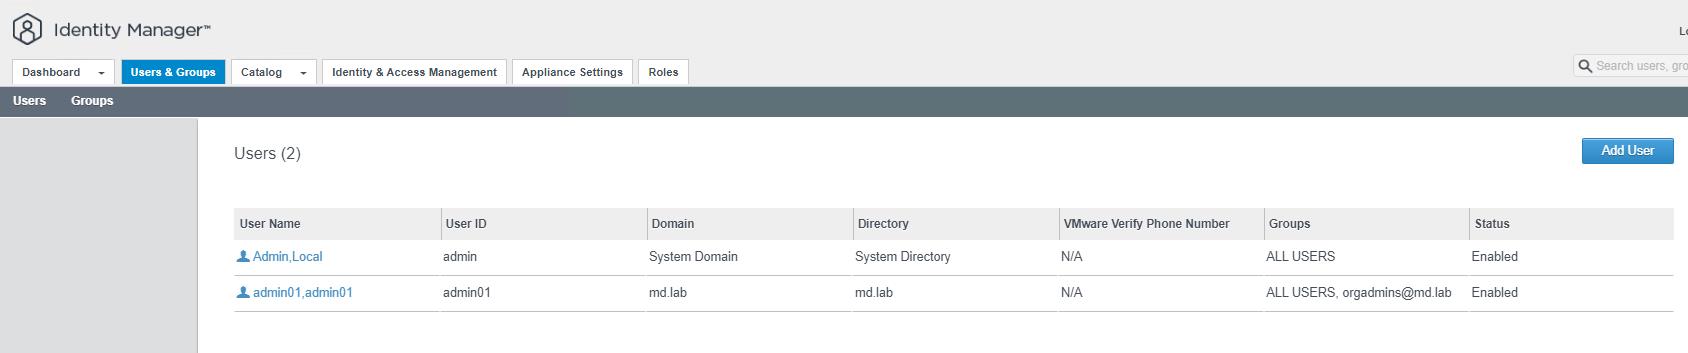
you can also see the user’s accounts which are synced under Users & groups options.

That’s it. We are done with adding the Active directory servers to VIDM. We have also added the groups to sync from VIDM. In the upcoming article, I will explain the procedure of integrating NSX-T with VMware Identity Manager in the upcoming article. I hope this article is informative for you. Thanks for Reading!!!. Be social and share it with social media, if you feel worth sharing it.