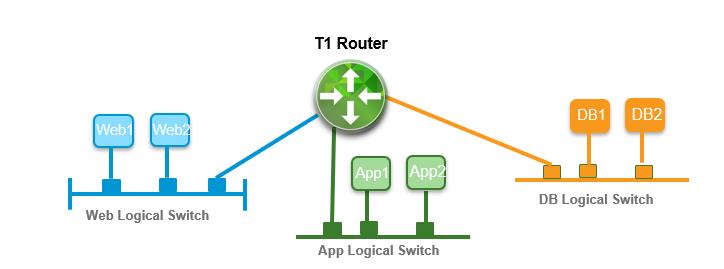
NSX-T logical routers provide East-West connectivity between different networks within the same tenants and also provide North-South connectivity, thereby enabling tenants to access public networks. With NSX-T it’s possible to create two-tier logical router topology: the top-tier logical router is NSX-T Tier-0 Gateway and the bottom-tier logical router is NSX-T Tier-1 Gateway. This structure gives both provider administrators and tenant administrators complete control over their services and policies.
Tier-1 routing layer interfaces with the logical switches defined by the tenant administrators, and provides a one-hop routing function between the NSX-T segments. For Tier-1 attached subnets to be reachable from the physical network, route redistribution towards the Tier-0 layer must the enabled. We need to have either the Tier-0 or Tier-1 gateway to establish routing between the NSX-T segments. In this article, we will discuss how to create the NSX-T Tier-1 Gateway.

How to Create NSX-T Tier-1 Gateway
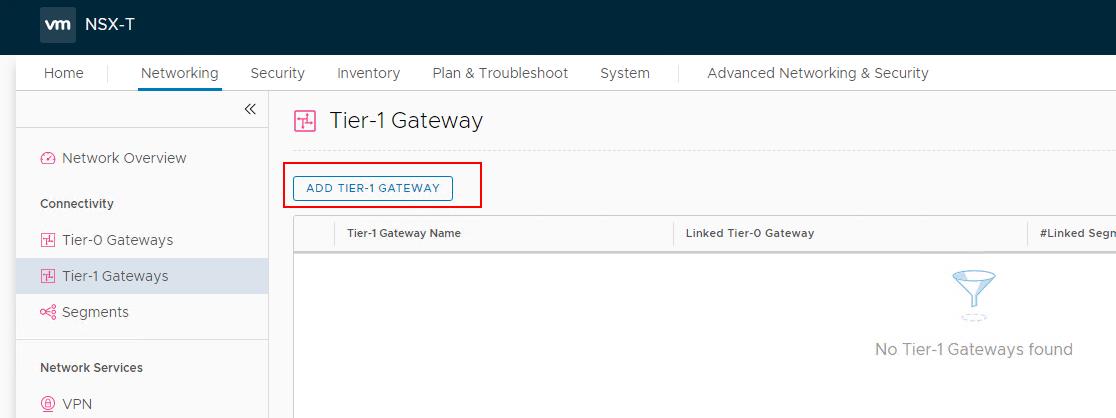
To Create NSX-T Tier-1 Gateway, log in to NSX-T Manager with admin credentials. Click -> Networking -> Tier-1 Gateways -> ADD TIER-1 GATEWAY

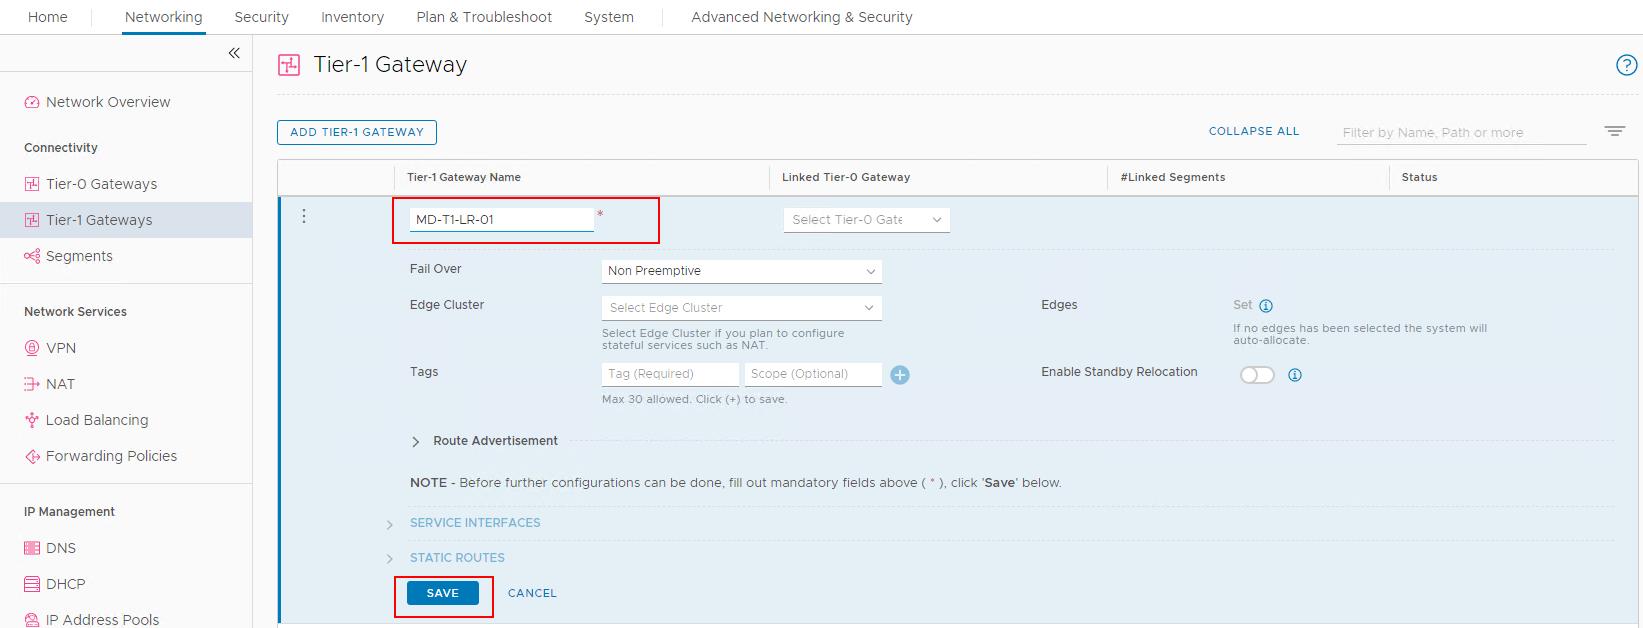
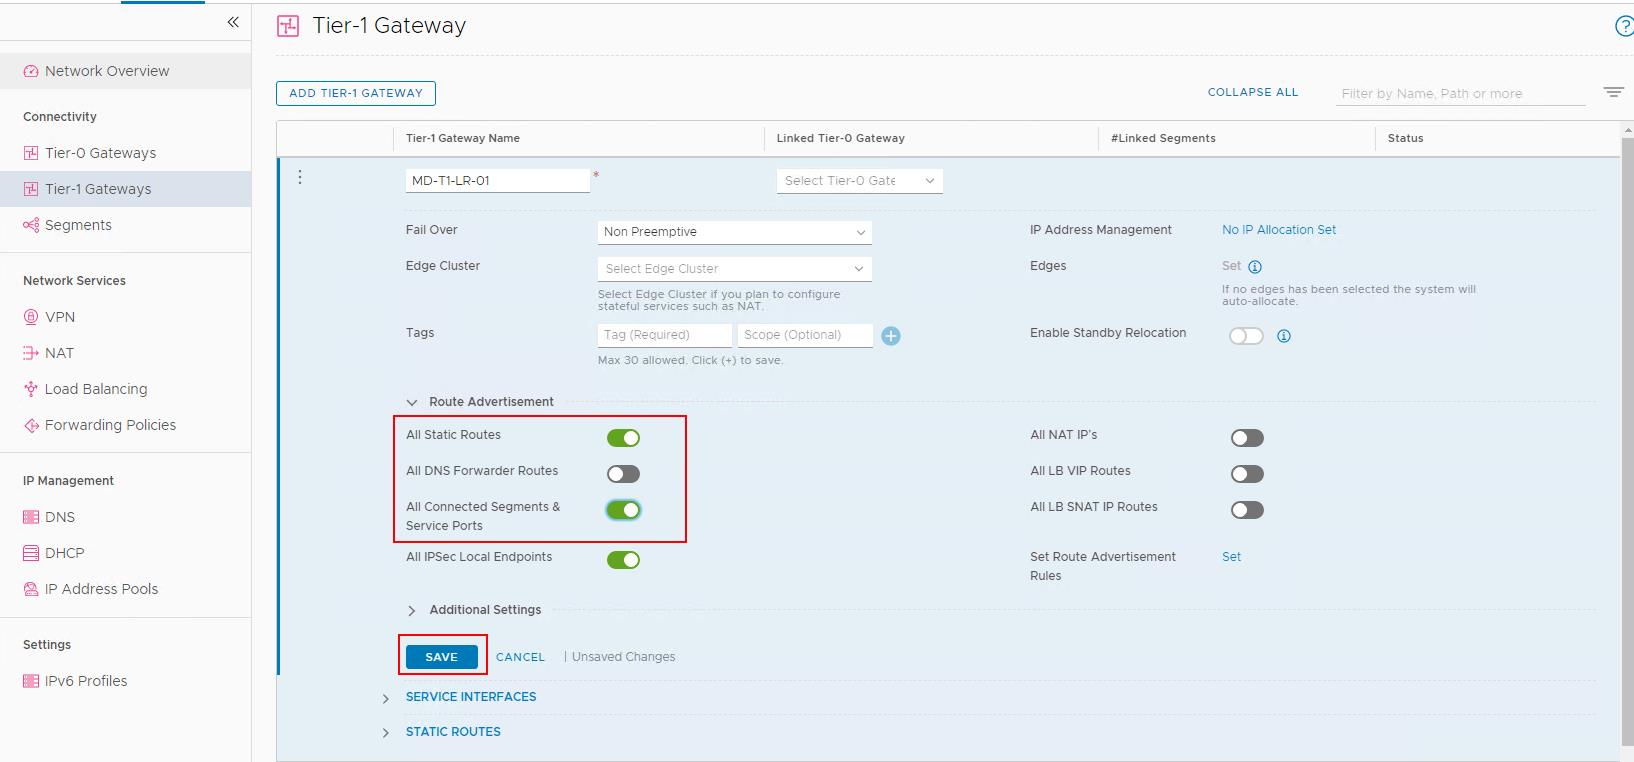
Specify the name for the Tier-1 Gateway. Select a tier-0 logical router to connect to this tier-1 logical router ((Optional). If you do not yet have any tier-0 logical routers configured, you can leave this field blank for now and edit the router configuration later. As of this part, I didn’t create a Tier-0 gateway yet. So I am leaving it blank.
Select an NSX Edge cluster. If the tier-1 logical router is going to be used for NAT configuration, it must be connected to an NSX Edge cluster. If you do not yet have any NSX Edge clusters configured, you can leave this field blank for now and edit the router configuration later.
Click Save to create the NSX-T Tier-1 gateway.

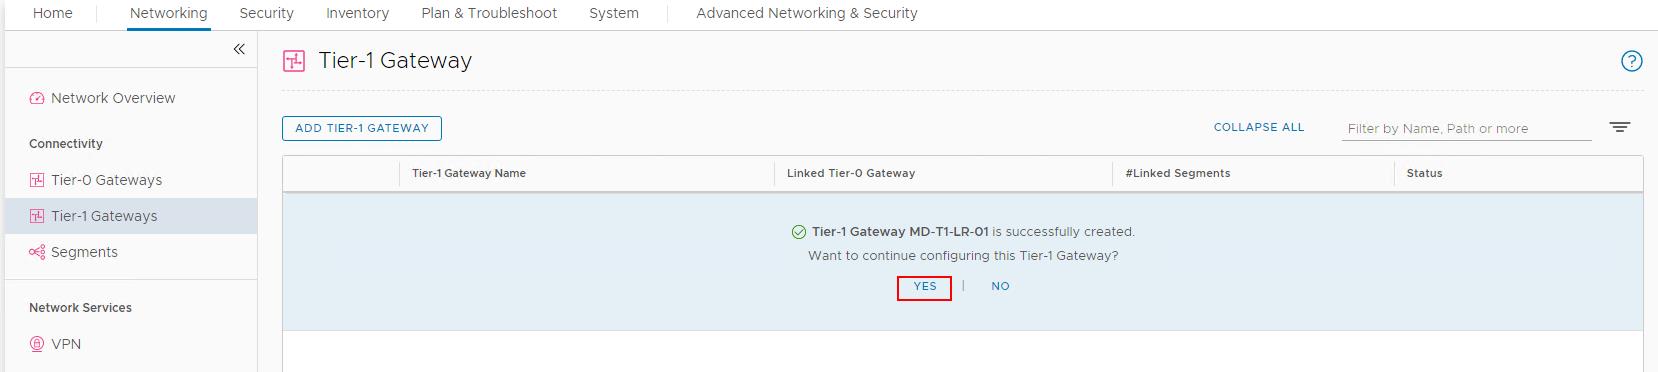
Click Yes to continue to configure this Tier-1 Gateway.

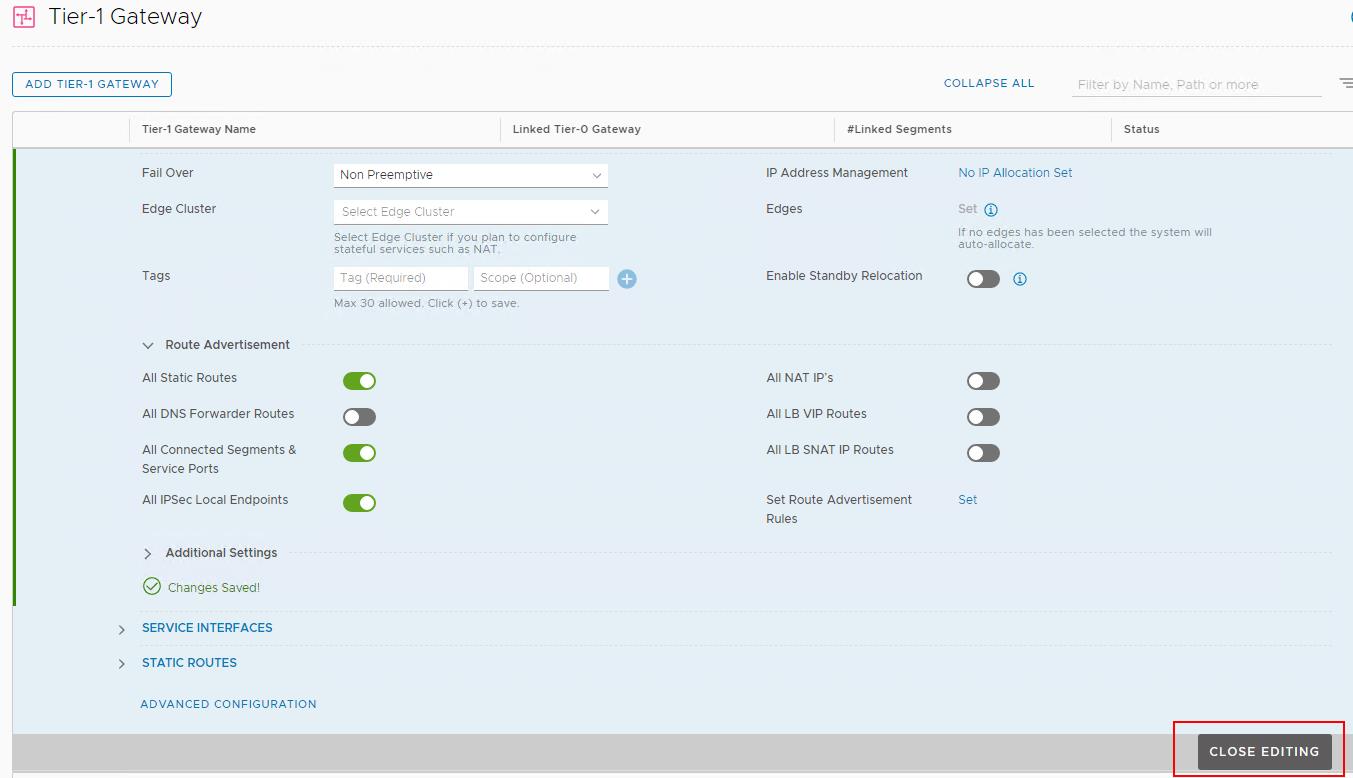
Expand the Route Advertisement -> Ensure the “All Connected segments & Service ports” option is selected. Click Save.

Click on Close Editing to close the Edit page of the NSX-T Tier-1 gateway.

We can now see the NSX-T Tier-1 gateway appears under the Tier-1 Gateway list.


That’s it. we have created the NSX-T Tier-1 gateway. In the next article, I will explain the procedure to create Gateway ports to provide logical routing and routing between the NSX-T segments. I hope this is informative for you. Thanks for reading!!!. Be social and share it with social media.