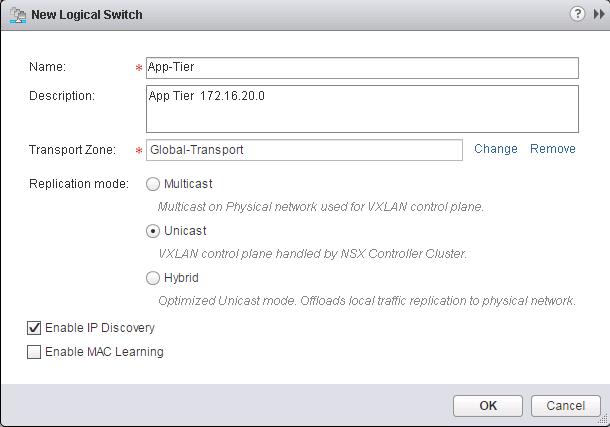
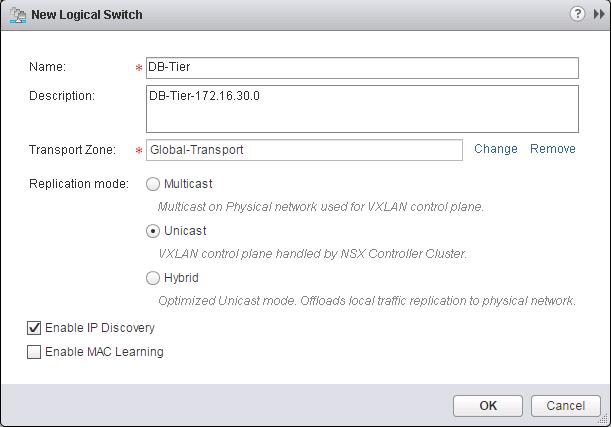
In the Previous post, We have discussed creating NSX logical switches and now workloads have L2 adjacency across IP subnets with the help of VXLAN. In this post, we are going to enable routing between multiple Logical switches. So We will build a three-tier application with logical isolation provided by network segments. Before We deploy the Distributed Logical router, Let’s create additional logical switches. We have already created a Logical switch called “Web-Tier” in the previous post. Now I am going to create two additional Logical switches called “App-Tier” and “DB-Tier”.
I have created additional NSX logical Switches like (App Tier, DB tier along with Web-Tier). We are going to utilize these Logical switches to enable communication between them using Distributed Logical Routing in upcoming Section
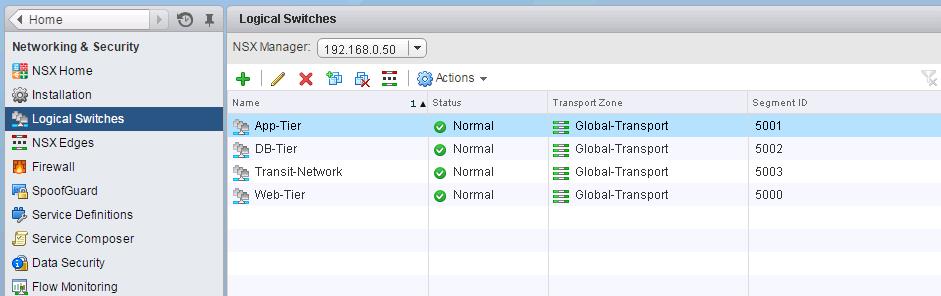
You can see the list of Logical switches which are created from Web Client -> Network & Security -> Logical Switches
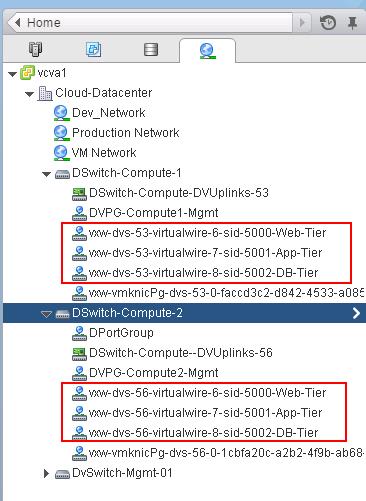
When we create the logical switches, it will create a Distributed Port group on all the respective Distributed Switches.
Deploying NSX Distributed Logical Router (DLR):
NSX for vSphere provides L3 routing without leaving the hypervisor Known as the Distributed Logical Router. This advancement sees routing occur within the kernel of each host allowing the routing data plane distributed across the NSX enabled domain. The distributed routing capability in the NSX platform provides an optimized and scalable way of handling East-West traffic within a data center. East-West traffic is a communication between the virtual machine or a resource within the datacenter.
In a typical vSphere network model, virtual machines running on a hypervisor want to communicate to the VM connected to different subnets, the communication between these VM’s has to go via Physical Adapter of the ESXi host to Switch and also Physical router is used to provide routing services.
Virtual machine communication has to go out to the physical router and get back to the server after routing decision. This un-optimal traffic flow is sometimes called “hair pinning”.
The distributed routing on the NSX platform prevents the “hair-pinning” by providing hypervisor level routing functionality. Each hypervisor has a routing kernel module that performs routing between the logical interfaces (LIFs) defined on that distributed router instance. LIFs is nothing but the interfaces on the router which connects various networks i.e various Logical switches.
Distributed Logical Router can support a large number of LIFs up to 1000 per Logical Distributed Router. This along with the support of dynamic routing protocols such as BGP and OSPF allows for scalable routing topologies. LDR allows for heavy optimization of east-west traffic flows and improves application and network architectures.
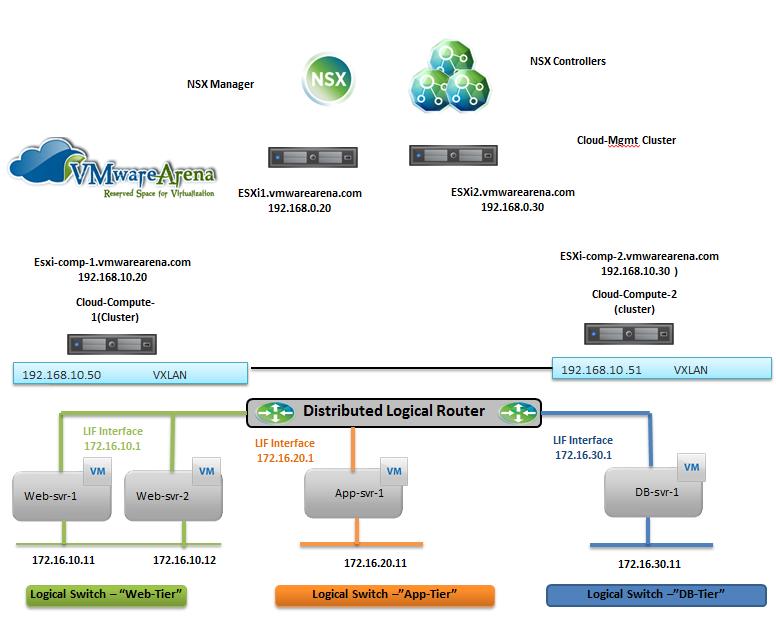
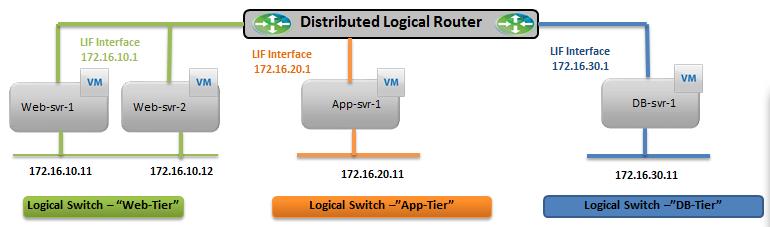
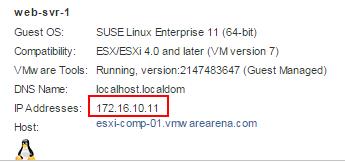
Below is my lab Topology. I am going to establish communication between 3 Logical switches “Web-Tier”,”App-Tier” & “DB-Tier” using Logical Router “LDR-001”
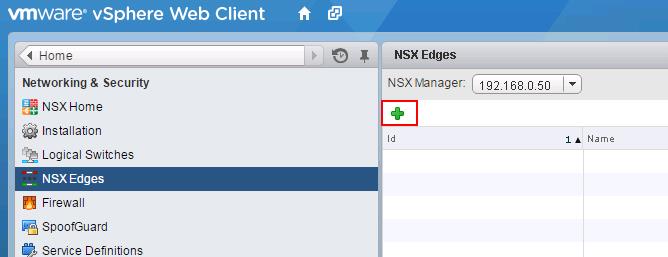
To Deploy Logical Router -> Login to Web Client ->Networking & Security -> NSX Edges -> Click on + to add NSX Logical Router.
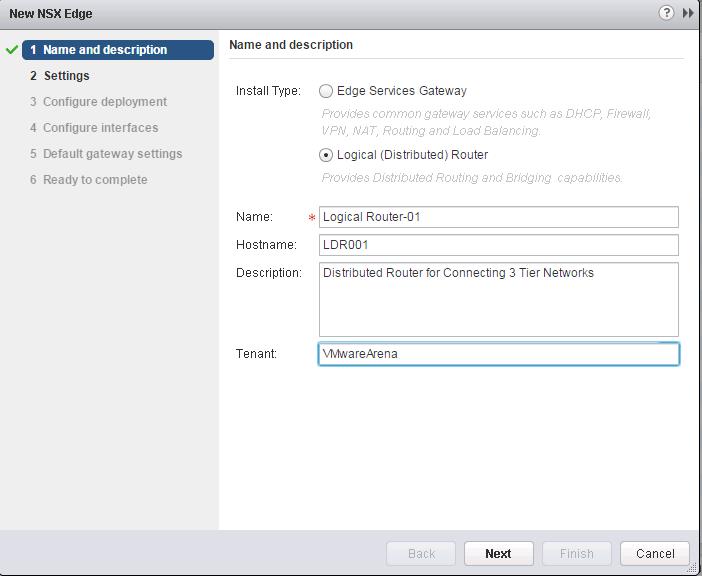
Select the Logical (Distributed) Router from the radial menu and Provide in the Name, Hostname and Description for the Logical Router and Click Next.
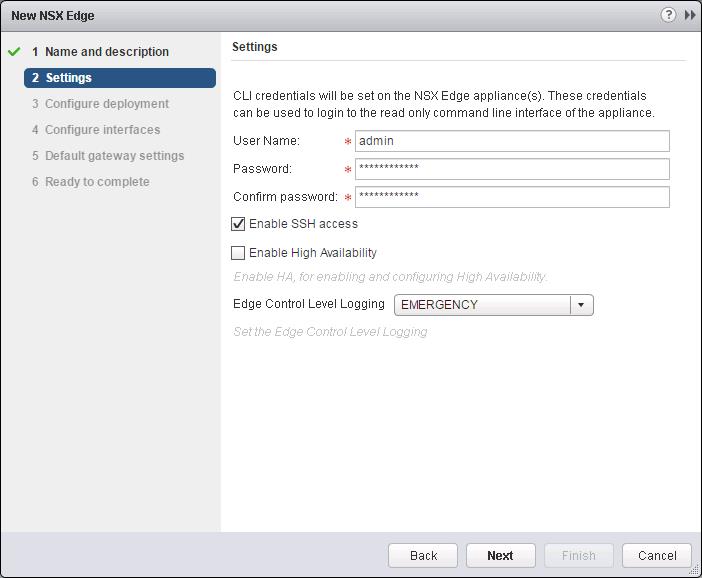
Set an administrative password and username. Select the checkbox Enable SSH access and click on Next.
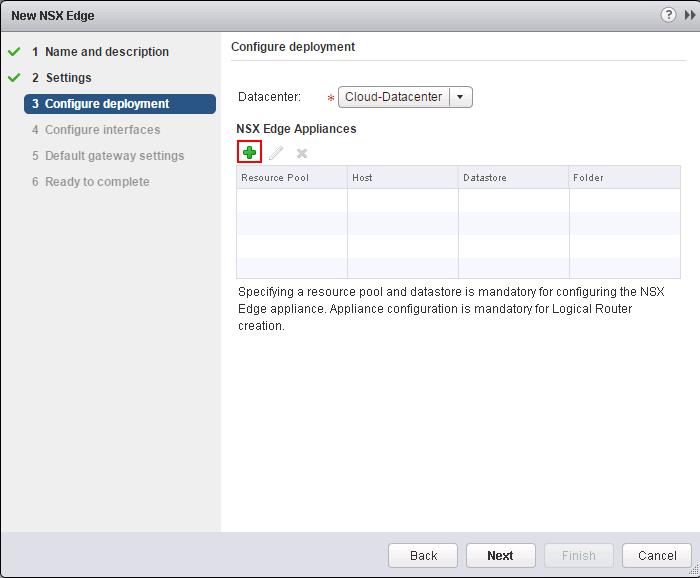
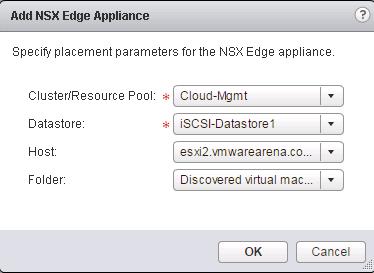
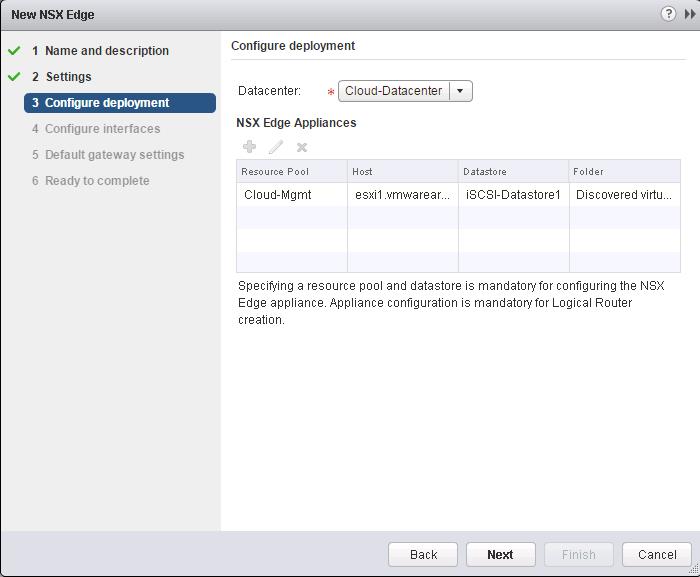
Click on + under NSX Edge Appliances and we need to define where we want to deploy the DLR Control VM.
Click on Next
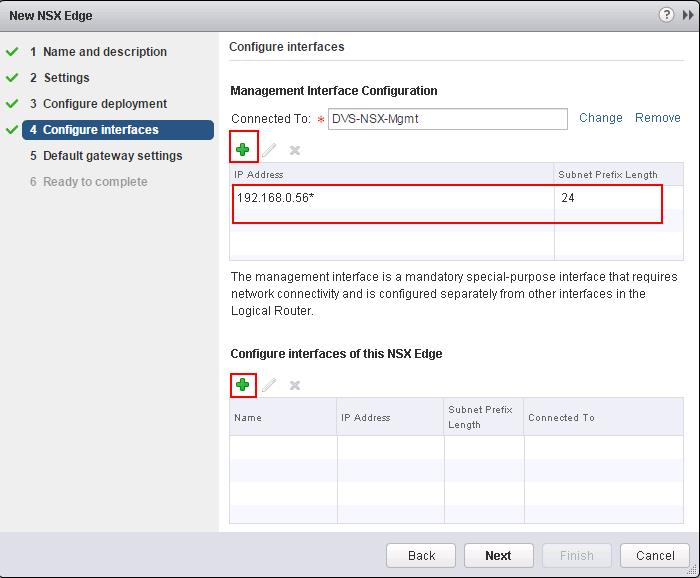
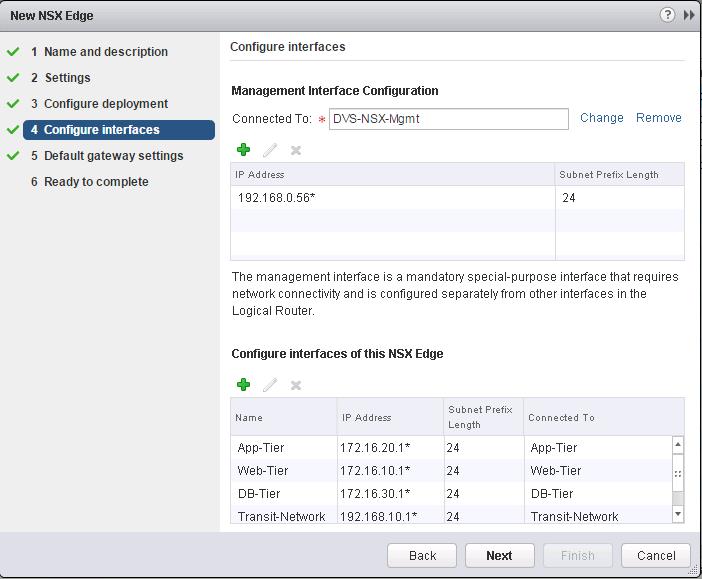
We need to specify the Management interfaces and Logical Interface (LIF).Management Interface is for access with SSH to Control VM. LIF interface needed to be configured in Second Table below “Configure Interfaces of this NSX Edge”.
Click on Select Option under Management interface Configuration to select the PortGroup to connect to the Control VM Management Interface and assign the IP address for the Management interface of the Logical Router.Click on + symbol under Configure interfaces of this NSX Edge.
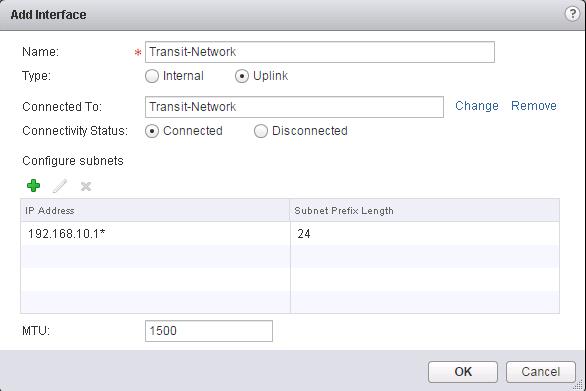
Create an interface called “Transit-Network” and Select the type as “Uplink”. Click on Connected To and select the logical switch“Transit-Network” to connect to and Assign the Ip address for this LIF (Logical interface). I am going to use this Transit interface to establish the communication between Logical router to the Physical network by connecting it to NSX edge device. Which we will discuss in upcoming posts.
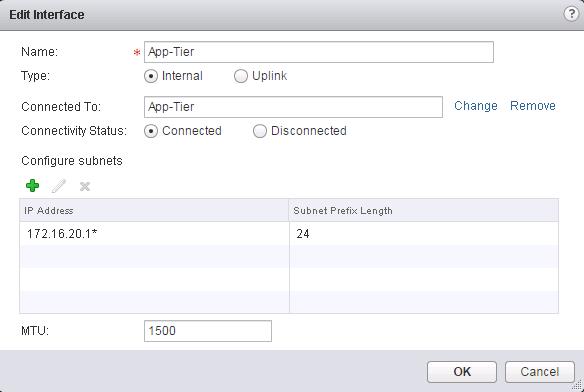
Enter the Name for this Logical interface(LIF) as “App-Tier” and Select the type as “Internal” and Click on Connected To and select the Logical Switch “App-Tier” and Enter the IP address for this LIF (Logical Interface) as “172.16.20.1”.
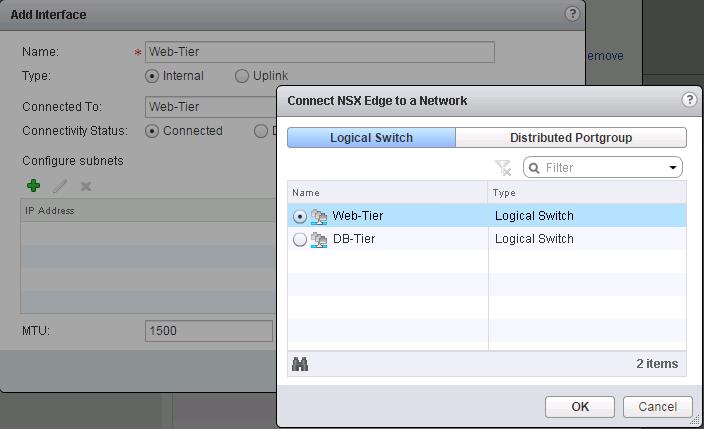
Create an interface called”Web-Tier” and click on Connected To and Select the logical switch “Web-Tier” and enter the IP address for this interface.
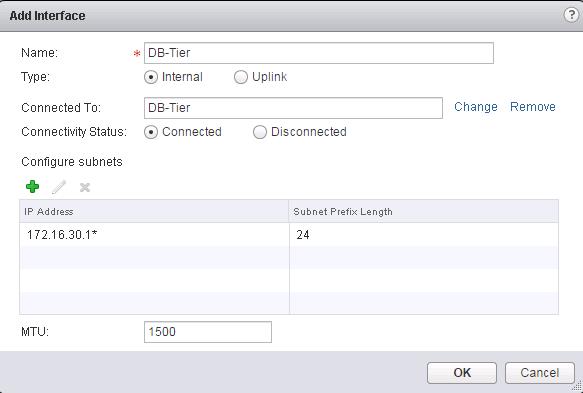
Create a Logical Interface “DB-Tier” and connect to the Logical Switch “DB-Tier” and assign the IP address for this LIF interface and click on Ok.
I have Connected 4 Logical Switches “Transit-Network”, “Web-Tier”, “App-Tier” and “DB-Tier” as the interfaces for this logical interface. In Simple terms, This Logical router provides routing between the VM’s connected to this Logical switches.
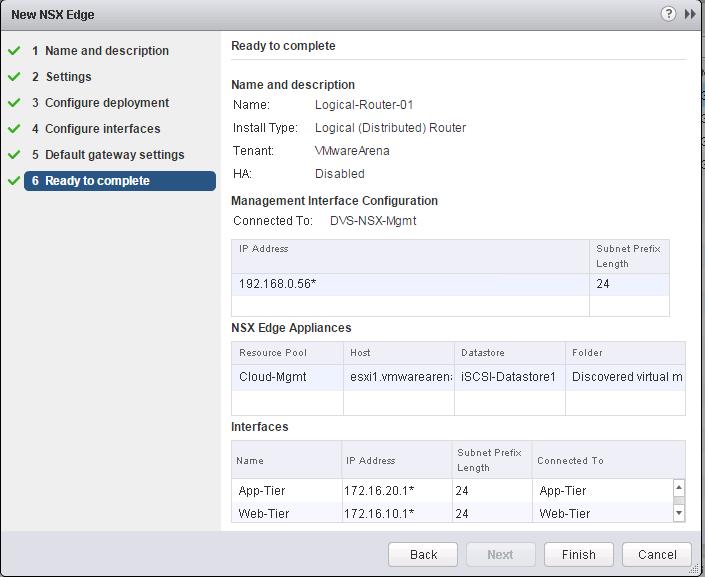
Review the Configured settings for the Distributed Logical Router and Click on Finish.
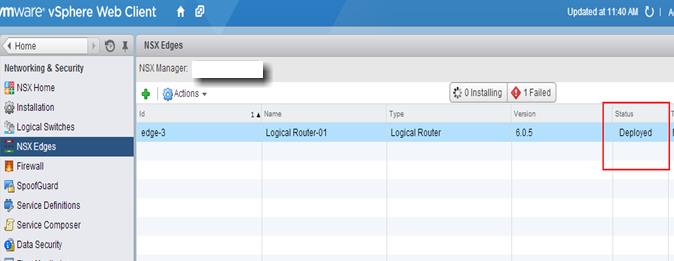
Once the Logical router is deployed, you can see the status of the DLR deployment under NSX Edges. Wait until Status of DLR changed to “Deployed”
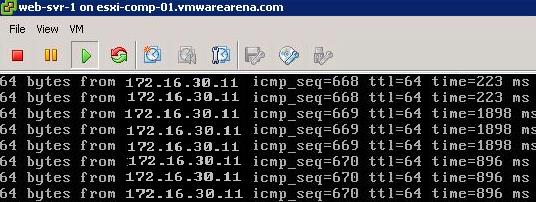
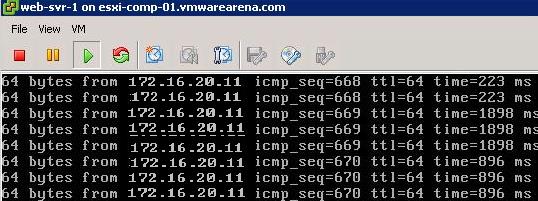
Ping Test To Prove the Distributed Routing:
Ping Test between different Virtual Machines connected to different logical switches is able to reach each other. It proves that Logical Routing is working.
We are done with configuring Distributed routing. I hope this is informative for you. Thanks for Reading!!. Be Social and share it on Social media, if you feel worth sharing it.
Other VMware NSX Related Posts:
VMware NSX Installation Part 1 – NSX Overview & Installation Prerequisites
VMware NSX Installation Part 2 – NSX Lab Design & Deploying NSX Manager
VMware NSX Installation Part 3 – Integrating NSX Manager with vCenter Server
VMware NSX Installation Part 4 – Deploying NSX Controller
VMware NSX Installation Part 5 – Checking NSX Controller Status
VMware NSX Installation Part 6 – Preparing Cluster and Hosts for NSX
VMware NSX Installation Part 7 – Verify NSX VIBs Installation from ESXi hosts
VMware NSX Installation Part 8 – Configuring VXLAN on the ESXi Hosts
VMware NSX Installation Part 9 -Create Segment ID and Transport Zones
VMware NSX Installation Part 10 – Create NSX Logical Switch
VMware NSX – Backup & Restore VMware NSX Manager Data
VMware NSX – Unable to Delete/Remove NSX Logical Switch
VMware NSX – How to Manually Install NSX VIBS on ESXi Host
VMware NSX – How to Manually Remove NSX VIBs from ESXi Host?
How to Remove NSX (Network & Security) Extension from vSphere Web Client