VMware Virtual SAN 6.2 is released as part of vSphere 6.0 Update 2 on 15th March 2016. It’s been almost 2 years from now from the initial release of Virtual SAN as part of vSphere 5.5 Update 1 on March 2014. Within this 2 years, Virtual SAN has improved a lot better and added with great new features in each releases. Virtual SAN is the foundation of VMware’s Hyper-Converged Software (HCS) that enables customers to experience industry leading hyper-converged infrastructure. Customers are finding VMware HCS key in adopting a Software Defined Data Center (SDDC) approach of streamlining and automating storage, networking and compute. Take a look at what’s new with Virtual SAN 6.2.
VMware Virtual SAN 6.2 adds greater abilities around lower cost and improving management and monitoring for the most demanding customer storage environments. In this new release, VMware continues to focus on providing a reliable and consistent storage environment for the biggest business critical applications. VMware is expanding the capabilities of Virtual SAN as a platform and is introducing better data efficiency features by delivering deduplication and compression of data as well as providing RAID-5/RAID-6 support for all flash Virtual SAN environment.
Minimum Requirements for VMware Virtual SAN 6.2:
- Minimum of 4 ESXi hosts with all contributing local disks (1 SSD and 1 HDD) to VSAN cluster.( In a 3-node cluster, if one node fails, there is nowhere to rebuild the failed components. The same principle holds for a host that is placed in maintenance mode. One of the maintenance mode options is to evacuate all the data from the host. However, this will only be possible if there are 4 or more nodes in the cluster, and the cluster has enough spare capacity)
- VMkernel port configured for VSAN traffic
- 1 GB network for small environment Lab/test (For Production VMware recommends 10GB)
- At least 1 SAS or SATA solid state Drive (SSD) should be part of each ESXi host with SSD is not claimed by vSphere Flash Read Cache
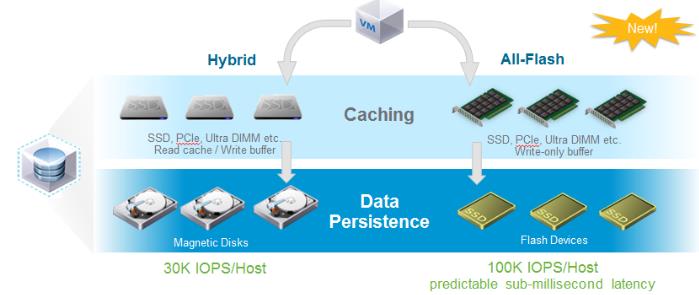
VMware Virtual SAN Operating Mode
There are 2 Modes in which VMWare Virtual SAN can operate. Which is Hybrid or All-Flash. With All-Flash, SSD’s are no longer just used for read caching and write buffering, they can now be used as primary storage as well in an All-Flash mode. The traditional model of magnetic hard disks and SSD’s is now referred to as Hybrid Mode. In Hybrid mode the SSDs function only as a read cache and write buffer as they did in vSphere 5.5, persistent data cannot be written to the SSD tier in Hybrid Mode.

VMware Virtual SAN 6.2 Installation & Configuration
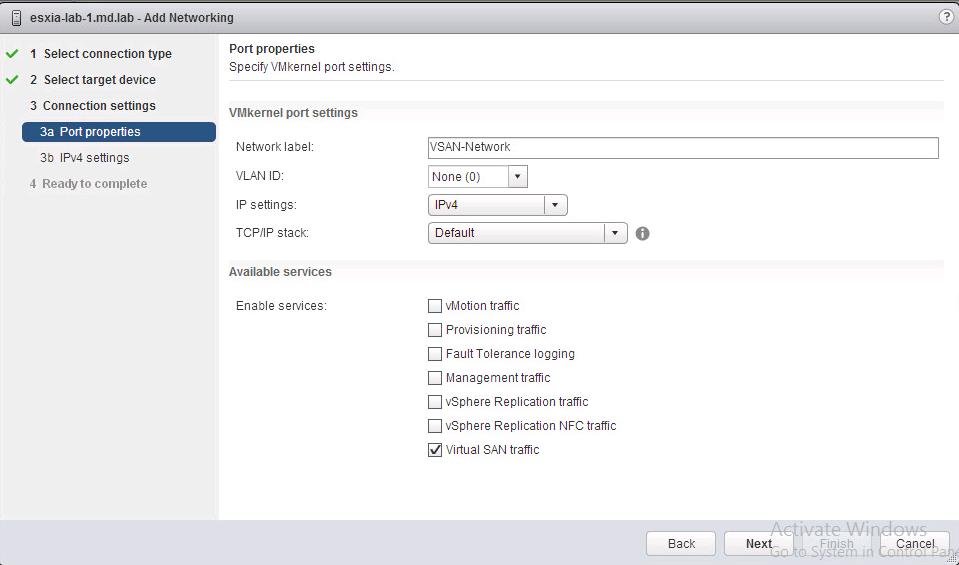
- You need to configure VMkernel Portgroup with “Virtual SAN Traffic” enabled on all the ESXi hosts which are going to participate in VMWare Virtual SAN cluster.

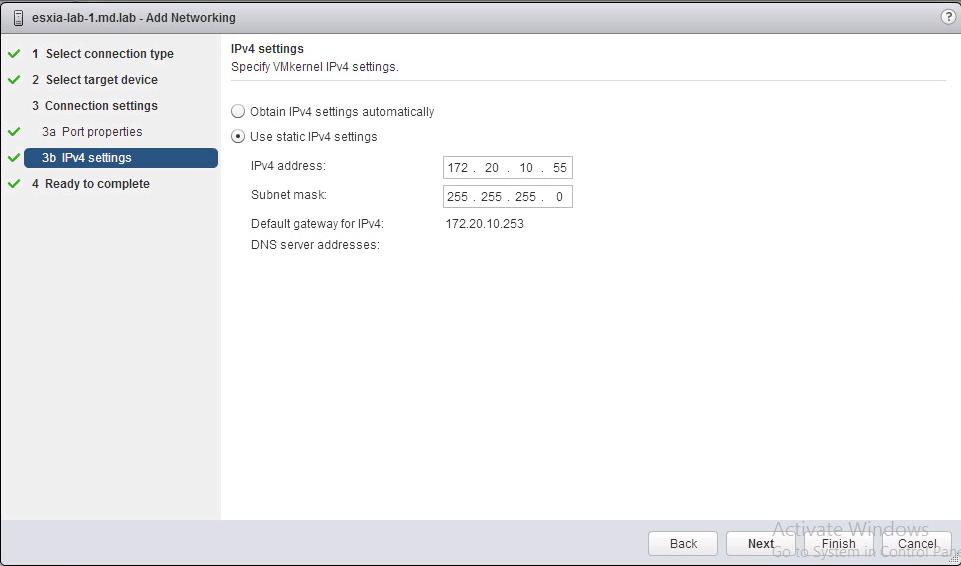
Specify the IP address for the VMkernel network used for Virtual SAN traffic.

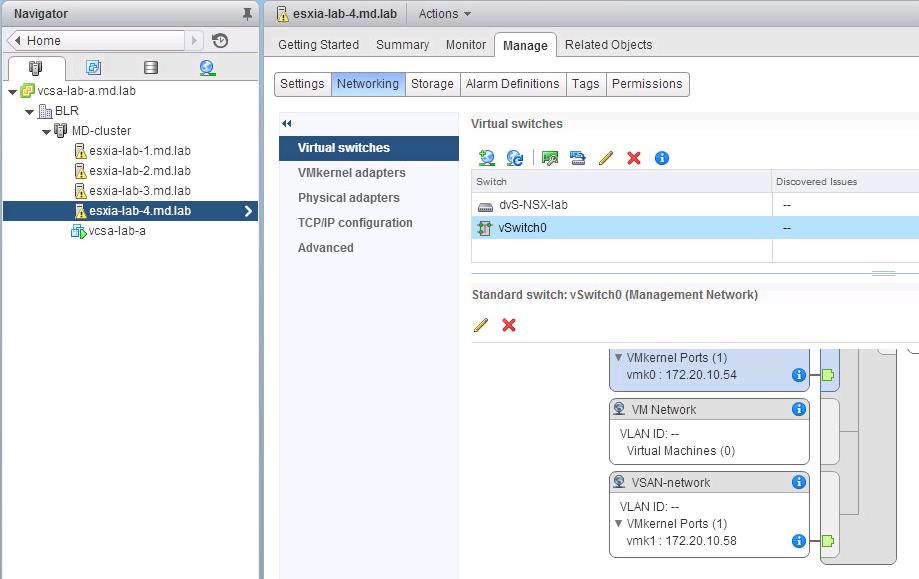
Virtual SAN enabled VMkernel port group needs to be created on all the Esxi hosts.

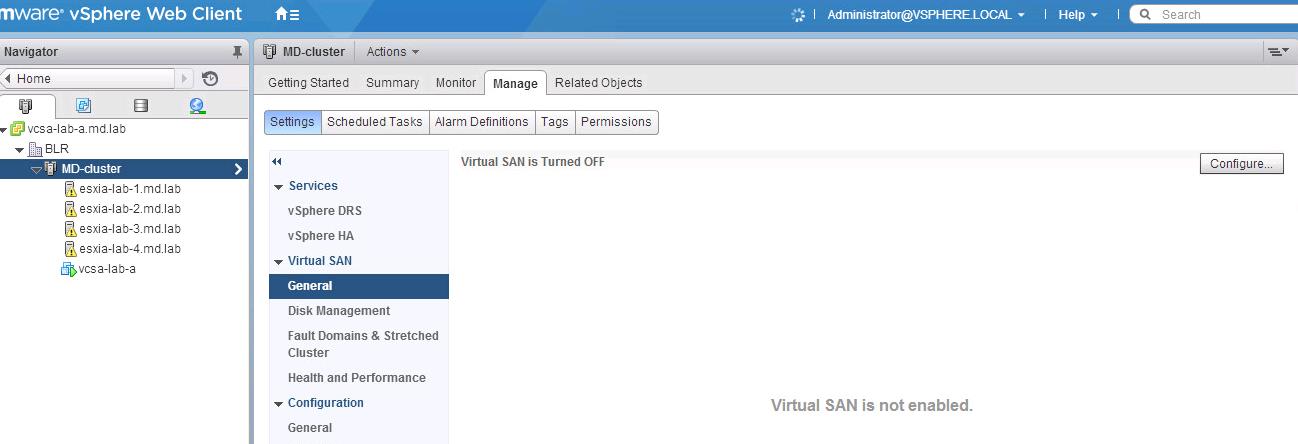
To enable vSAN on the cluster ,login to vSphere WebClient and Select Cluster > Manage > Virtual SAN > General -> Click on Configure

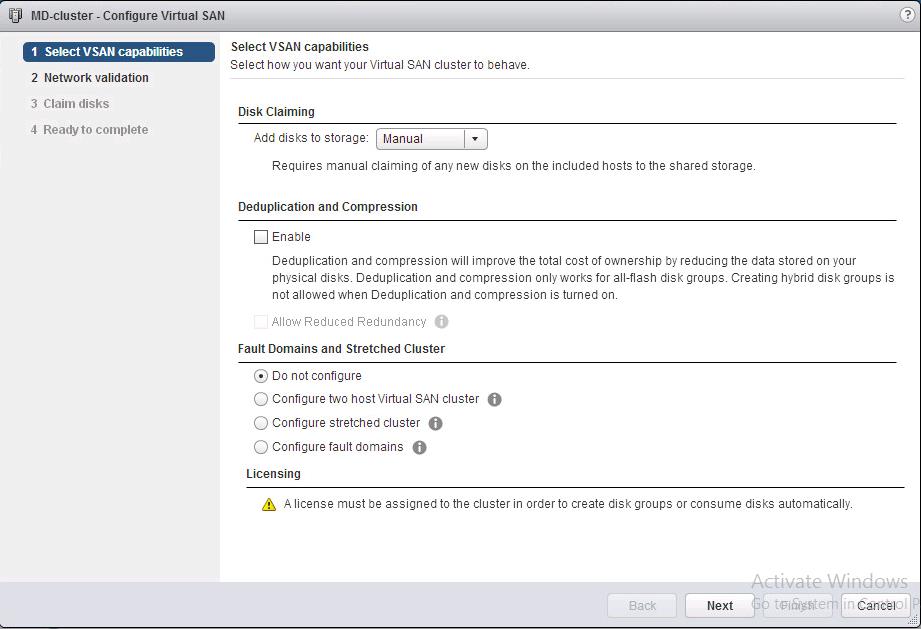
Select the Automatic or Manual from the drop-down under Disk Claiming. I am going to use Manual method to manually claim the disks for my disk group. You can enable Deduplication and Compression for your virtual SAN cluster. Deduplication and compression will improve the total cost of ownership by reducing the data stored on your physical disks. Deduplication and compression works only for all-flash disks groups. I am creating Hybrid disk group for my virtual san setup So i didn’t enabled the option of Deduplication and compression. You can also configure Fault domains and Stretched cluster under this wizard. Click on Next.

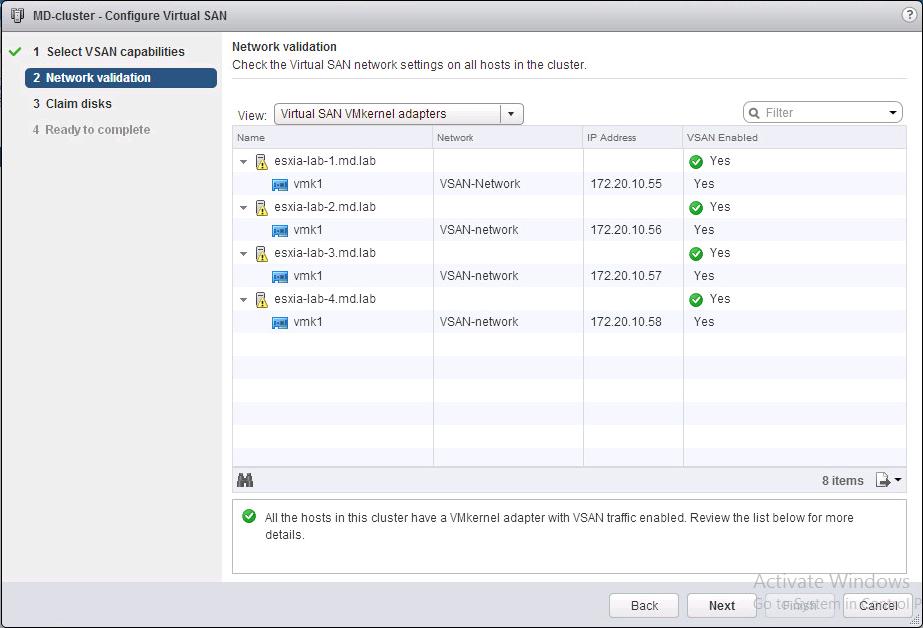
Virtual SAN wizard will validate your ESXi hosts network settings on all the ESXi hosts in the cluster. Since I have configured all of ESXi hosts for VSAN network. It is showing Green check mark under VSAN Enabled.

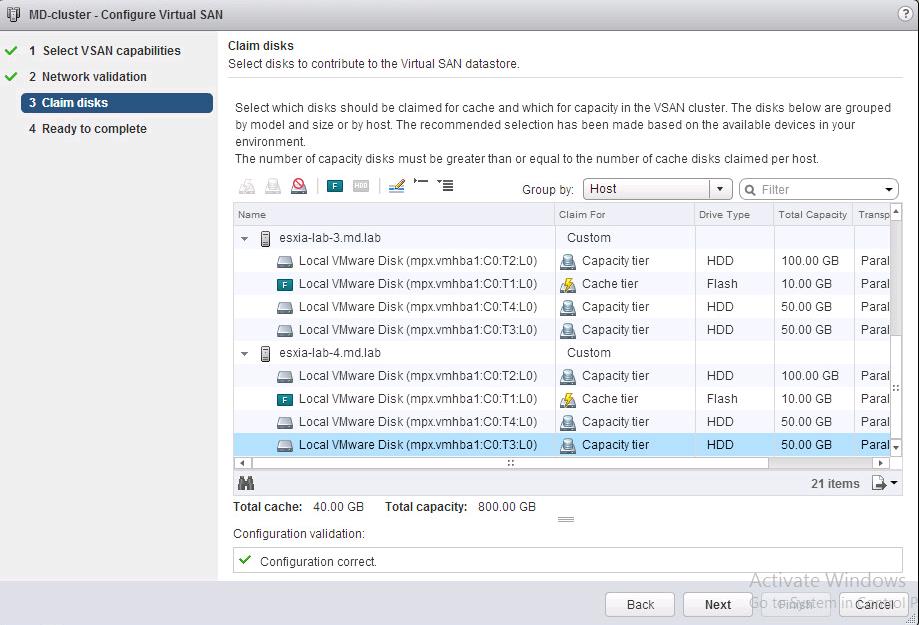
Under Claim disks page, Select the disks which should be claimed for cache and which for capacity in the VSAN cluster. Select atleast one disk for cache tier and one for capacity tier. Based on your capacity tier selection, your Virtual SAN datastore size will be created. In my lab configuration, I am claiming SSD disk of 10 GB from all of my 4 ESXi hosts and 3 disks with 2*50 Gb and 1 * 100 GB ( total 300 GB) from each esxi host for my capacity tier.

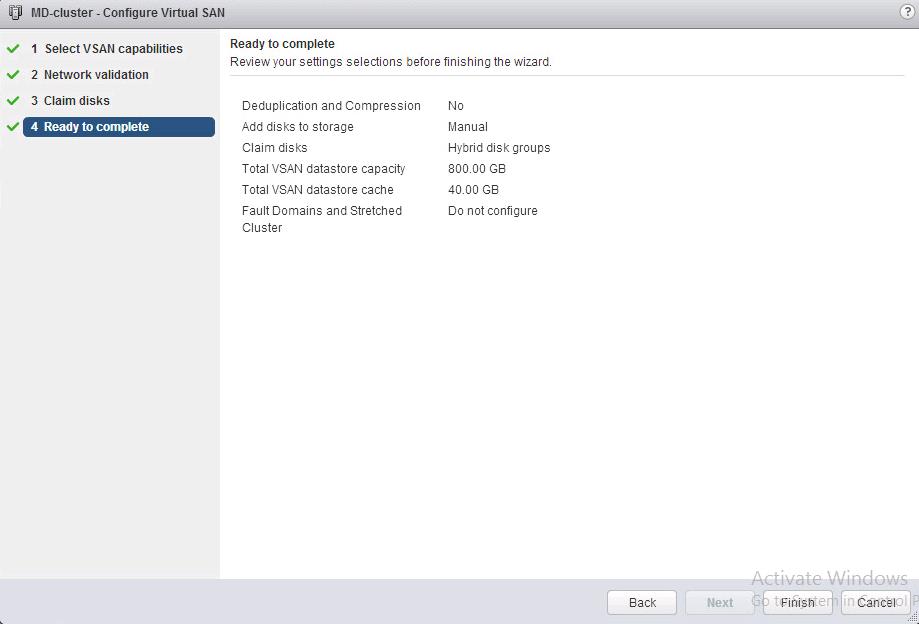
Review the Virtual SAN settings. So I am configuring Hybrid disks groups with 10 GB flash and 200 GB capacity tier from each ESXi hosts. Click on Finish to create the VMware Virtual SAN cluster.

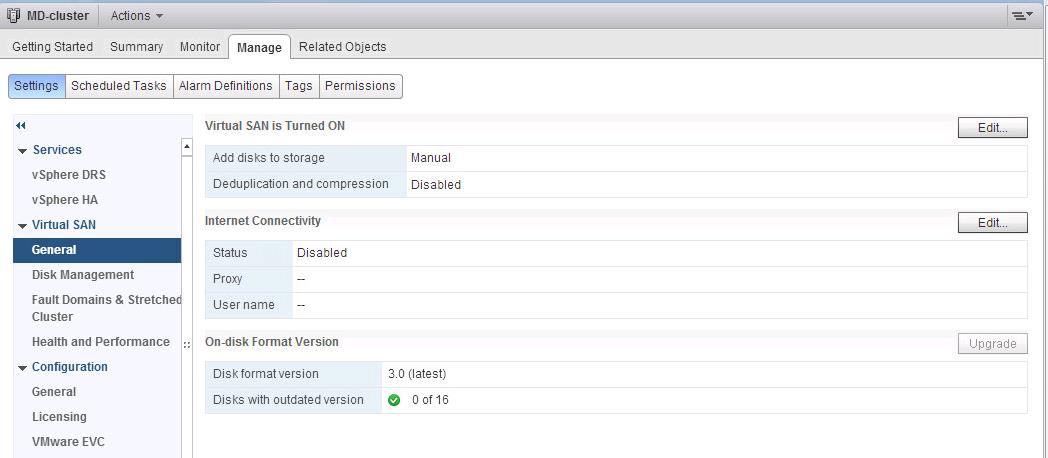
My Virtual SAN is Turned on Now. You can see the status of the Virtual SAN cluster under Select Cluster > Manage > Virtual SAN > General . You can notice the Virtual SAN on-disk format version. Which is 3.0 (latest for VMware Virtual SAN 6.2). Disks with outdated version, etc.

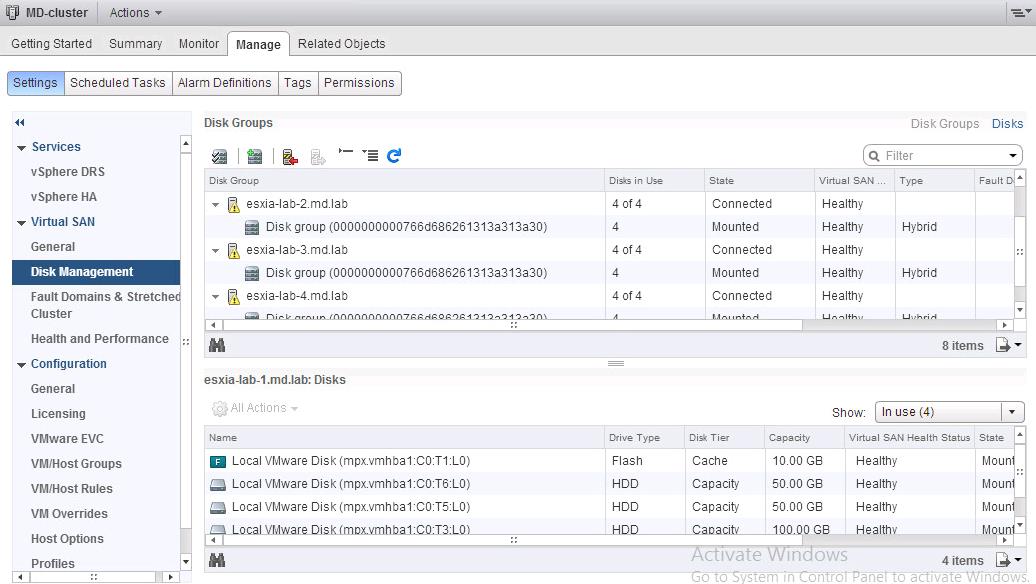
Under the Disk management option, You can notice the disk group created under each of my 4 ESXi hosts and Each disk group contains 4 disks (1 SSD and 3 HDD)

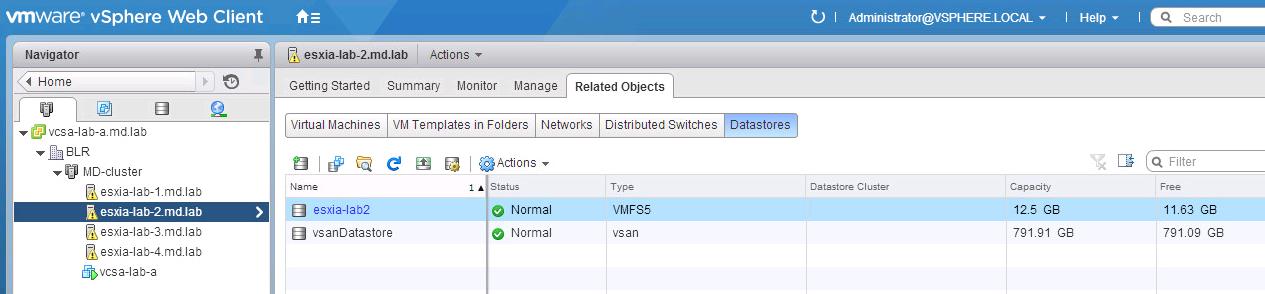
You can notice “vsanDatastore” is created and it is accessible to each of the ESXi hosts in the VMware Virtual SAN cluster.

That’s it. We are done with installation of VMware Virtual SAN 6.2 and disk group creation. vsan datastore is also ready to use now. We will talk about VSAN storage policies on the upcoming posts. I hope this is informative for you. Thanks for Reading!! Be social and share it in social media, if you feel worth sharing it.
For VMware Virtual 5.5 Setup in VMware Workstation, Take a look at the below posts: