

VMware vSAN is a software-defined, enterprise storage solution that supports hyper-converged infrastructure (HCI) systems. vSAN is fully integrated with VMware vSphere, as a distributed layer of software within the ESXi hypervisor. vSAN aggregates local or direct-attached data storage devices, to create a single storage pool shared across all hosts in a vSAN cluster. We talked a lot about vSAN in our articles. In this article, we will walk through the detailed step by step procedure to Configure vSAN File Service in vSAN 7.0 released with vSphere 7.0.
With vSAN 7.0, vSAN file service is introduced. vSAN File Service provides the file-sharing services using Network File System (NFS). vSAN File Service uses the vSAN Distributed File System (vDFS) to provide a scalable filesystem that is integrated with vSAN Storage Policy-Based Management. Take a look at my article to understand how to upgrade vSAN 6.7 to vSAN 7.0.
vSAN file service is a layer that sits on top of vSAN to provide file shares. Using vSAN file service, We can create file shares in the vSAN datastore so that client machines or VMs can access the NFS shares that have given access rights. Similar to Objects in vSAN datastore, File shares can also be integrated into the existing vSAN storage Policy. Different Policies can be applied on a per-share basis.
Watch the Video -> How to Configure vSAN File Services in vSAN 7.0
As similar to enabling other services in SAN, enabling vSAN file service is also simple. Let’s talk a look at how to configure vSAN file service.
How to Configure vSAN File Service
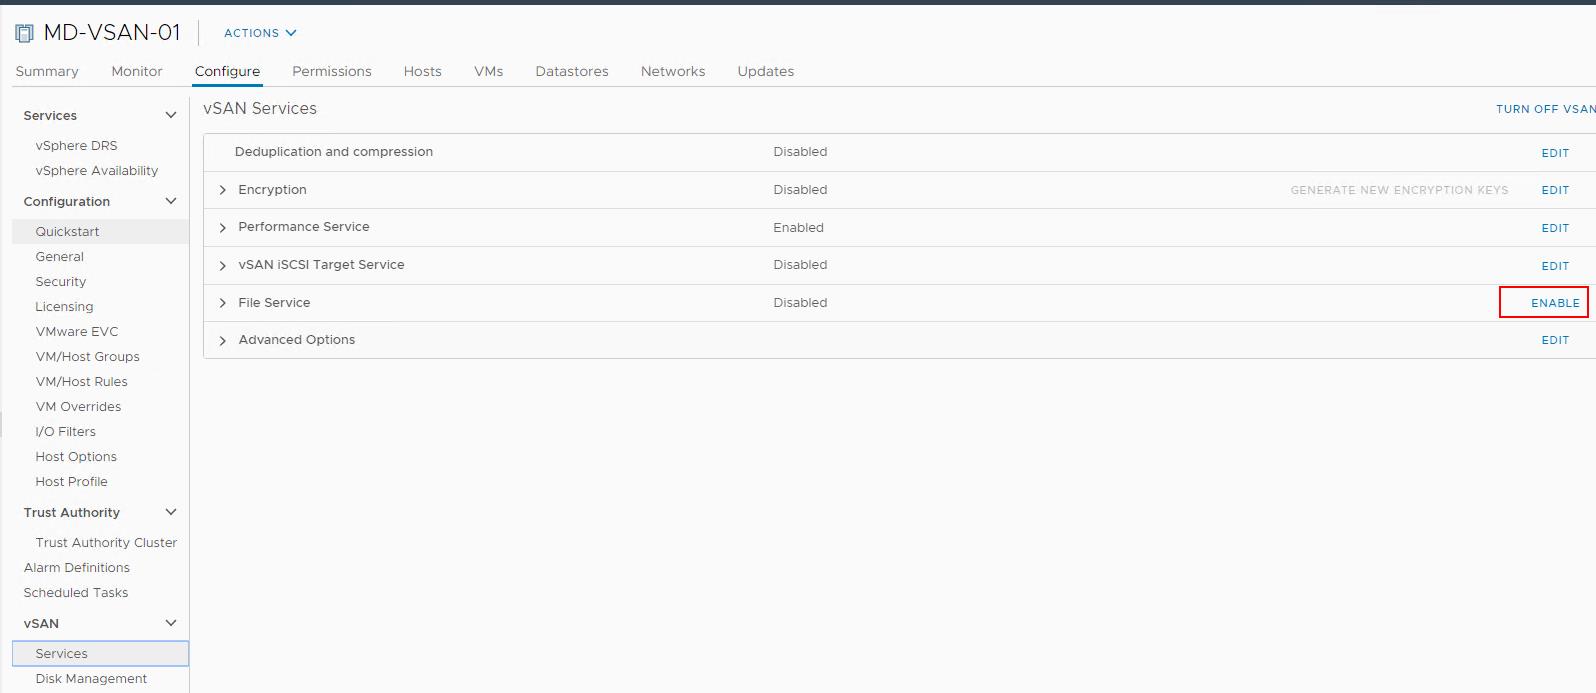
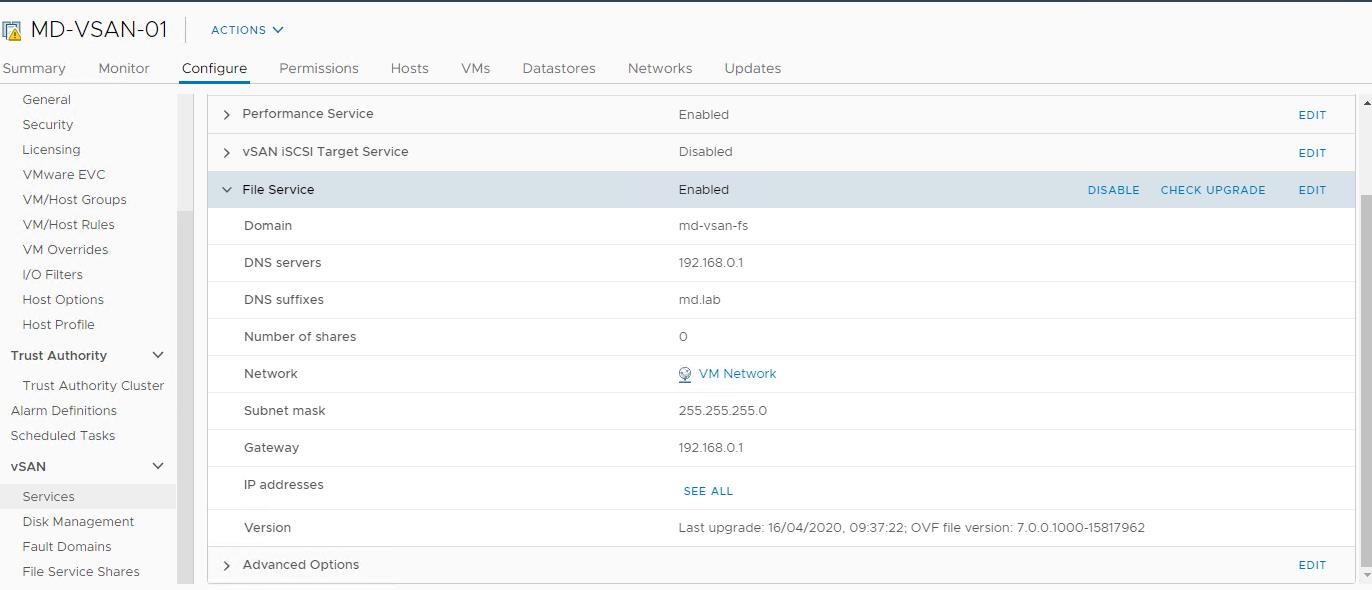
To configure the vSAN File service, Log in to the vCenter Server -> Select the vSAN cluster -> Configure ->vSAN -> Services.
In the File Service -> Click Enabled
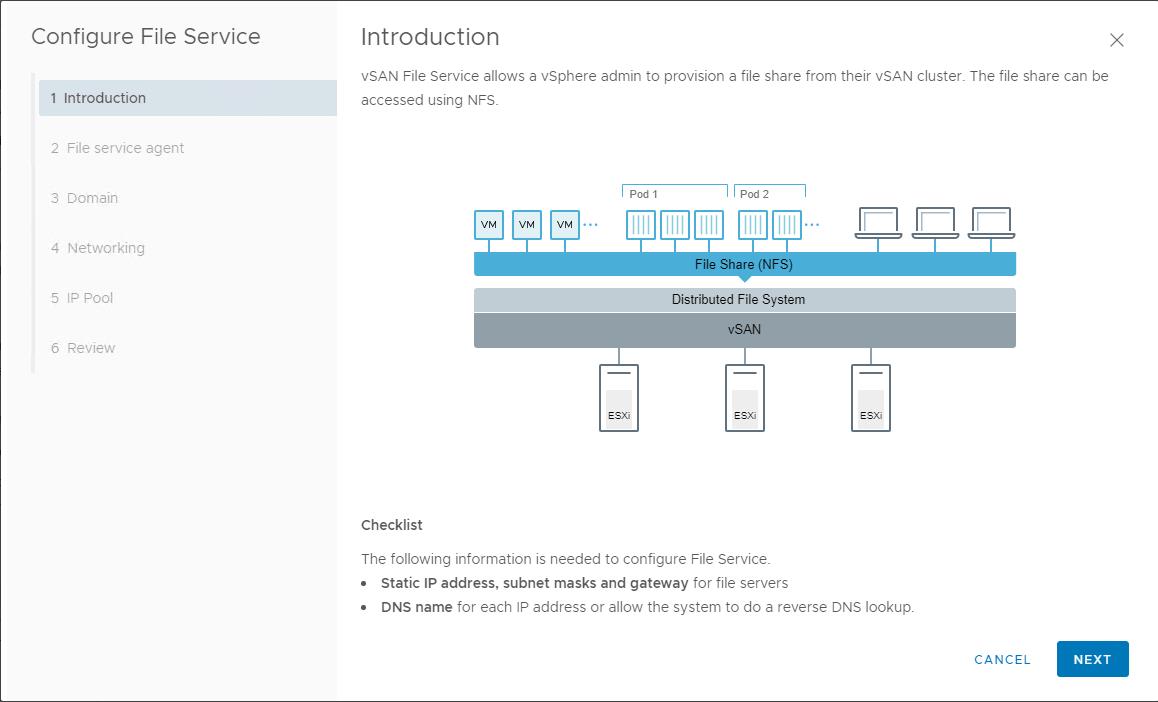
In the Introduction Page, Review the Checklist. You need to have a static IP address. The number of IP addresses is equal to the No of hosts in the cluster. Also register DNS Name for all the IP address in your DNS server.
For example, If you have 6 node vSAN Cluster, You need a 6 IP address for configuring vSAN file service in the vSAN cluster. Click Next to continue configuring the vSAN file service.
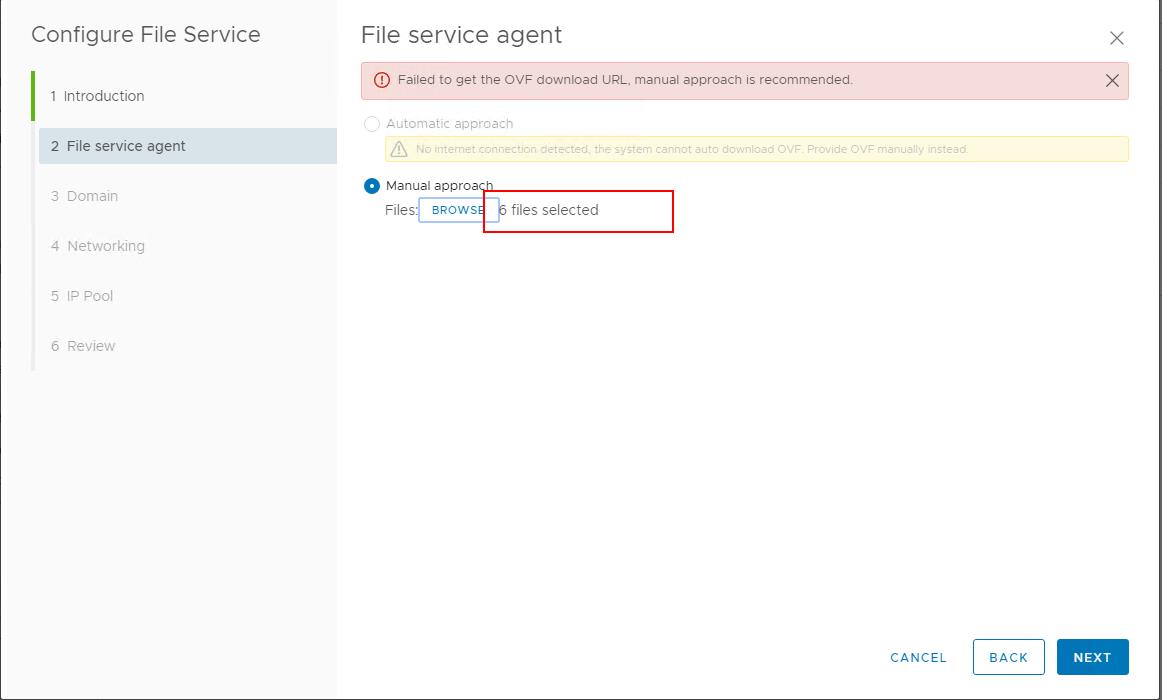
In the File service agent page, select one of the following options (Automatic or Manual approach) to download the OVF file.
The automatic approach is the default option. This option lets the system search and download the OVF. I don’t have internet connectivity to my vCenter. So recommend method is the manual approach.
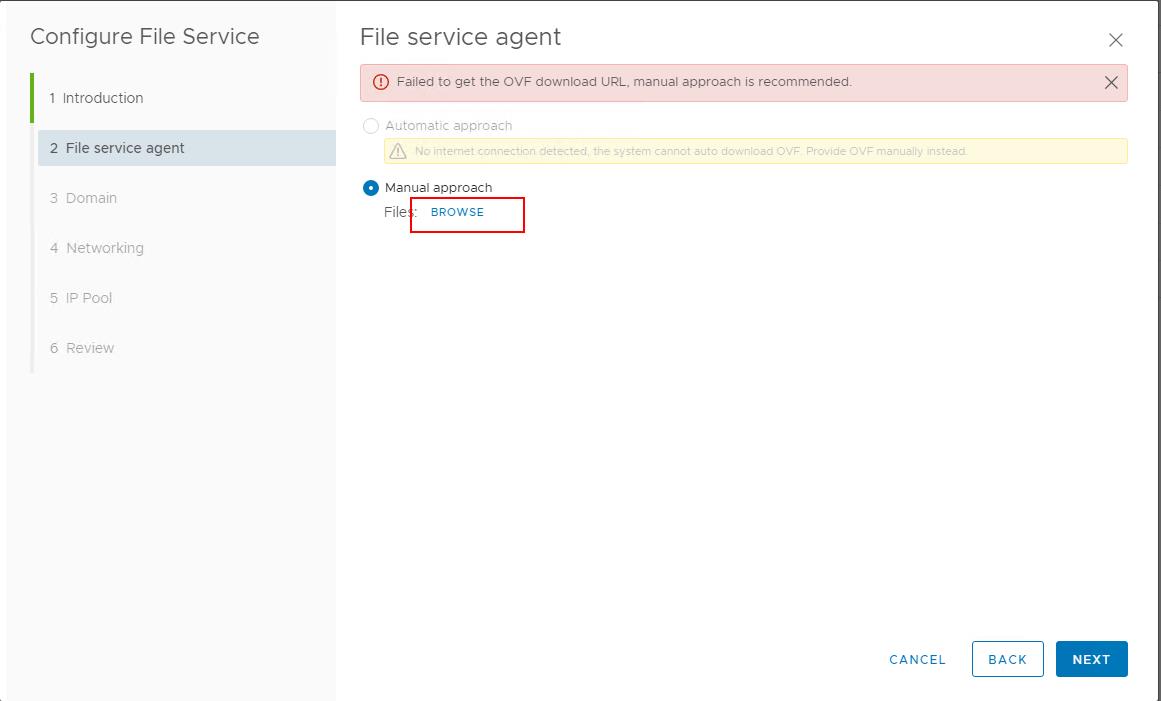
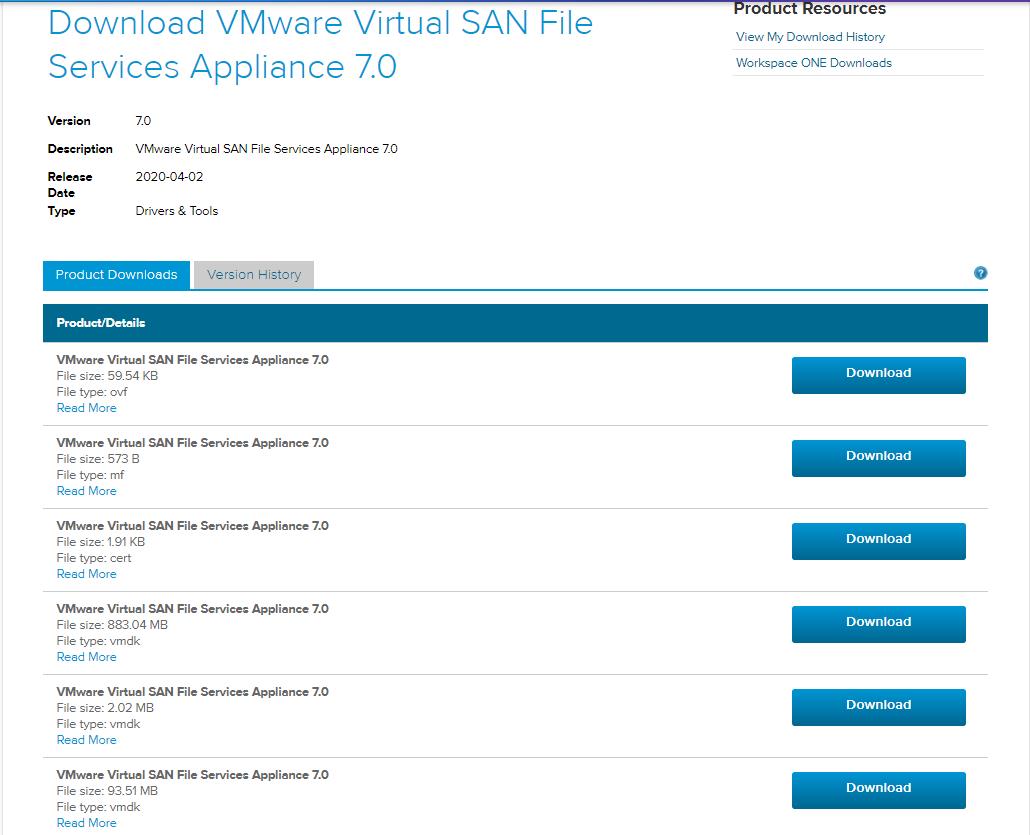
The manual approach allows you to browse and select an OVF that is already available on your local system. So we need to manually download the vSAN File Service appliance 7.0 from the VMware website. Download all the 6 files (.ovf, .mf,.cert and 3 .vmdk files) into your local system.
Click browse and select the all the 6 files.
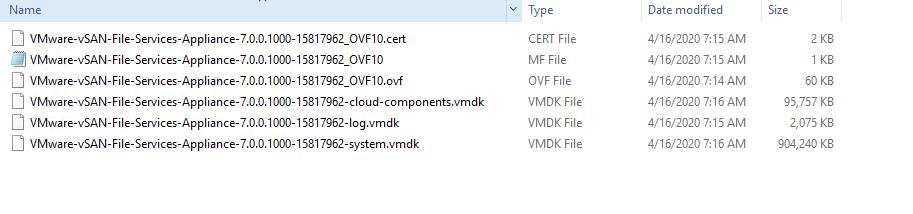
Ensure you have all the 6 files selected under the Manual approach. Click Next.
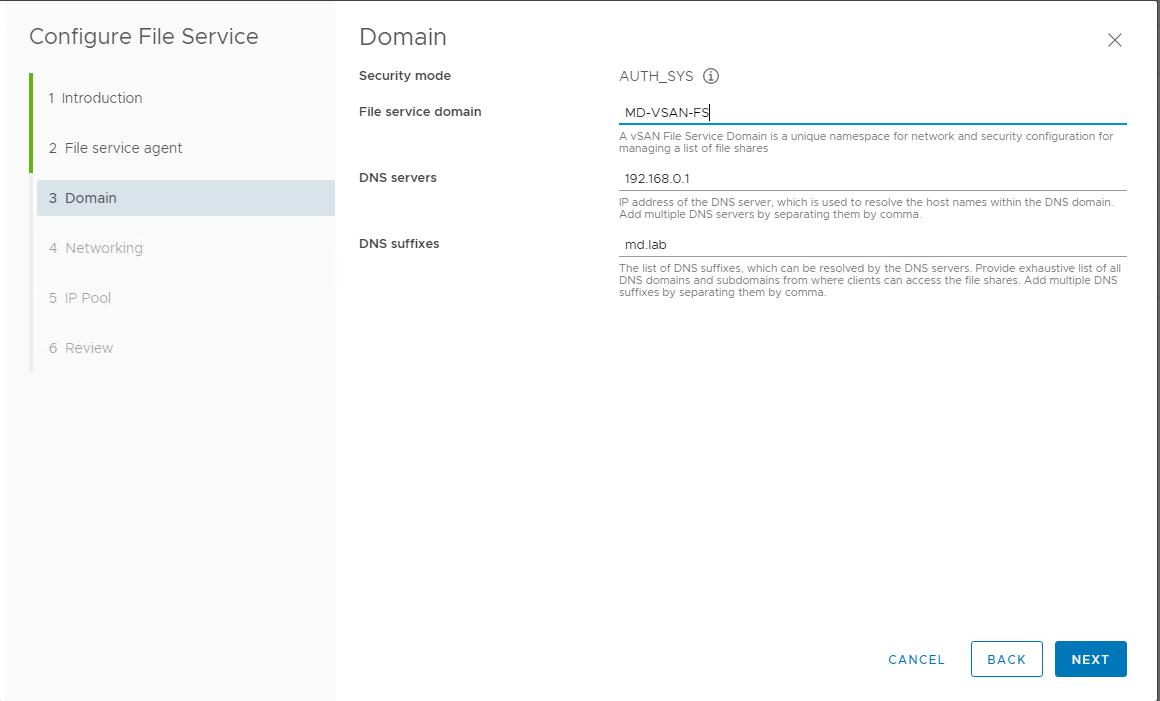
In the Domain page, enter the following information and click Next:
- File service domain: The domain name should have a minimum of two characters. vSAN file service domain is a unique namespace for network and security configuration for managing a list of file shares.
- DNS servers: Enter the IP address of the valid DNS server to ensure the proper configuration of File Services.
- DNS suffixes: Enter the DNS suffixes which can be resolved by the DNS servers.
Click Next to continue configuring the vSAN file service.
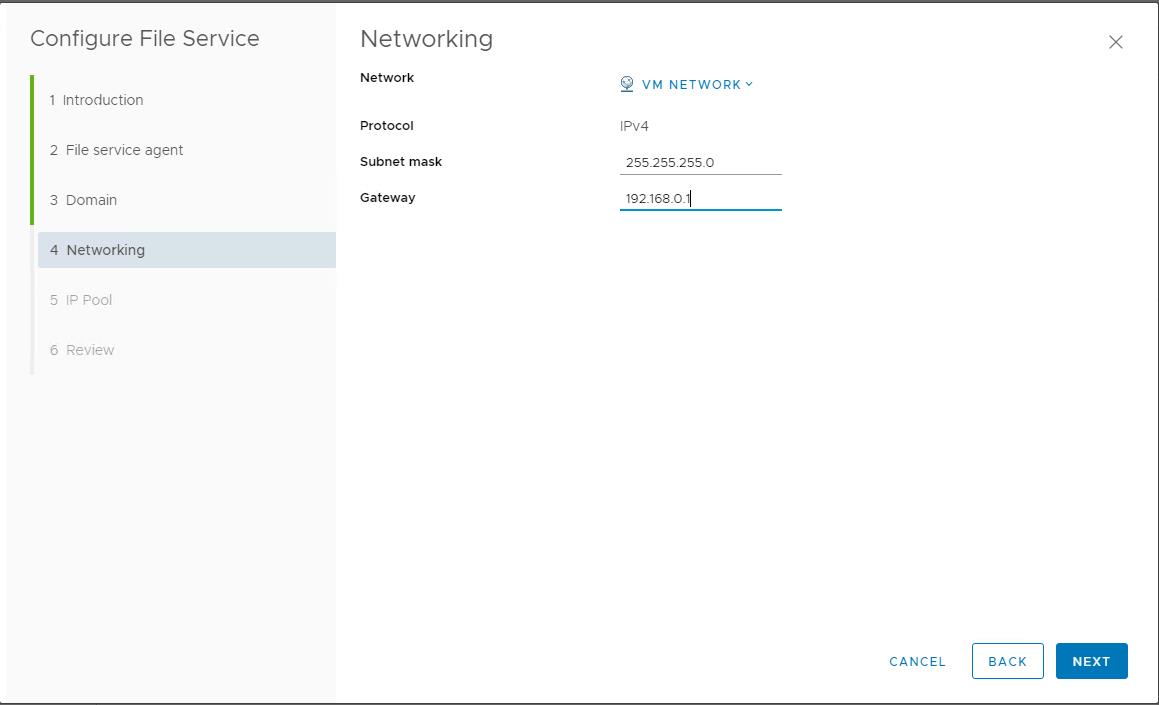
In the Networking page, Select the Port group from the Network drop-down. Enter the subnet mask and gateway click Next.
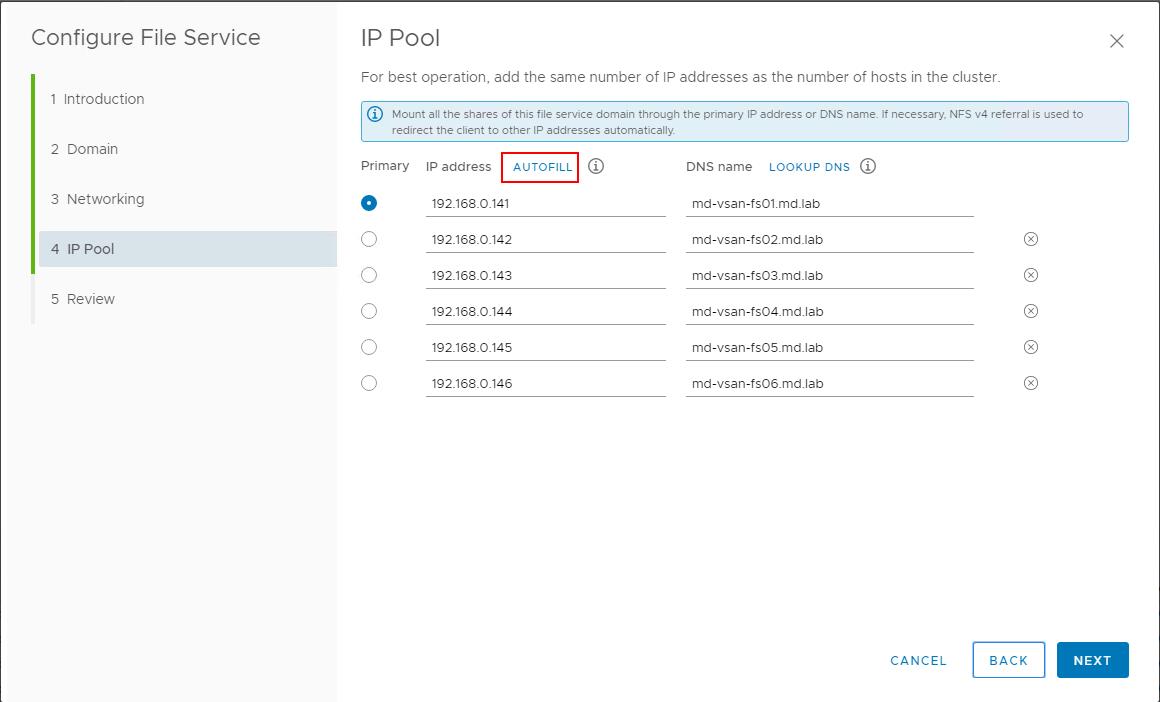
In the IP Pool page, enter the IP addresses and the DNS names, select a Primary IP, and then click Next.
The number of IP addresses must be equal to the number of hosts in the vSAN cluster. You can enter the first IP and click Autofill. This Autofill option is displayed after you enter the first IP address in the IP address text box. The Autofill option automatically fill the remaining fields with sequential IP addresses, based on the subnet mask and gateway address entered in the previous step.
LOOK UP DNS option will automatically retrieve the FQDN corresponding to the IP addresses in the IP address column.
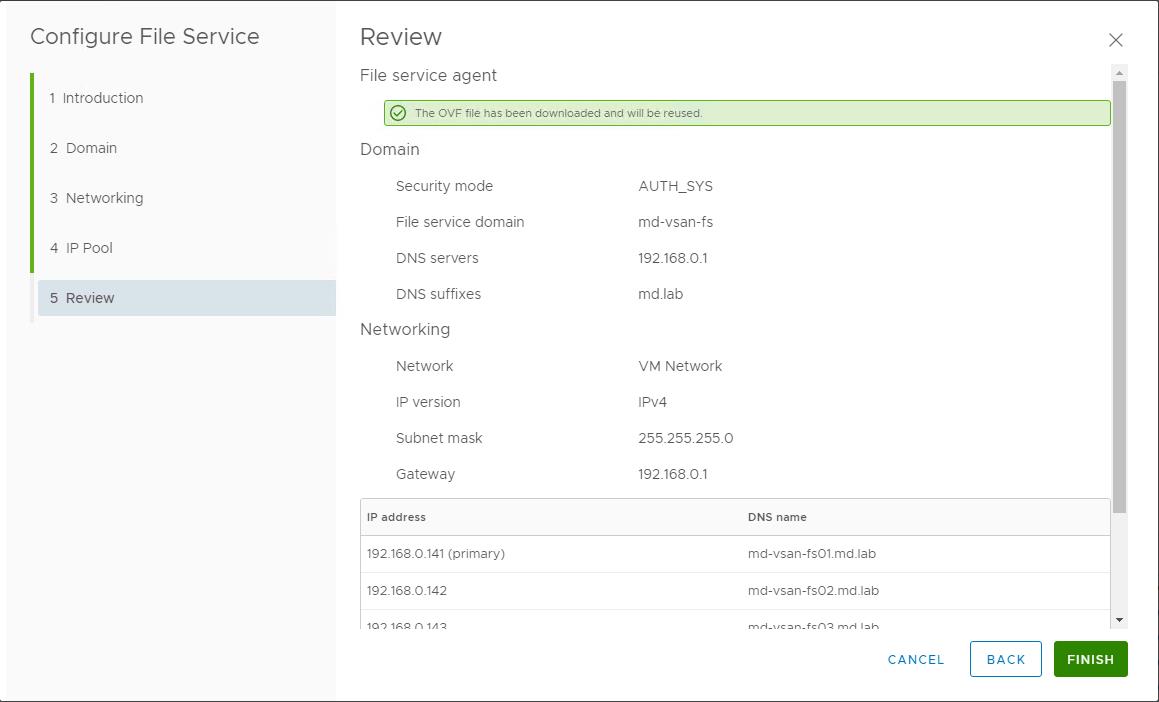
Review the configuration settings and click Finish.
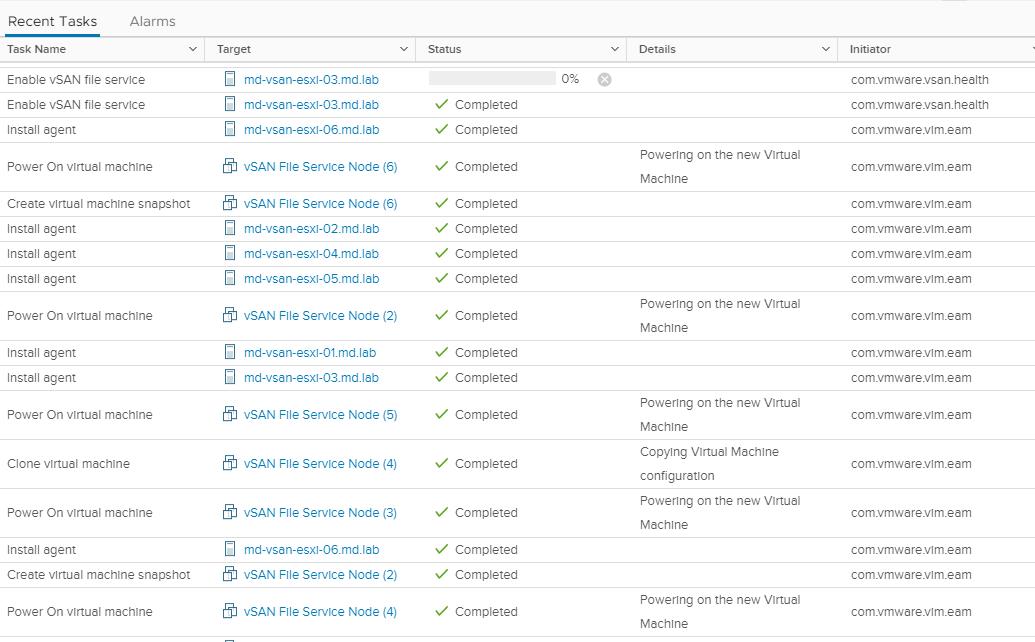
You can notice there a number of tasks such as deploy OVF, Install agent, Power On virtual machine, etc to complete the configuration of vSAN file service.
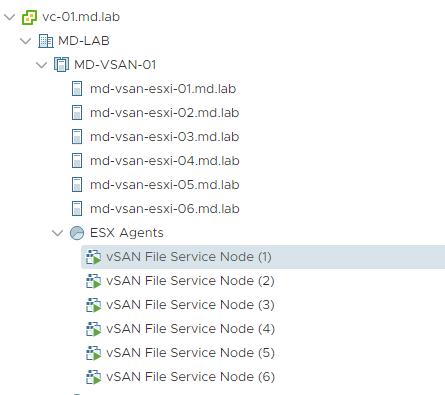
A vSAN file service Node (FSVM) VM’s are created and placed on each host. The FSVMs manage file shares in the vSAN datastore. Each FSVM contains an NFS file server. vSAN File Services is powered and managed by the vSphere platform that deploys a set of containers on each of the hosts. These containers act as the primary delivery vehicle to provision file services and are tightly integrated with the hypervisor.
Once all the VM deployment and agent installation is completed on each of the hosts. We can check the vSAN File Service in vSAN Services, we now see it enabled with various additional information. This information was provided during the vSAN file service configuration.
That’s it. we have successfully configured and enabled the vSAN File service in vSAN 7.0. We will see how to create vSAN file shares from vSAN file service and how to consume it from the operating system in the upcoming articles. I hope this article is informative for you. Thanks for Reading!!!. Be social and share it with social media, if you feel worth sharing it.