

NSX-T segment is a representation of a layer 2 broadcast domain across transport nodes. Virtual machines attached to the same segment can communicate with each other, even across transport nodes through encapsulation over tunneling. Each NSX-T segment is assigned a virtual network identifier (VNI) which is similar to a VLAN ID. It is the same as the Logical switches in NSX-V. Logical switches are called as “Segments” in NSX-T. As similar to NSX-V, the Transport zone defines the span of the segment. In NSX-V, We can only create Overlay (VXLAN) based logical switches. In NSX-T we can create either an overlay or VLAN-based transport zone. Created segments will be created as an Opaque network the vSphere.
Segments are created as a port group in the vCenter server but segment configuration changes are allowed only from the NSX-T Manager simplified UI. As similar to Port groups, virtual machines can be connected to the segment ports. In this article, we will discuss in detail how to create an NSX-T Segment.
How to Create NSX-T Segment?
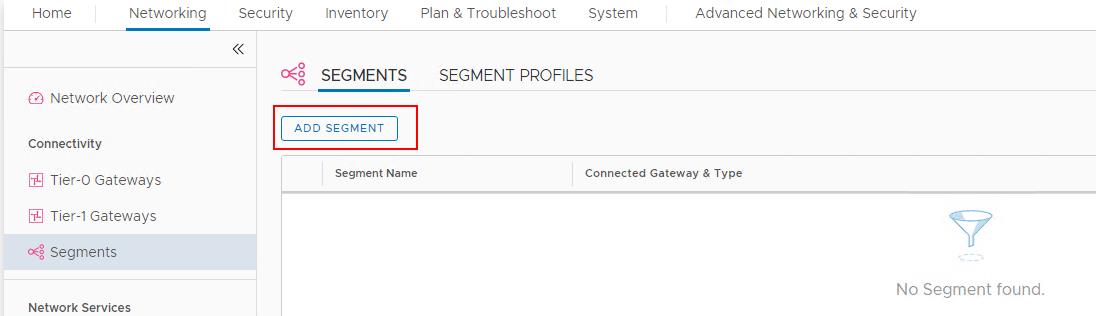
To Create NSX-T segments, log in to NSX-T Manager with admin credentials. Click -> Networking -> Segments-> ADD SEGMENT
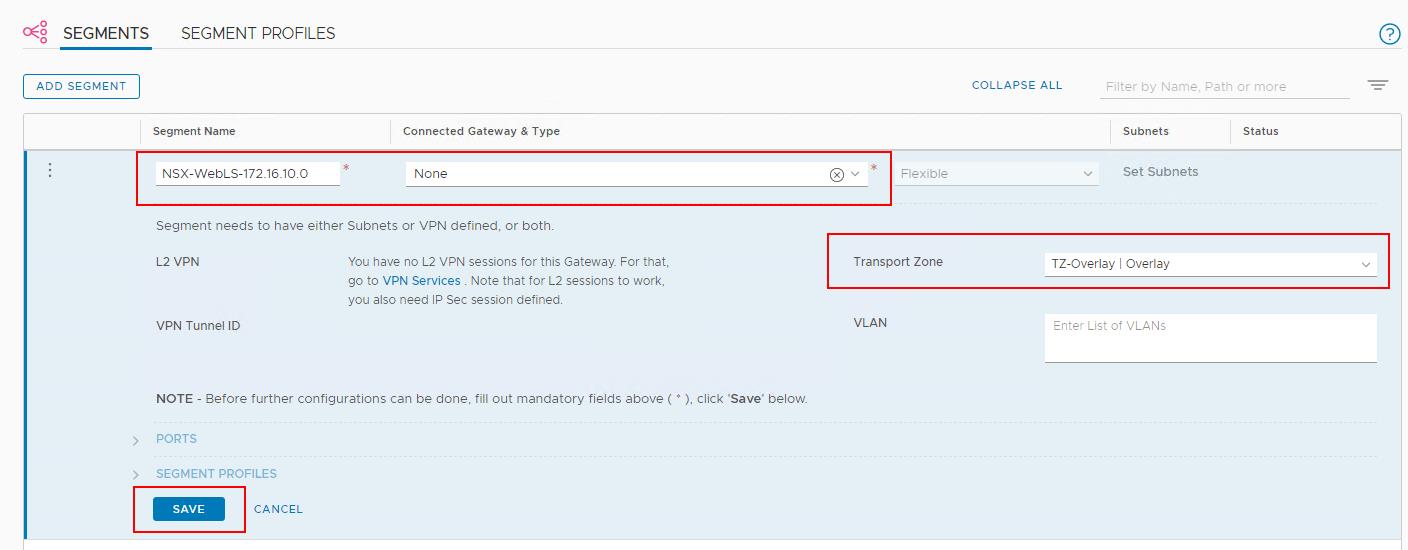
Enter the name for the NSX-T segment. It will be the name that will appear as a Port group or Opaque network for virtual machines to connect to.
In the “Connected Gateway & Type” Option, You can select an existing tier-0 or tier-1 gateway, or select None. If you select None, the segment is simply a logical switch. With a subnet configured, it can link to a tier-0 or tier-1 gateway.
if the uplink is a tier-1 gateway, select a type, Flexible or Fixed. A flexible segment can be unlinked from gateways. A fixed segment can be deleted but not unlinked from a gateway.
Select the Transport Zone from the drop-down. You have to have the transport zone created prior to creating the NSX-T segments. You need to select the appropriate transport zone based on the segment type. If you creating Overlay Segment, Then select the Overlay Transport zone. Select the VLAN transport zone, if you are creating VLAN segments. Also, specify the list of VLAN for VLAN segments.
As of now, I am not specifying the connected gateway and leaving it to “None” and creating the Overlay Segments. Click SAVE to create the NSX-T Overlay segments.
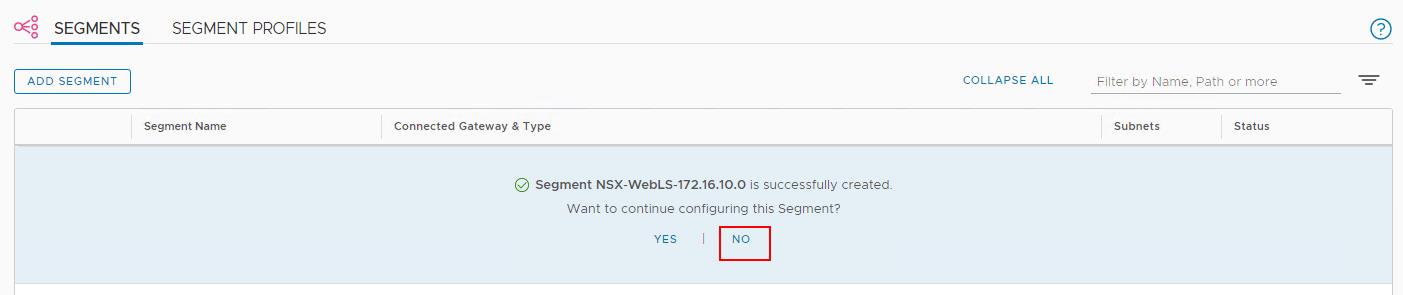
In the option, Want to continue configuring this segment. Click NO. We will configure the segments in the upcoming posts.
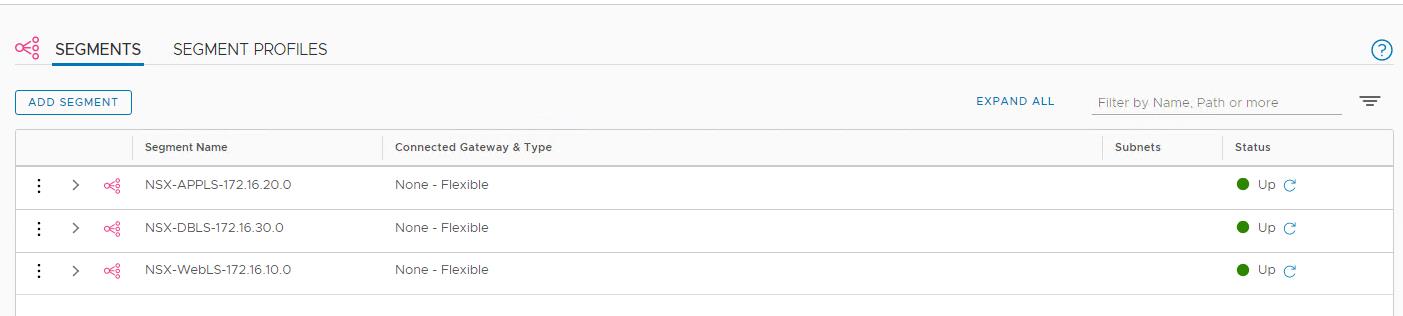
Similarly, I have created the 3 different NSX-T Segments (Overlay segments) for my environment. We should ensure that the status of the segments should be “UP”.
Created segments will appear as Opaque network (port group) under the vCenter server. I can see the port groups are created for my segments.

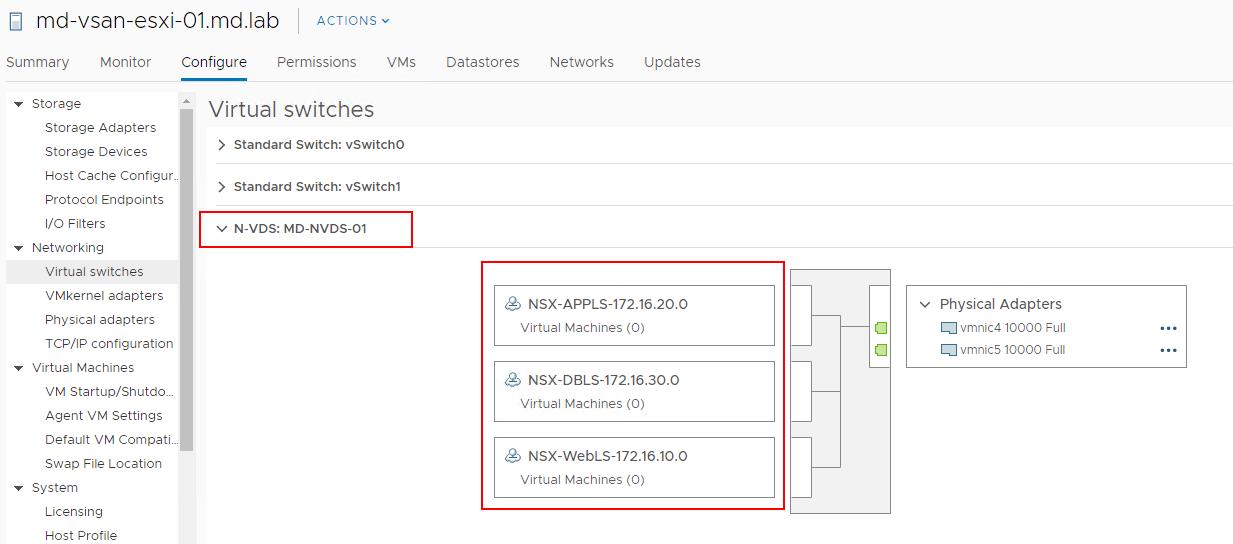
You can see the same port groups under virtual switches options in the ESXi hosts. I have the NSX-T segments (Port groups) created under my NSX-T N-VDS.
That’s it. we have created the NSX-T segments. In the upcoming posts, I will explain how to connect the virtual machine to these NSX-T segments and also migrate the virtual machines from another network to the NSX-T segments. I hope this is informative for you. Thanks for Reading!!!. Be social and share it with social media, if you feel worth sharing it.