

In a typical Datacenter, It is common that the disk failure can happen for the server. In modern systems, replacing failed disks isn’t painful. Most of the disks in modern servers are hot-swappable disks and no need of downtime to servers while replacing the failed disk with the RAID systems. VMWare vSAN is the VMware’s software-defined storage platform which delivers flash-optimized, secure storage. vSAN pools together server-attached storage to provide a highly resilient shared datastore suitable for any virtualized workload. Disks are very important for the vSAN implementation. It is common to replace the failed disks in the server. Typically, you delete devices or disk groups from vSAN when you are upgrading a device or replacing a failed device, or when you must remove a cache device. In this article, I will explain the detailed step by step procedure to remove capacity disk from VSAN disk group before attempting to replace the failed disk.
Remove Capacity Disk from VSAN Disk Group
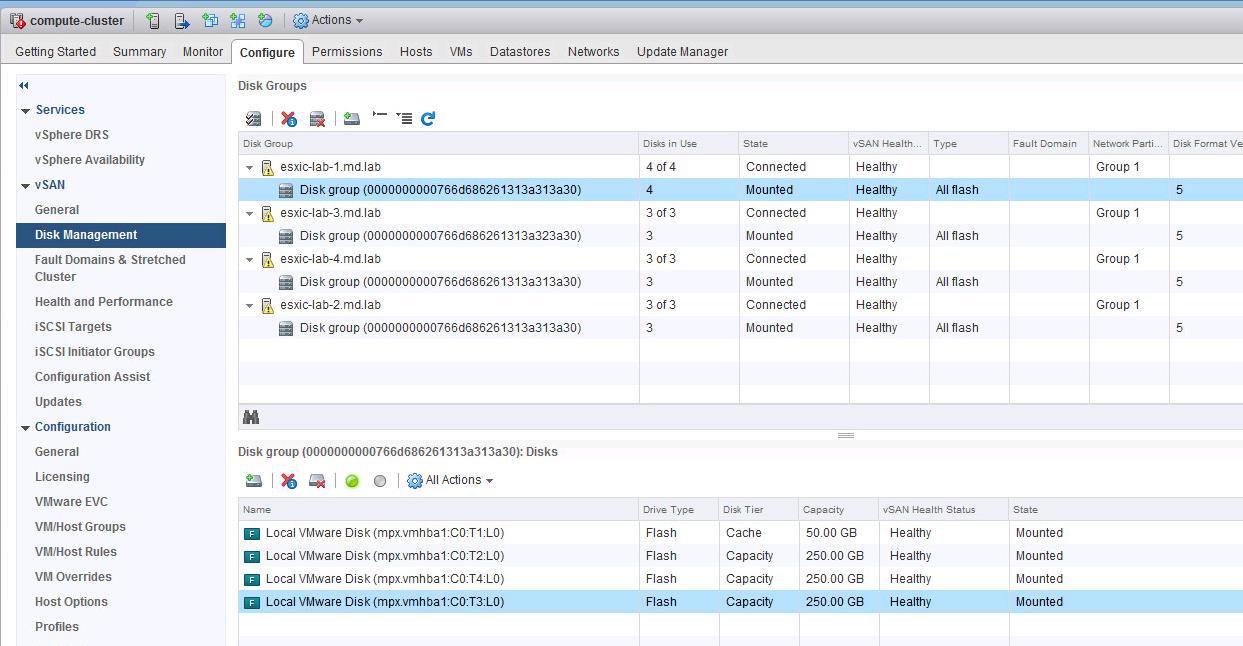
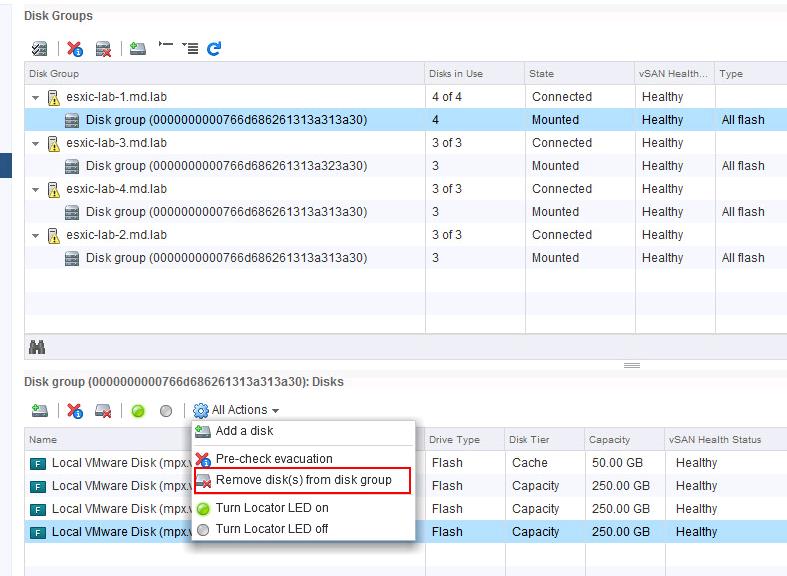
Login to the vCenter server using vSphere Client. Select the cluster -> Configure -> Disk Management -> Click on the disk group in which you want to remove the capacity disk
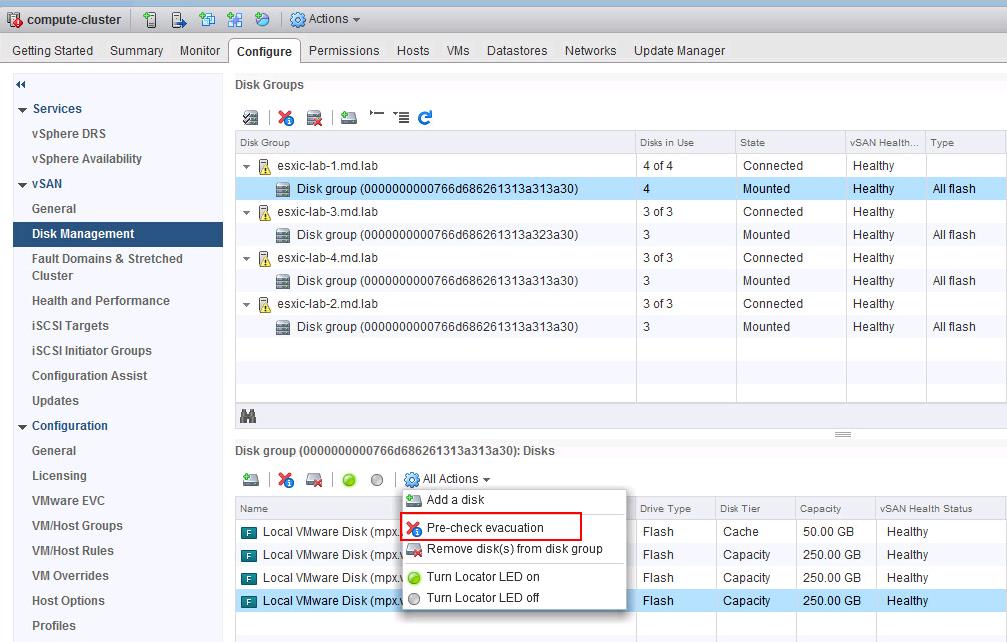
Select the disk group and select the disk which you want to remove it from the disk group. Select “Pre-check evacuation” under Actions. Pre-check evacuation provides you the idea of the impact of removing the disk from the disk group.
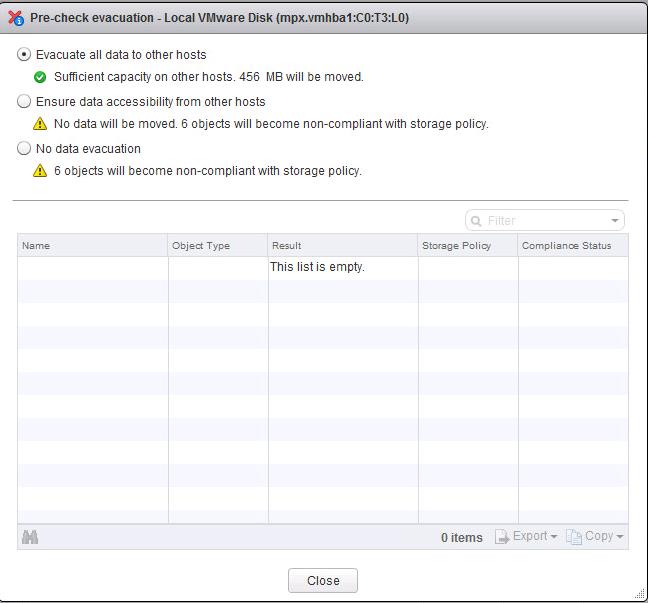
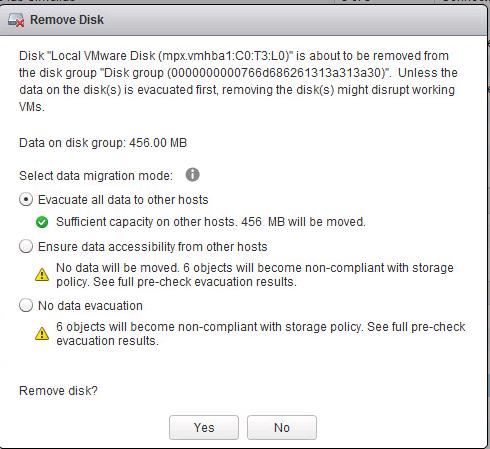
You can select the Option based on the need. When I select “Evacuate all data to other hosts”, it permanently moved the data stored on this disk to other hosts. Since it is the lab environment, It shows only 456 MB will be moved. It will be huge in the production environment.
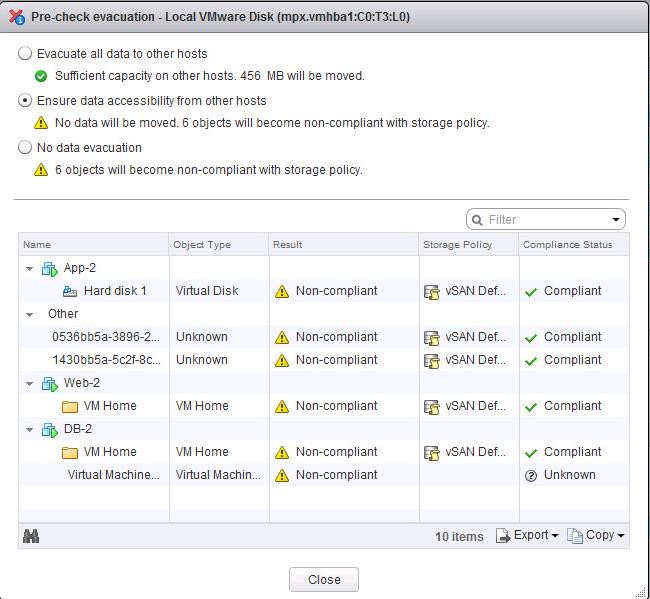
If I Choose “Ensure data accessibility from other hosts”, It ensures that data will be accessible and lists how many objects will be non-compliant with the storage policy. This will be fine if you are replacing the failed disk with the new disk. Once the new disk is added, Non-complaint objects will be re-build. Click on Close.
Once you have understood the impact of removing the disk from the disk group. Select the disk under disk group -> Remove disk(s) from the disk group.
Select the appropriate option based on your choice. and Click Yes to remove the disk from the disk group
You can monitor for the “Remove disk from vSAN” to get complete under Tasks & events.

Now I only have 3 disks in the disk group. You can replace the failed disk and re-add it into to the disk group. You can refer my article Add Capacity disk to the disk group to add the new disk into the VSAN disk group after disk replacement.

That’s it. We are done. I am sure you are now clear with the procedure to under how to remove capacity disk from VSAN disk group using vSphere Web client. I hope this is informative for you. Thanks for Reading !!!. Be social and share it on social media, if you feel worth sharing it.