

The first thing after you deploying the NSX-T Manager is configuring the Backup for the NSX-T Manager. NSX-T Manager backup should be in place before NSX-T Datacenter implementation should go live into production. NSX-T Manager backup can be configured to store in the file server. We need to configure the backup file server before configuring the NSX-T Manager. Once the file server is ready, you can start a backup of the NSX-T Manager at any time or configure a schedule for automatic backups.
There are two ways to back up the NSX-T Manager
Cluster Backup: This backup includes the desired state of the virtual network
Node Backup: This is a backup of the NSX Manager nodes.
There are two backup methods:
Manual Backup: We can manually run the backup at any time
Automated Backup: Automated backups run based on a schedule that we have set. Automated backups are highly recommended to ensure that we have up-to-date backups for the NSX-T Manager.
In this article, we will discuss the detailed procedure to configure NSX-T Manager backup from the NSX-T Manager simplified UI.
How to Configure NSX-T Manager Backup
To Configure the NSX-T Manager backup, log in to NSX-T Manager with admin credentials. Click -> System -> Backup & Restore -> Backup-> Click Edit
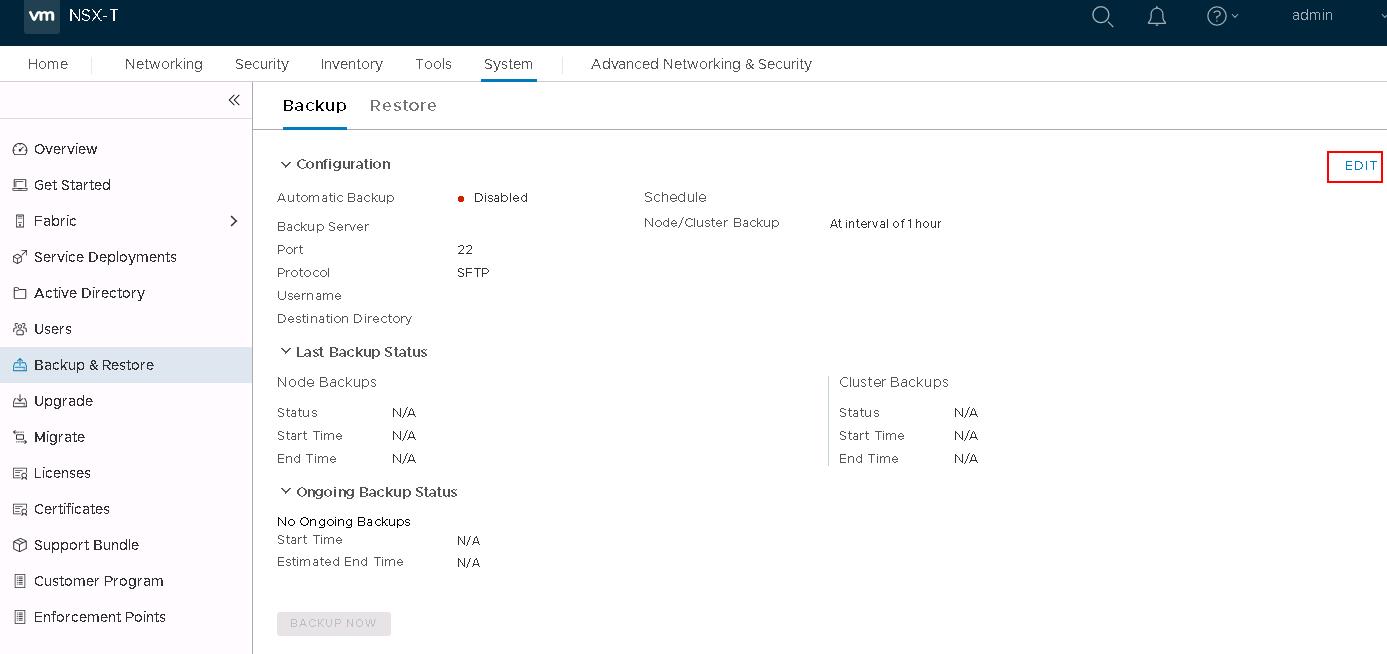
Backing up NSX-T Manager is a two-step process:
1. Configure a Backup target location
2. Configure an automated Schedule
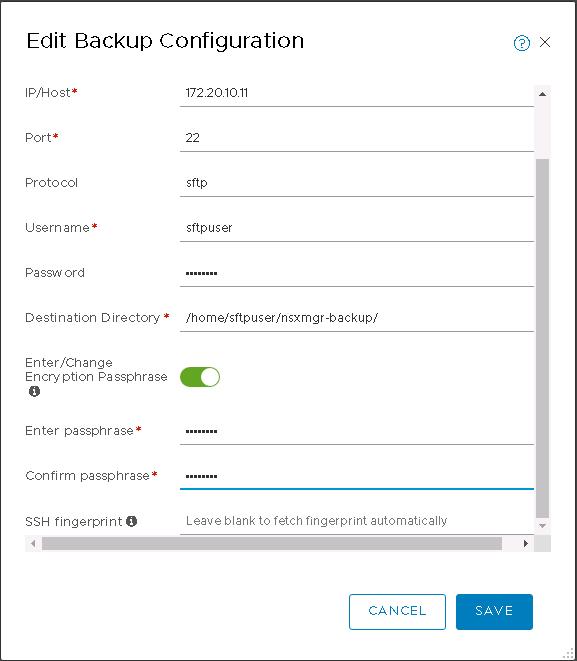
Configure a Backup Target Location
In the Edit backup configuration page, Specify the File server settings
1.IP/Host: Specify the IP/Hostname of the file server
2.Port and Protocol: SFTP (TCP port 22) is used for the file transfer. Change the default port if required.
3. Username and Password: Enter the user name and password to log in to the backup file server. The first time you configure a file server, you must provide a password. Subsequently, if you reconfigure the file server, and the server IP (or hostname), port, and user name are the same, you do not need to enter the password again.
4.Destination Directory: Enter the absolute directory path where the backups will be stored.
5. Toggle to enable the Encryption Passphrase
6. Enter and Confirm Passphrase: Enter the Passphrase to encrypt the backup.
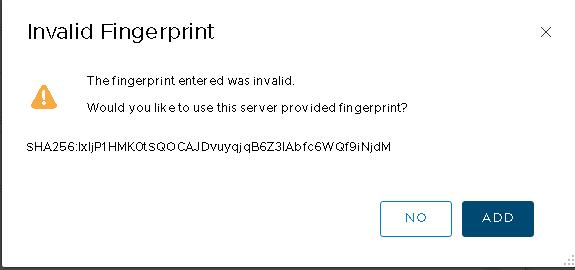
6.. SSH fingerprint: Verify you have the SHA256 hashed ECDSA key (fingerprint) of the remote backup destination before proceeding. The location of the ECDSA (256 bit) key on a remote Linux system is commonly /etc/ssh/ssh. Leave it blank to fetch the fingerprint automatically.
Click SAVE to save the Backup configuration for the NSX-T Manager backup.
Click ADD to use this server provided fingerprint.
To validate the backup configuration, you can manually initiate the backup by clicking on “BACKUP NOW”
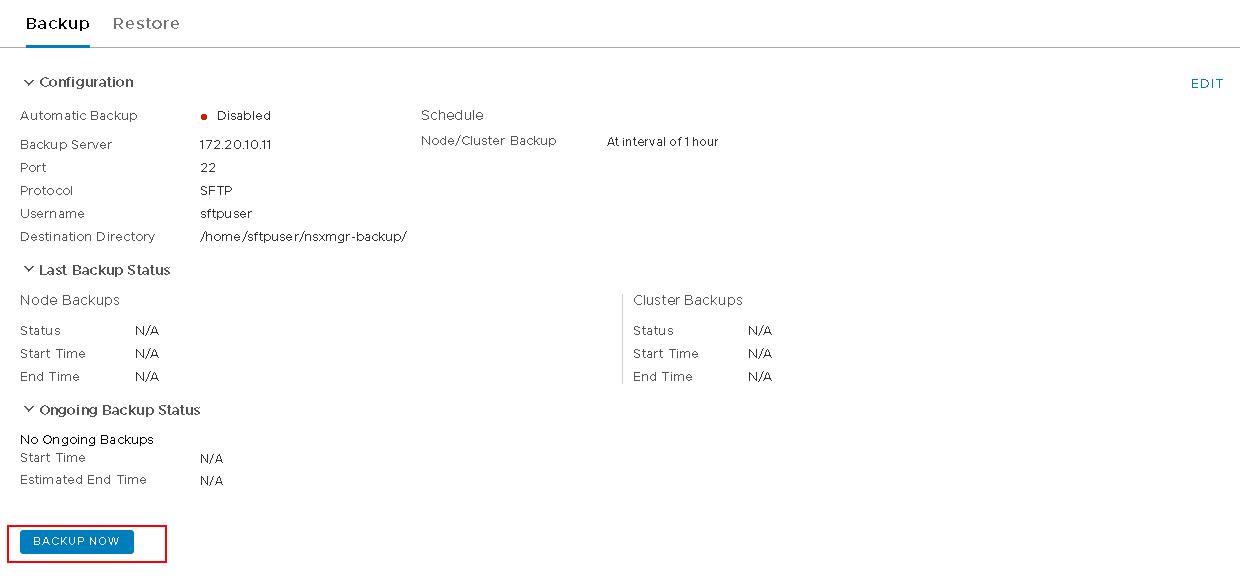
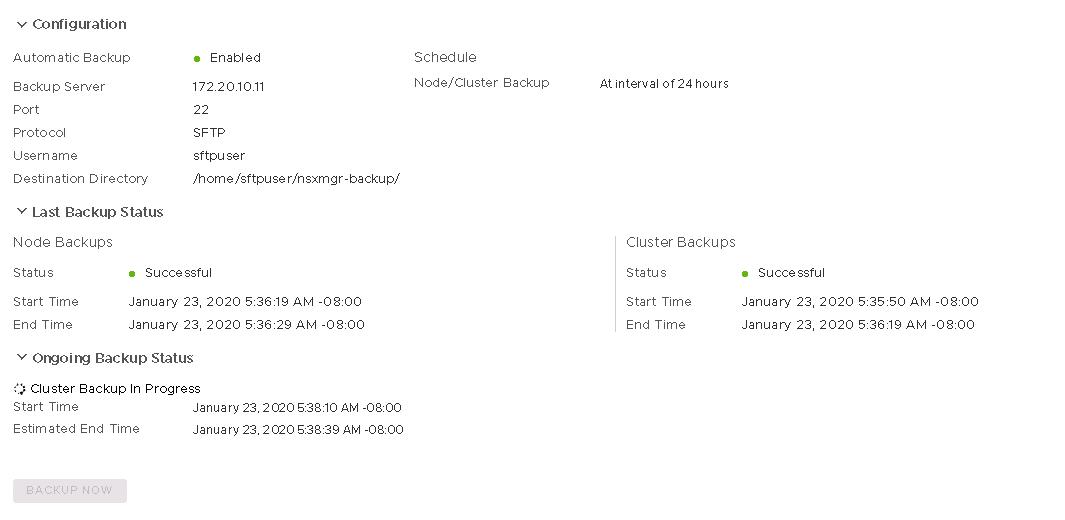
You can monitor the progress of the NSX-T Manager backup under “Ongoing Backup Status”. It will show the Start time and Estimated End time.
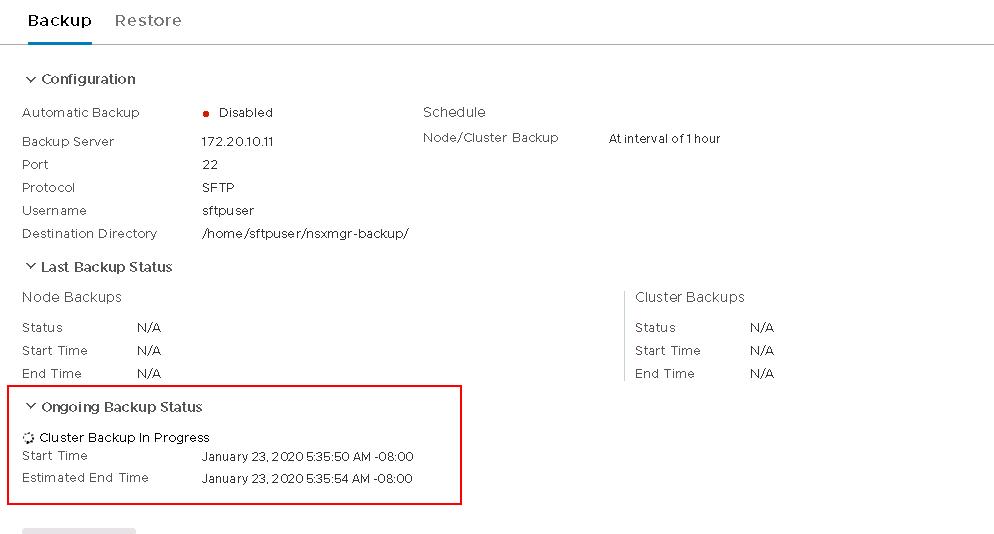
In the last backup Status, You can notice both Node Backups and Cluster backups is completed.

Configure an automated Schedule
Once we have validated the NSX-T Manager Backup configuration. It is time to set up an automatic schedule for the NSX-T Manager Backup. Click Edit and select the option “Schedule”.
Toggle to enable the “Automatic Backup” and select the frequency of the backup either weekly or interval. Specify the interval for the backup.
You can enable “Detect NSX Configuration change” to trigger a full backup each time a configuration change is detected by NSX Manager. Click SAVE.
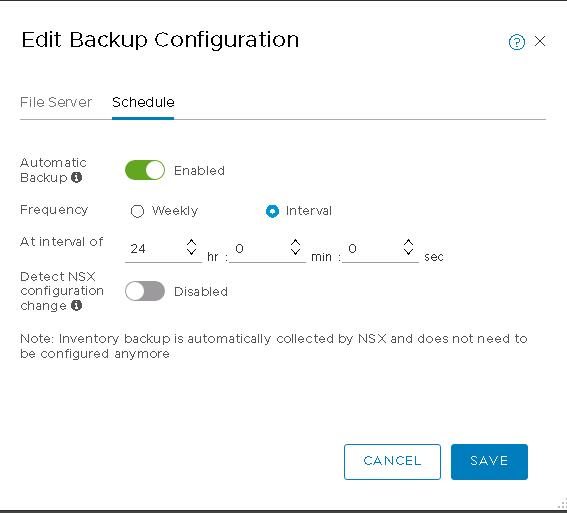
The NSX-T Manager backup process starts immediately after you click SAVE.
That’s it. We are done with configuring the NSX-T Manager Backup. I hope this is informative for you. Thanks for Reading!!!. Be social and share it with social media, if you feel worth sharing it.