

NSX-T Uplink profile is like an Uplink template that defines how an N-VDS (on a transport node) maps to the physical network adapter of the ESXi hosts which connects to the physical network. You can define the settings such as teaming policies, active/Standby links, transport VLAN ID, MTU settings and LAG settings if you are using LACP configuration in the NSX-T Uplink profile.
The advantage of the NSX-T uplink profile is which allows you to consistently configure the identical capabilities and configurations for network adapters across multiple hosts. Instead of specifying and configuring individual settings for each network adapter, you can specify the settings in the Uplink profiles and which can be applied to Transport nodes when you prepare the ESXi hosts/ KVM hosts as a transport node. You can create Uplink profiles not only for ESXi hosts but also for NSX Edge nodes.
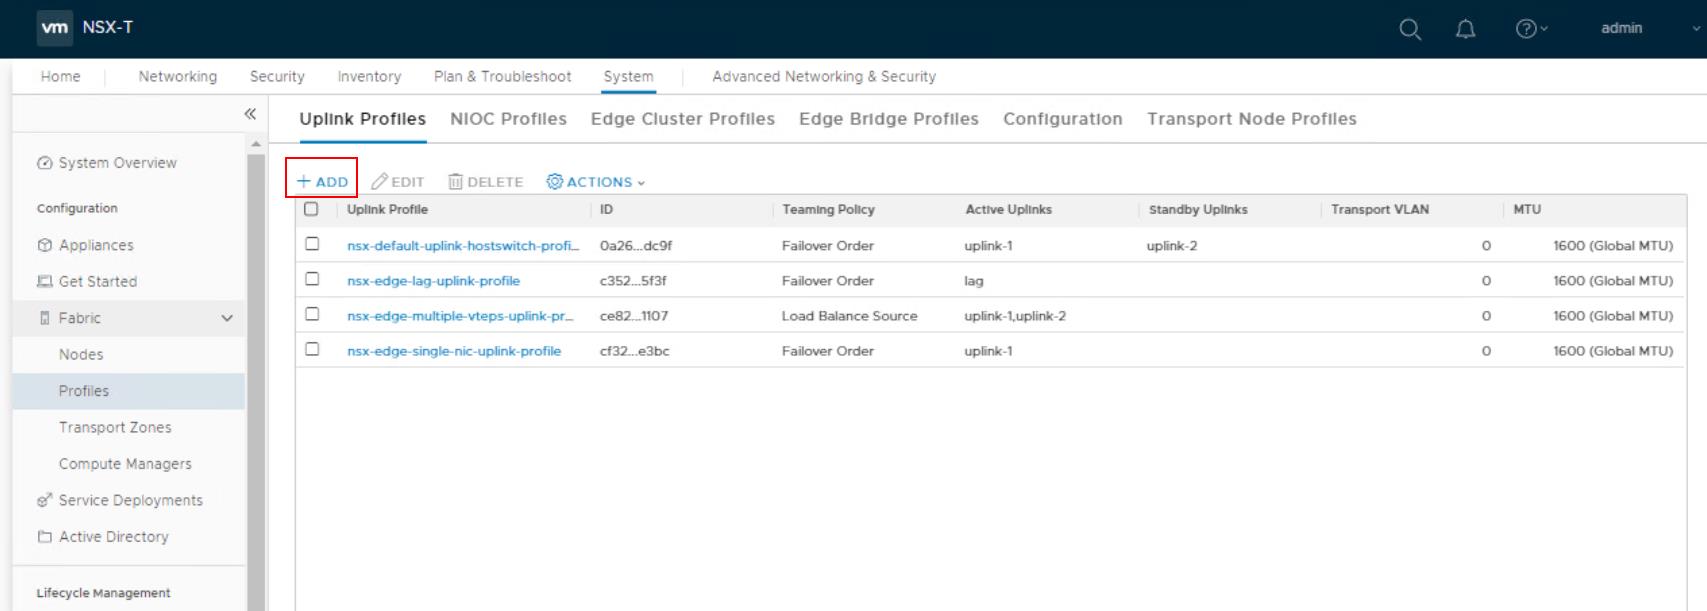
Standby uplinks are not supported with VM/appliance-based NSX Edge. When you install NSX Edge as a virtual appliance, use the default uplink profile. For each uplink profile created for a VM-based NSX Edge, the profile must specify only one active uplink and no standby uplink. There are default 4 Uplink profiles create in the NSX-T 2.5. One for host profile and other 3 for edge uplinks. You can use the existing default one or create a new uplink profile based on your organization network availability policy. We cannot edit the default NSX-T Uplink profiles.
Below are the 4 default NSX-T Uplink profiles as of the NSX-T 2.5 version.

How to Create NSX-T Uplink Profile
From a browser, log in with admin privileges to an NSX Manager at https://<nsx-manager-ip-address>
Click on System ->Fabric -> Profiles-> Uplink Profiles ->click +ADD
Specify the Name and description for the Uplink profile. If you using LACP, You can specify the Link aggregation groups (LAGs) for the transport network. If you not using LACP for the uplinks from the physical side, you can specify the teaming settings.
In the Teaming section, click Add and enter the details. The teaming policy defines how the N-VDS uses its uplink for redundancy and traffic load balancing.
There are three teaming policy modes to configure teaming policy:
Failover Order: You can specify the Active uplink along with the optional list of standby uplinks. If active uplink fails, NIC under the standby uplink replaces the active uplink. No load balancing is performed with this option
Load Balanced Source: You can specify the list of active uplinks and each interface on the transport node (ESXi host) is pinned to one active uplink based on the source Port ID. This policy allows the use of several active uplinks at the same time.
Load Balanced Source MAC: Thi policy is similar to the Load balanced source policy but instead of determining the uplink based on the source port, this policy determines the uplink based on the source VM’s MAC address.
The Load Balanced Source and Load Balanced Source Mac teaming policies do not allow the configuration of standby uplinks. Load Balanced Source and Load Balanced Source Mac teaming policies are only supported for the ESXI transport nodes and not supported for the KVM transport nodes. KVM hosts are limited to the Failover Order teaming policy
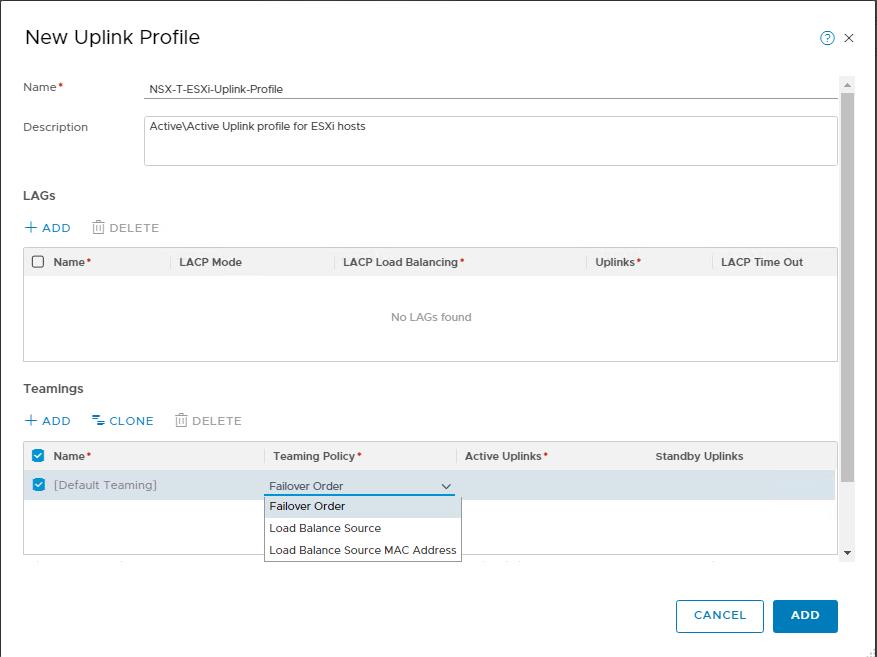
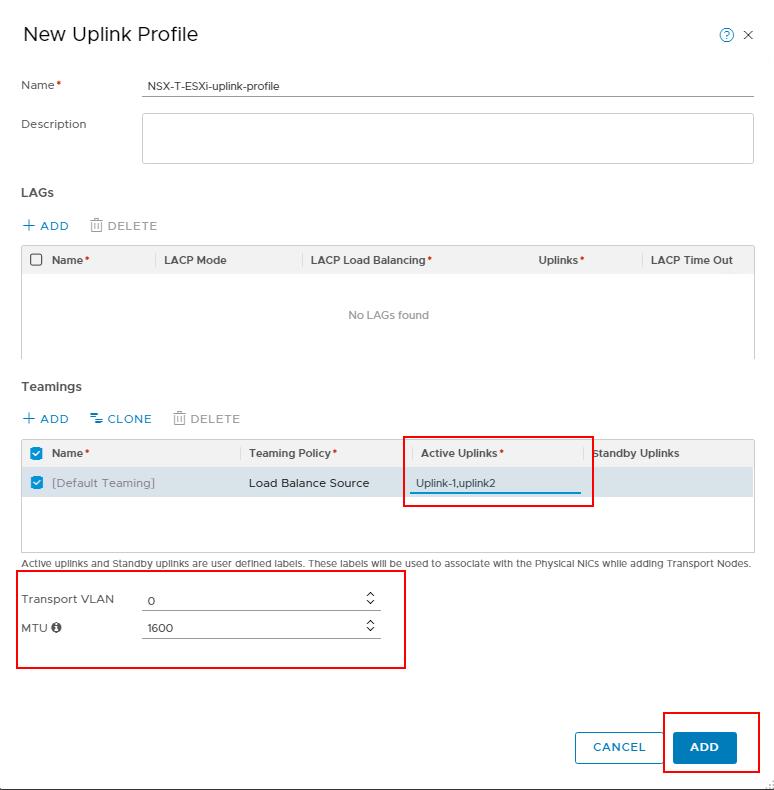
I have selected the “Load Balance Source” as my teaming policy for the ESXi host transport nodes. Enter the Uplink name to be part of Active Uplinks.
Enter a Transport VLAN value. The transport VLAN set in the uplink profile tags overlays traffic only and the VLAN ID is used by the TEP endpoint and enters the MTU value. The uplink profile MTU default value is 1600
Click “ADD” to create the New NSX-T Uplink Profile
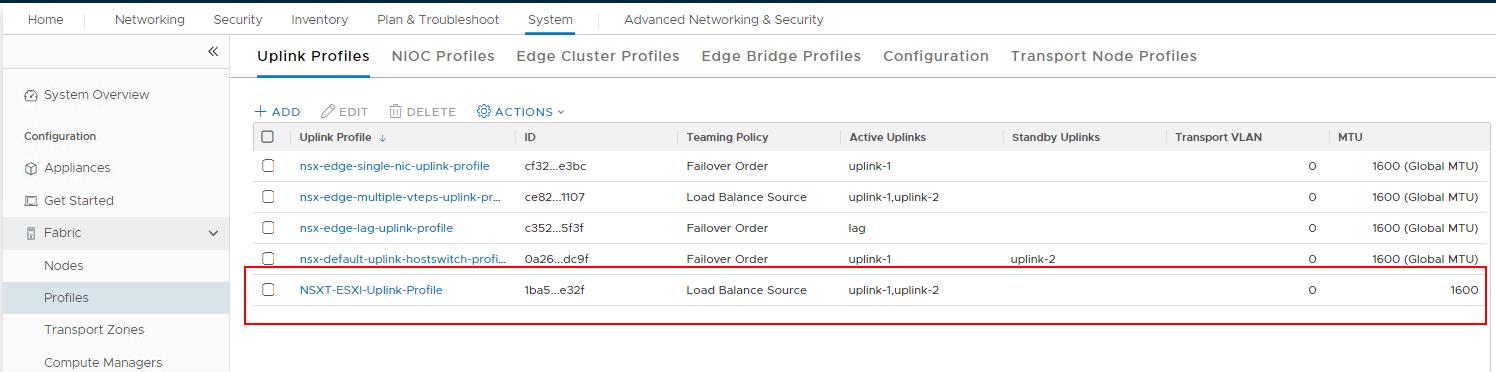
The NSX-T Uplink profile called “NSX-T-ESXi-Uplin-Profile” is created and it will appear under the list of Uplink Profiles.
That’s it. we have created the NSX-T Uplink Profiles. The uplink profile is ready to associate it with transport nodes. In the upcoming post, I will explain how to prepare ESXi hosts as transport nodes and how to associate the uplink profile to the ESXI transport nodes during transport node preparation. I hope this is informative for you. Thanks for reading!!!. Be social and share it in social media, if you feel worth sharing it.