

NSX-T Transport nodes are hypervisor hosts such as ESXi & KVM hosts and NSX Edges that will participate in an NSX-T overlay. You can manually specify the transport node settings at the individual host level or create a Transport node profile to apply to a group of hosts to prepare hypervisors as the NSX-T Transport node. A transport node profile captures the configuration required to create a transport node. The transport node profile can be applied to an existing vCenter Server cluster to create transport nodes for the member hosts. Transport node profiles define transport zones, member hosts, N-VDS switch configuration including uplink profile, IP assignment, mapping of physical NICs to uplink virtual interfaces and so on.
Transport node creation begins when a transport node profile is applied to a vCenter Server cluster. NSX Manager prepares the hosts in the cluster and installs the NSX-T Data Center components on all the hosts. Transport nodes for the hosts are created based on the configuration specified in the transport node profile.
To delete a transport node profile, you must first detach the profile from the associated cluster. The existing transport nodes are not affected. New hosts added to the cluster are no longer automatically converted into transport nodes.
Prerequisites for configuring the NSX-T Transport Profile:
- Verify that the hosts are part of a vCenter Server cluster
- vCenter Server must have at least one cluster
- Verify that an NSX-T transport zone is configured.
- Verify that a cluster is available
- Verify that the NSX-T IP pool is configured, or DHCP must be available in the network deployment.
- Verify that an NSX-T compute manager is configured.
How to Create NSX-T Transport Node Profile
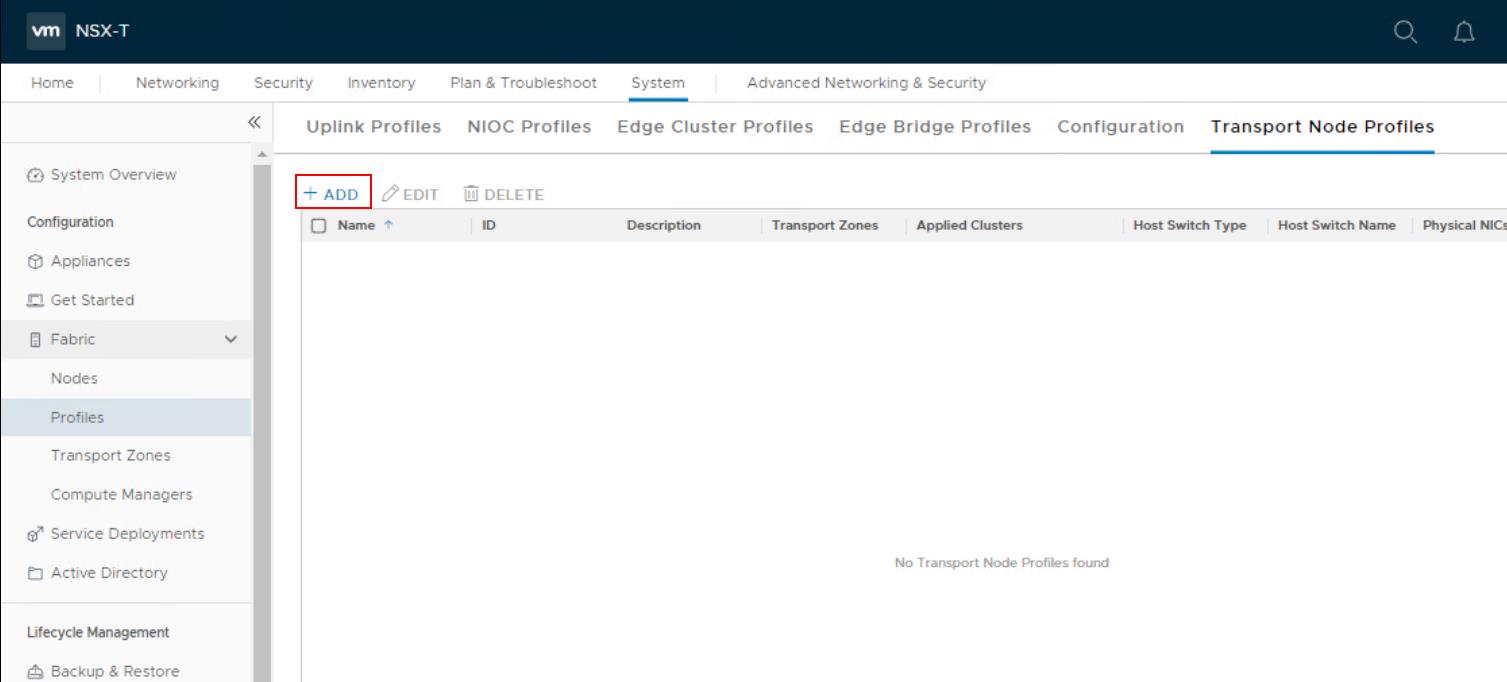
To Create an NSX-T Transport Node profile, Login to NSX-T Manager with admin credentials. Click -> System ->Fabric -> Profiles -> Transport Node Profiles -> ADD
Specify the Name and Description for the Transport Node Profile. Select the available transport zones and click the > button to include the transport zones in the transport node profile.
![]()
You can include multiple Transport Zones up to the maximum of 1000 transport zones into the single Transport Node Profile.
![]()
Click on N-VDS tab and Specify the following details
- N-VDS Name: Enter the N-VDS Name and Name should be the same as N-VDS name. You can add a maximum of four N-VDS switches for each configuration: enhanced N-VDS created for VLAN transport zone, standard N-VDS created for overlay transport zone, enhanced N-VDS created for overlay transport zone. There is no limit on the number of standard N-VDS switches created for the VLAN transport zone.
- NIOC Profile: For ESXi host, select a Network IO Control Profile. If you don’t have created one, you can use the default NIOC profile from the drop-down
- Uplink Profile: Select an NSX-T Host Uplink profile which we have created in the previous posts.
- LLDP Profile: By default, NSX-T receives LLDP packets but doesn’t send them. You can set LLDP to send in order to send and receive LLDP packets from other LLDP neighbors
- IP Assignment: Select Either Use DHCP, Use IP Pool or Use Static IP List.
- IP Pool: If you select Use IP Pool for IP Assignment, you must select an IP Pool name. We have already created the NSX-T IP Pool. Select the IP Pool from the drop-down
- Physical NICs: Add Unused physical NICs to the transport node. You can add additional NICs by clicking Add PNIC.
- PNIC only Migration: Enable only if you want to migrate physical NICs from a VSS or VDS to an N-VDS
- Network Mapping for Install: Used to migrate VMkernels to N-VDS during installation.
- Network Mapping for Uninstall: Used to revert VMkernels to VSS or VDS during uninstallation.
![]()
Once all the specified settings were defined. Click ADD to create the NSX-T Transport Node Profile.
![]()
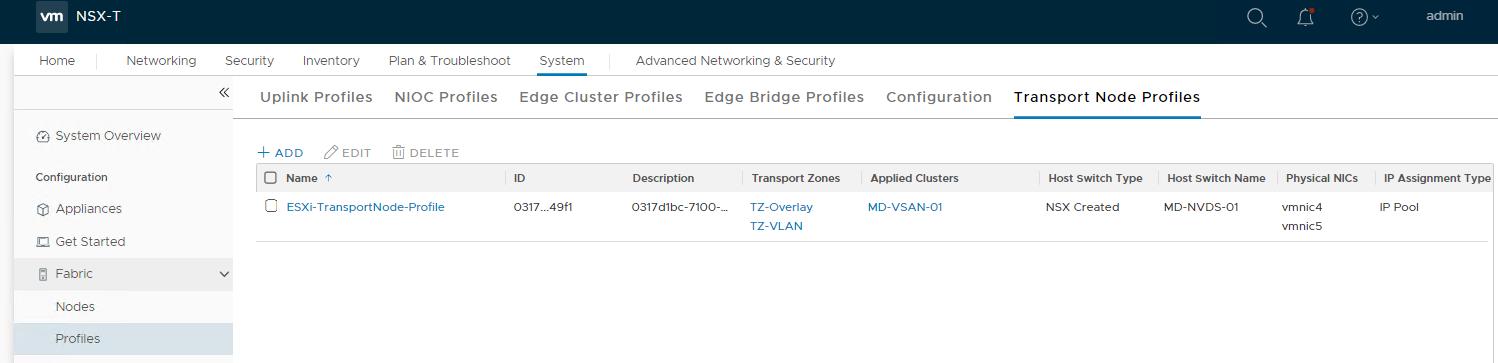
NSX-T Transport Node Profile called “ESXi-TransportNode-Profile” is created.
That’s it. We are done with creating the NSX-T Transport node profile. In the upcoming posts, I will explain how to use the transport Node profile to prepare ESXi hosts as Transport Nodes in an automated way. I hope this is informative for you. Thanks for Reading!!!. Be social and share it with social media, if you feel worth sharing it.