

In my previous article, we have discussed how to create NSX-T segments. Segments are nothing but the logical switches which create an Opaque network under the N-VDS. AN N-VDS is a software logical switch similar to the vSphere distributed switch in NSX-V. It provides the forwarding service on the transport nodes. A- NVDS is create and distributed across hypervisor (ESXi and KVM) and NSX Edge transport nodes. N-VDS provides uplinks for host connectivity to the physical switches. When the ESXi host is prepared for NSX-T as a transport node, an N-VDS is created on the hosts. We have to migrate VM network to N-VDS port groups to allow the VM to communicate using NSX-T Overlay or VLAN based segments.
Unlike vDS in NSX-V, the N-VDS switch is independent of the vCenter server and it is seen as an opaque switch by vCenter server. N-VDS can co-exist with vSphere standard and distributed switches. N-VDS performs layer 2 forwarding and supports VLAN, port mirroring, NIC teaming and Link aggregation (LACP) groups are implemented as ports.
When we create the NSX-T segments, it creates the Port group in the N-VDS. Similar to how we connect the virtual machines to the distributed or standard port group, we can migrate the VM network from virtual switch (VSS or VDS) to NSX-T N-VDS. In this article, we will discuss in detail how to migrate the VM network to an N-VDS network.
Migrate VM Network to N-VDS Network
There are two methods to migrate the virtual machine network from the virtual switch network to the N-VDS network. The first method is to manually reconfigure the virtual machine and modify the port group settings of the virtual machine and attach the N-VDS port groups (NSX-T segments) to the virtual machine network adapter. the second method is to migrate the group of virtual machines from a particular port group to N-VDS port groups using bulk network migration wizards Lets talk about both the methods.
Method 1: Manually Migrate a virtual machine to N-VDS Network
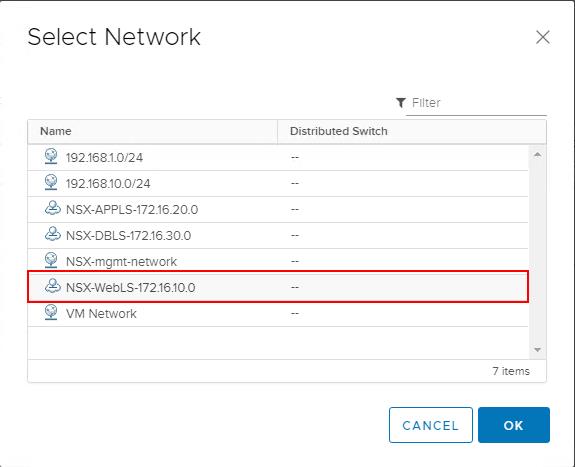
Log in to vCenter server, Right-click the virtual machine which you want to migrate it to N-VDS network. In the Network adapter, Click Browse to select the NSX-T segments (N-VDS Port group)

Select the N-VDS Port group which you want the virtual machine to connect to from the list of networks. Click Ok.
Make sure the “Connected” checkbox is selected. Click OK.
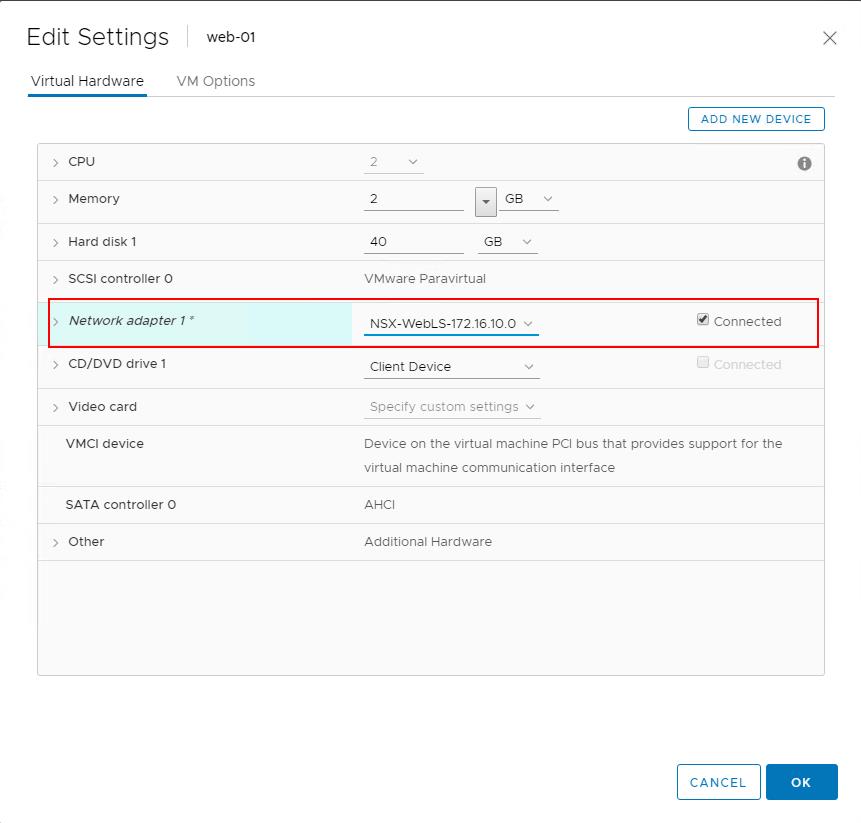
The virtual machine will be connected to the NSX-T segment Port group.
Method 2: Bulk VM Migration to N-VDS network
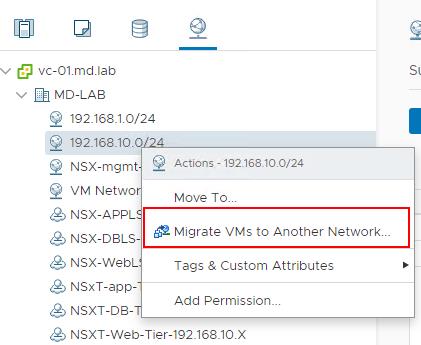
In this method, we can migrate the group of virtual machines from one network to another network. Right-click the Standard or Distributed port group from which you want to migrate the virtual machines to N-VDS network and select “Migrate VMs to Another Network”
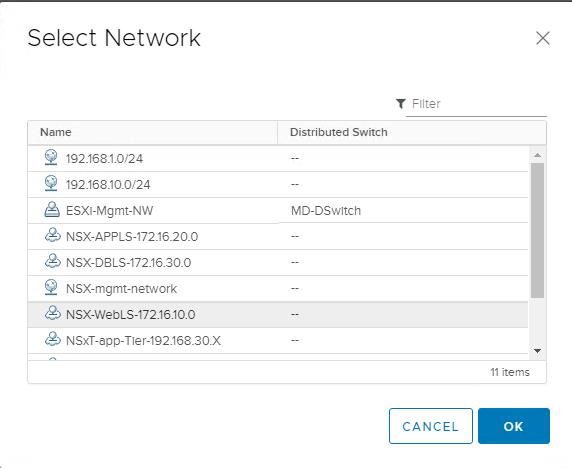
In the Destination Network option, Click Browse.
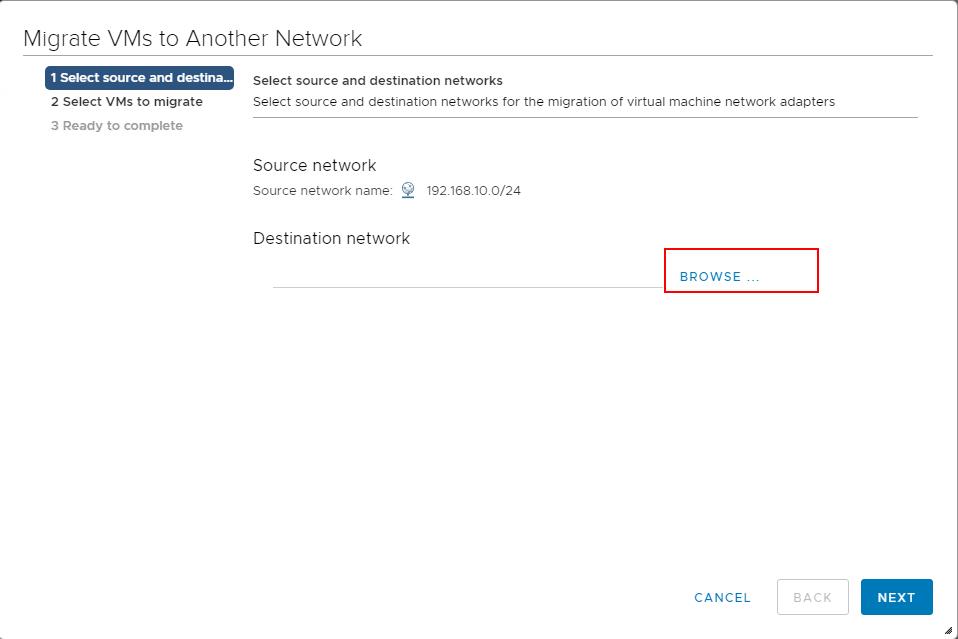
Select the NSX-T N-VDS port group from the list which you want the virtual machines to connect to. Click Ok.
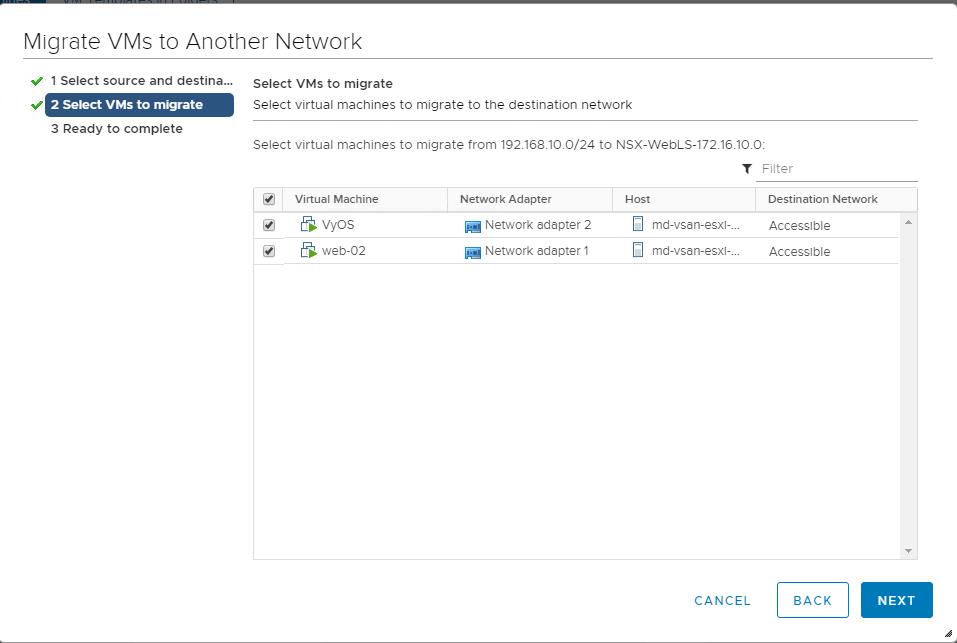
Select the virtual machines which you want to migrate to the N-VDS network and click Next.
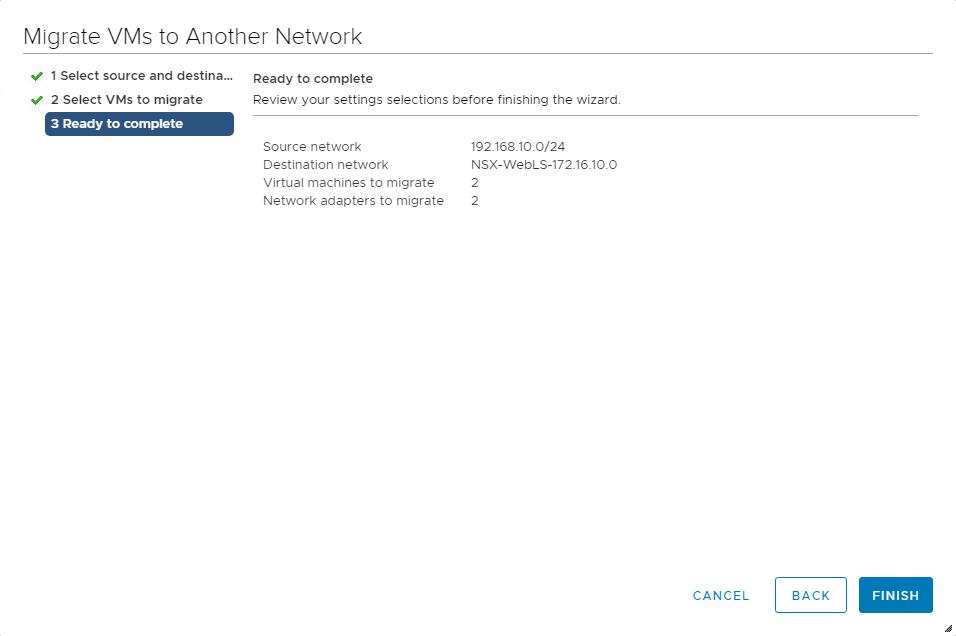
Review the selection and validate the source and destination network. Click Finish.
That’s it. All the selected VM’s are migrated to the NSX-T segments. You can also validate the list of connected from the segments ports in NSX-T Manager UI.
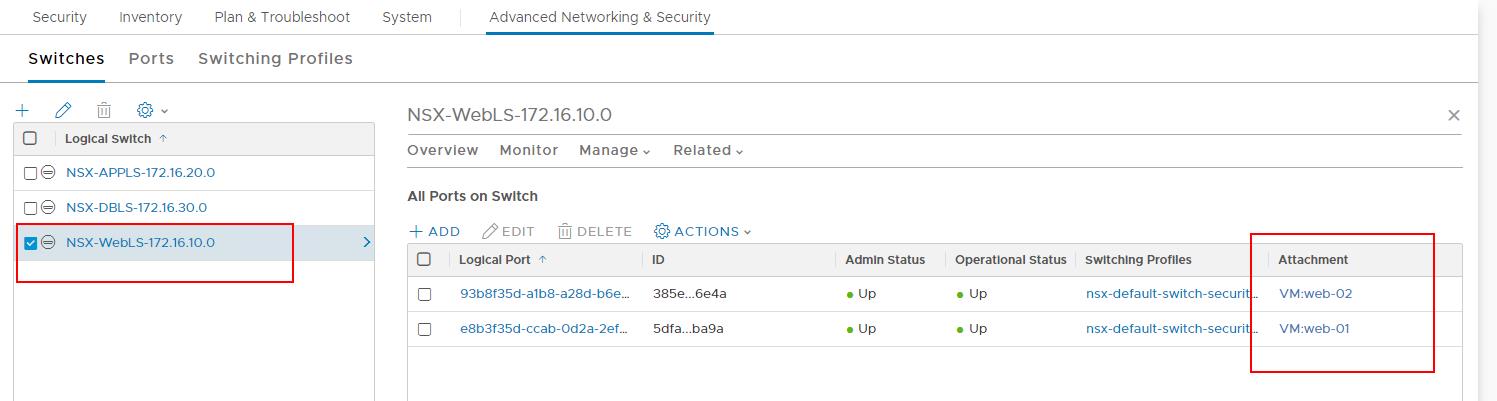
To validate the NSX-T segment ports, log in to NSX-T Manager UI -> Advanced Networking & Security -> Switches -> Double click the switch -> Related -> Ports.
Under the Attachment -> you can notice which VM’s are attached to the particular Segments (Logical Switches)
That’s it. We are done with migrating the virtual machines to the N-VDS network. We also understand the two different methods to migrate the virtual machines from virtual switch port groups to N-VDS port groups. I hope this is informative for you. Thanks for Reading!!!. Be social and share it in social media, if you feel worths sharing it.