

VMware vSAN File Service provides the file-sharing services using Network File System (NFS). vSAN file service is a layer that sits on top of vSAN to provide file shares. Using vSAN file service, We can create vSAN file share in the vSAN File Service so that client machines or VMs can access the NFS shares that have given access rights.
Once the vSAN file service is enabled, you can create one or more file shares on the vSAN File Service. Also look at How to Configure vSAN File Service.
These NFS shares can be used to Mount to virtual machines but these NFS shares are not supported as NFS datastores on the ESXi host to store Virtual files such as VMDK for running virtual machines. Take a look at How to create an NFS File share from Windows to mount as datastore in ESXi host.
Both NFSv3 and NFSv4.1 are both supported via vSAN file shares. In this article, we will take a look at how to create Files Shares on vSAN File Service.
How to Create a vSAN File Share in vSAN File Service?
To Create a vSAN file share, Login to vCenter server ->navigate to the vSAN cluster and click Configure > vSAN > File Service Shares -> ADD
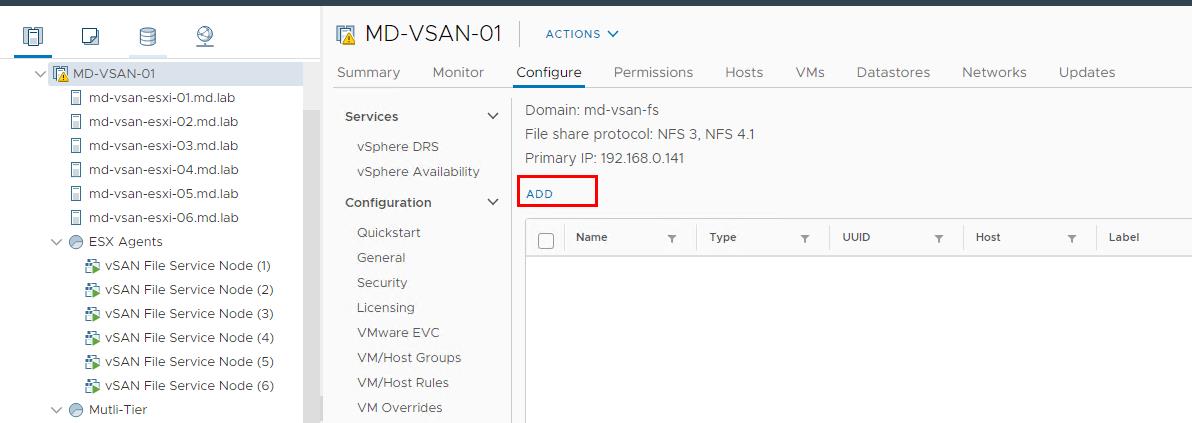
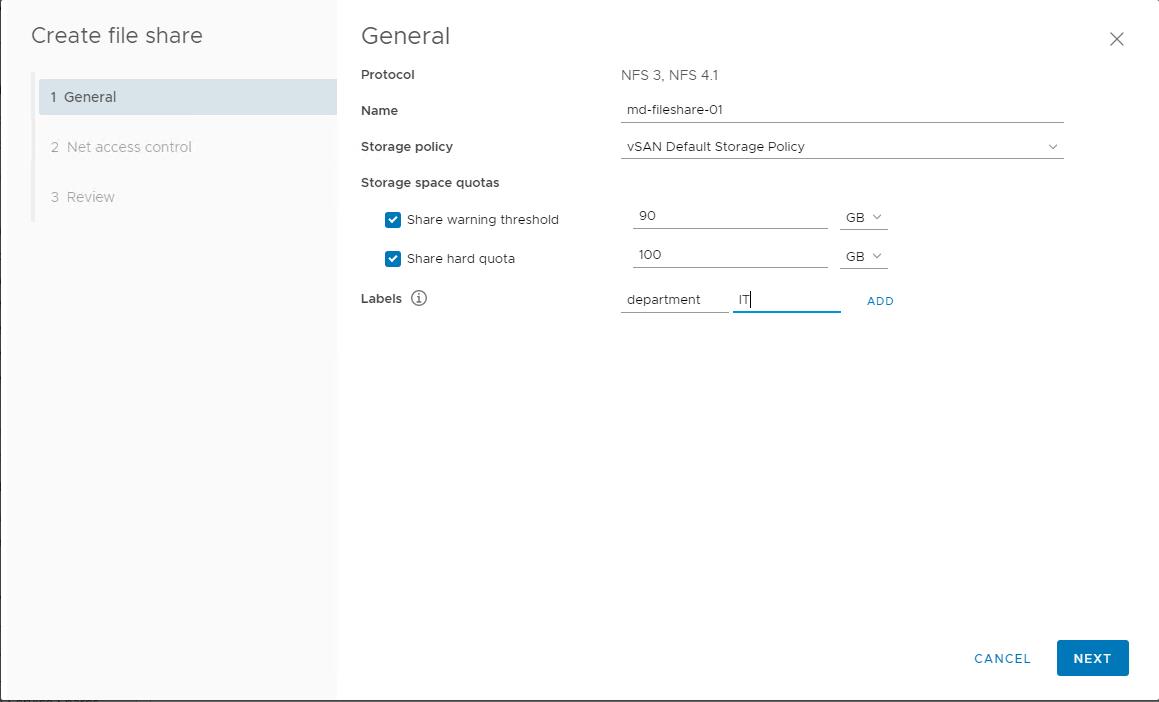
In the General page, enter the following information and click Next.
- Protocol: vSAN 7.0 supports NFSv3 and NFSv4.1 by default.
- Name: Enter the name for the vSAN file share
- Storage Policy: Select vSAN Default Storage Policy or other vSAN storage policies created for file shares.
- Share warning threshold: When the share reaches this threshold, a warning message is displayed.
- Share hard quota: This is the maximum size limit of the share. When the share reaches this threshold, new block allocation is denied.
- Labels: A label is a key-value pair that helps you organize file shares. You can attach labels to each file share and then filter them based on their labels.
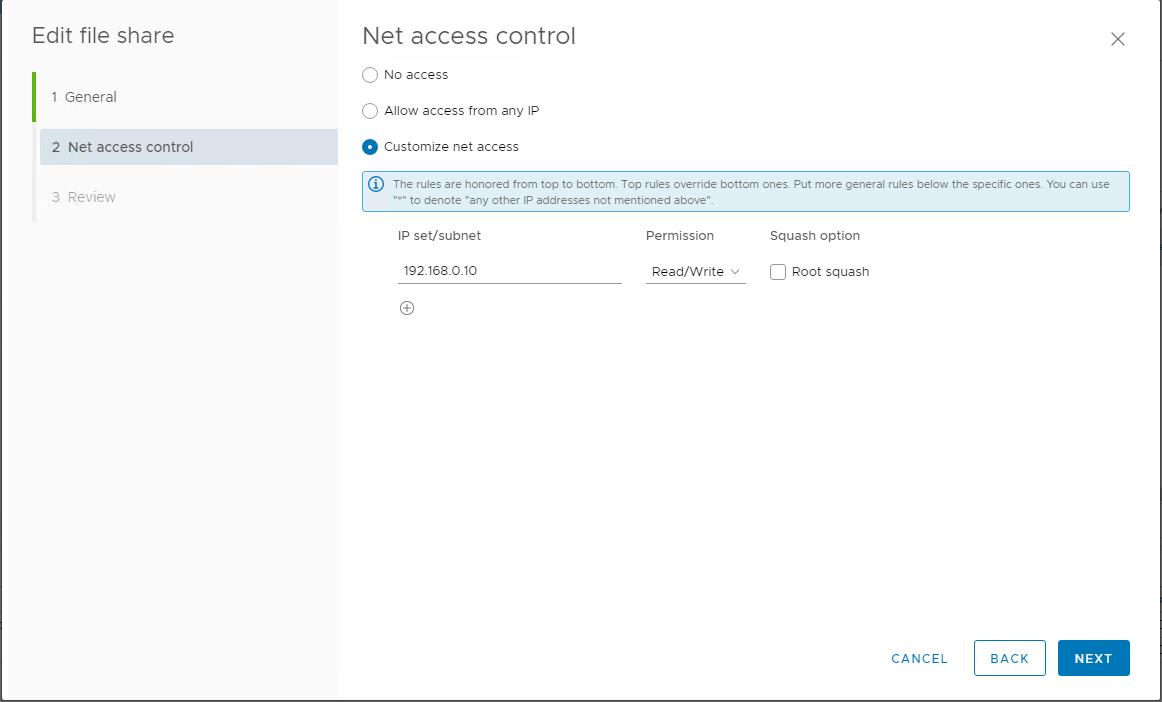
In the Net access control page, provides options to define access to the file share. Select one of the following options and click Next.
- No access: This option makes the file share inaccessible from any IP address.
- Allow access from any IP: This option allows the file share accessible from all IP addresses.
- Customize net access: Select this option to define permissions for specific IP address, range of IP address, or entire IP subnet. You can also select the permission like Read\Write, only Read from the drop-down.
In the Review page, review the settings provided, and then click Finish.

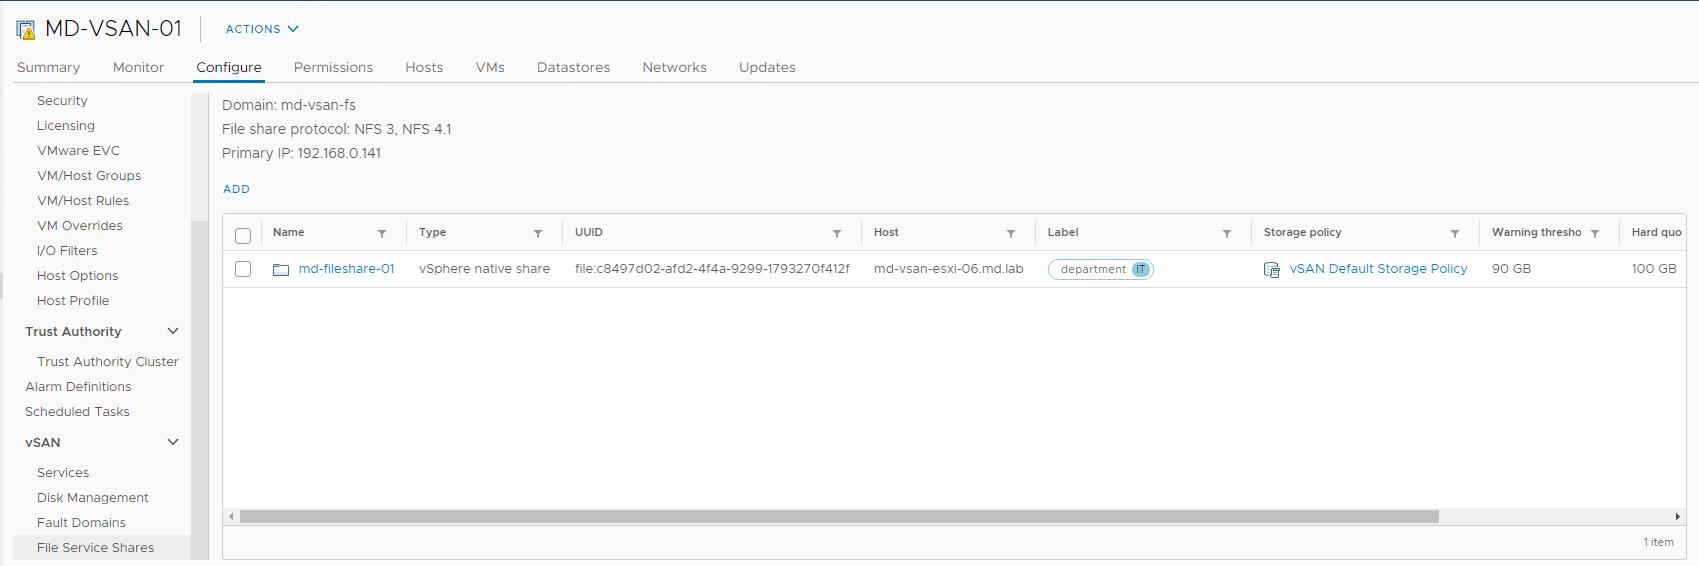
How to view vSAN file shares?
To view the list of vSAN file shares, navigate to the vSAN cluster and click Configure > vSAN > File Service Shares. You can view the information of the file share such as file share name, storage policy, hard quota, warning threshold, label, actual usage, and so on.
How to access vSAN file share?
Accessing the vSAN file share from the client machine is the same as accessing any other NFS shares. You can access a file share from a host client, using an operating system that communicates with NFS file systems.
Before mounting the vSAN file share in the operating system, We can get the connection string that should be used to mount this file share. Select the NFS3 or NFS 4.1. The connection string will be different based on the NFS version.
Select the File Share -> Click on NFS 4.1 -> Copy URL
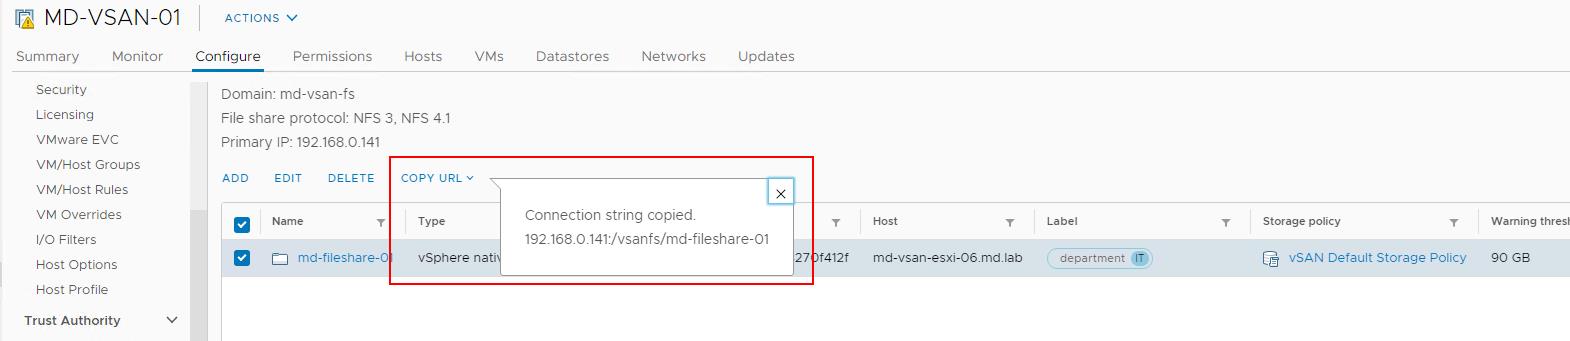
Select the File Share -> Click on NFS 3 -> Copy URL

I am going to mount this file share in one of my Photo OS machine. For the lab, I am testing the file share mounted to my vCenter server appliance (Photon OS). Which supports NFS 4.1.
First, I created the local directory called “file-share01” using mkdir command. Run the below command to mount the file share “md-fileshare-01” into the photon OS.
mount <copied connection string> /local-directory

mount 192.168.0.141:/vsanfs/md-fileshare-01 /file-share01

That’s it. we have successfully created the vSAN file share and also mount the file share to the client. I hope this article is informative for you. Thanks for Reading!!!. Be social and share it with social media, if you feel worth sharing it.