

NSX-T Edge provides computational power to deliver IP routing and services. NSX Edge is an important part of the NSX-T Data Center transport zone. NSX-T Edge nodes provide the administrative background and computational power for dynamic routing and services. Edge nodes are appliances with pools of capacity that can host distributed routing and nondistributed services. NSX Edge nodes provide high availability, using active-active and active-standby models for resiliency. NSX Edge is commonly deployed in DMZs and multitenant cloud environments, where it creates virtual boundaries for each tenant and multitenant cloud environments, where it creates virtual boundaries for each tenant.
NSX-T Edge hosts gateways offering various network services such as NAT, load balancing and so on. Edge also offers DPDK-based VM or bare metal form factors for high performance.
NSX-T Edge can be deployed as VM on ESXi host or even deployed as Bare Metal on the hardware. You can deploy the Edge VM directly from NSX-T Manager UI or deploy as a virtual machine using the OVF file from vCenter Server and then register it to the NSX-T Manager manually from the command line.
In this, article, we will look at the procedure to deploy NSX-T Edge VM from the NSX-T Manager UI Which will automatically deploy VM into ESXi host and registers it with NSX-T Manager UI.
Deploy NSX-T Edge from NSX-T Manager UI
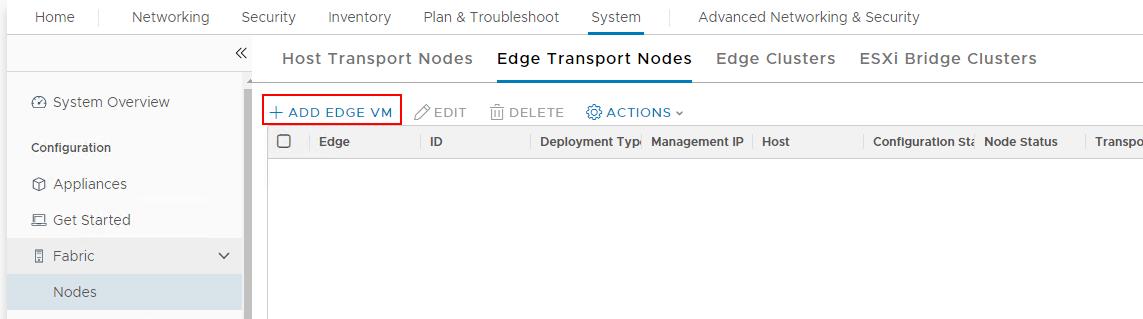
To deploy NSX-T Edge, log in to NSX-T Manager with admin credentials. Click -> System -> Nodes -> Edge Transport Nodes -> ADD EDGE VM
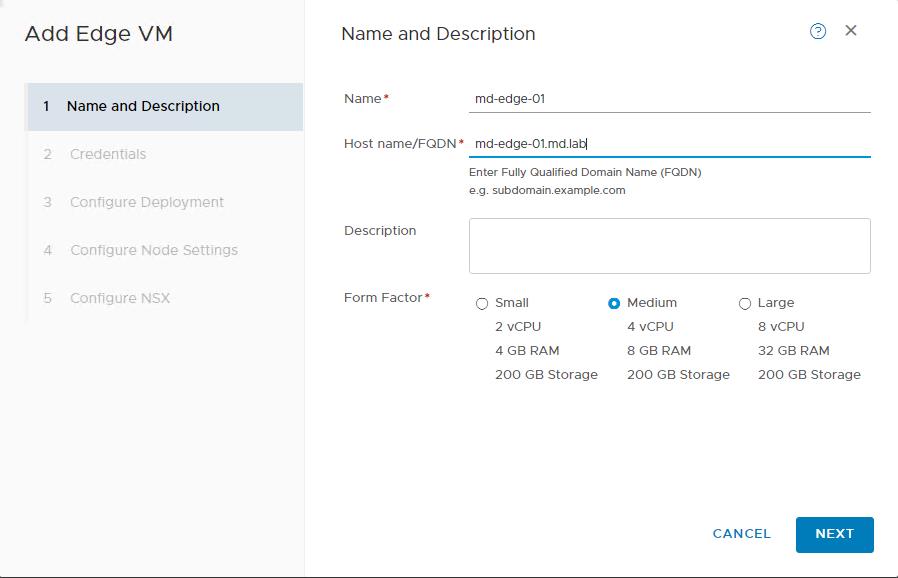
Enter the Name, FQDN, description and Form Factor for the Edge VM. Click Next.
For NSX Edge node VM deployment, the small appliance is for proof-of-concept deployments. The medium size is suitable for a typical production environment and can support up to 64 hypervisors. The large size is for large-scale deployments with more than 64 hypervisors. You can only deploy small and large VM form factors from the vSphere OVF deployment user interface.
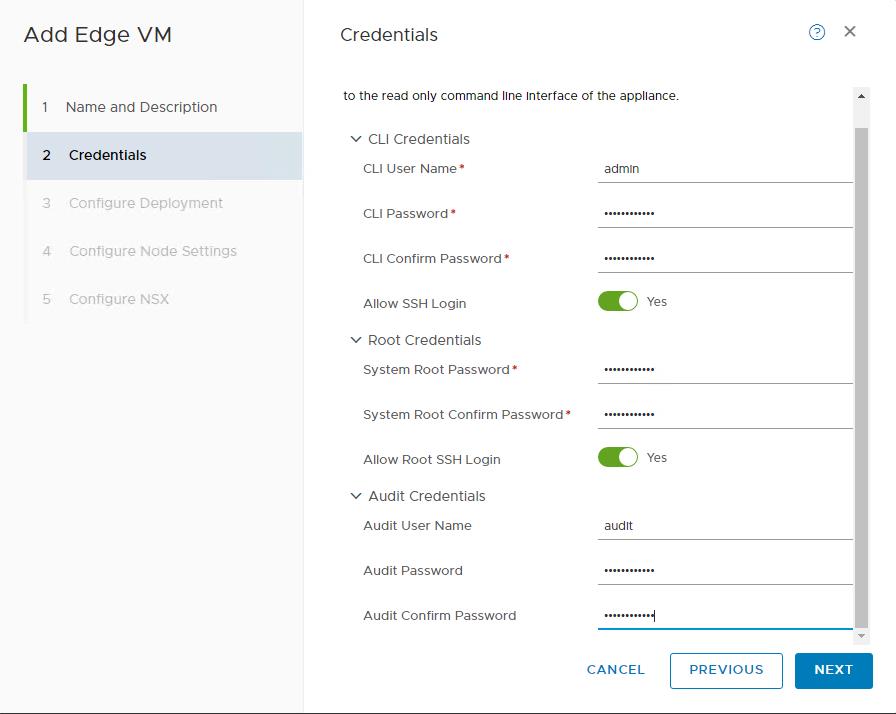
Enter the password for “admin”, “Root”, and “Audit” user account. Click Next.
Select the Compute Manager (vCenter Server), Cluster, Host, and Datastore to deploy the NSX-T Edge VM, Click Next.

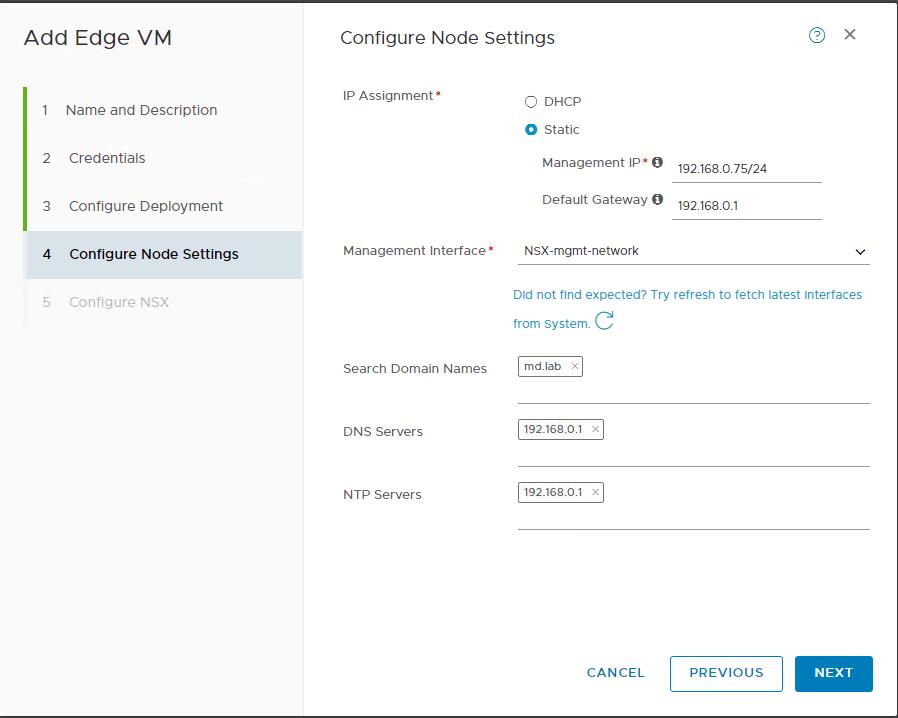
Select “Static” in the IP Assignment. Enter the Management IP, Default gateway and select the Portgroup for the NSX-T Edge Management gateway. Specify the Domain Names, DNS and NTP Servers. Click Next.
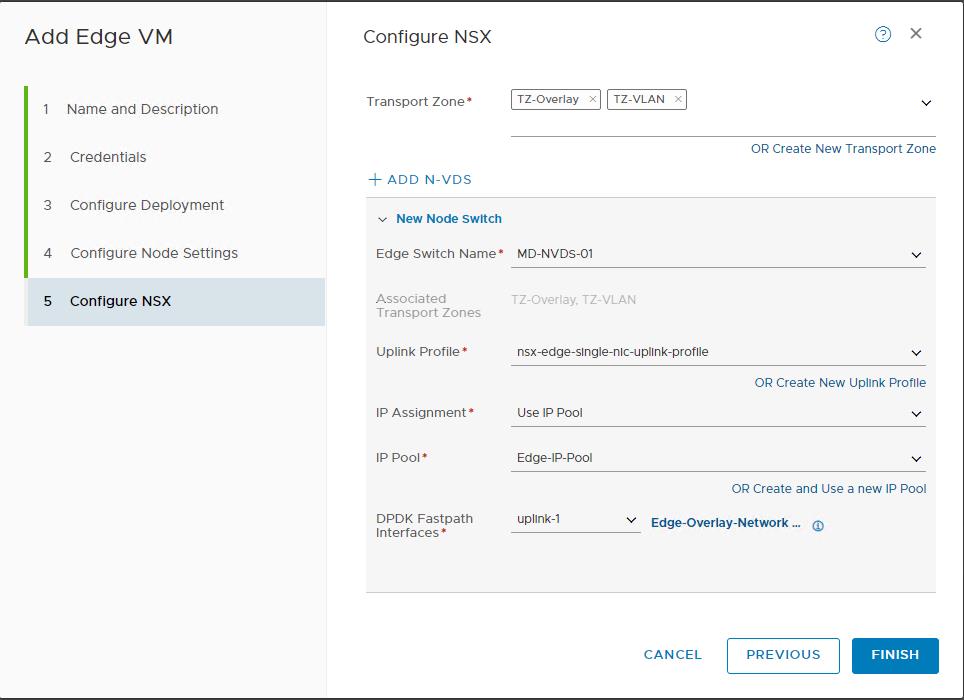
In the Configure NSX Page, Select the Transport Zones. I have selected both the Overlay and VLAN transport zone. Select the N-VDS from the drop-down menu, uplink profile, IP Pool for the IP Assignment, DPDK fast-path interface. Click Finish to start the NSX-T Edge VM deployment.
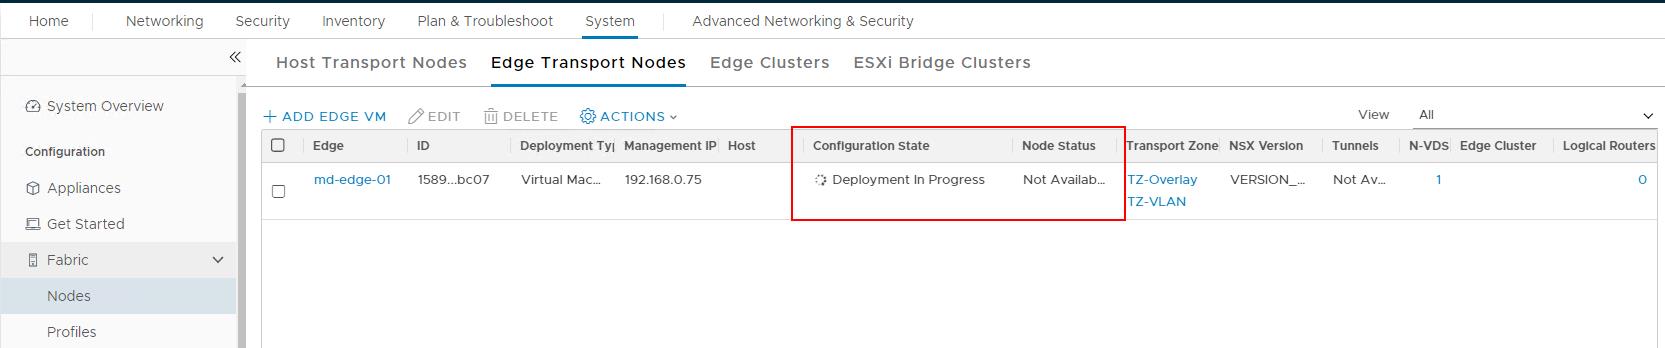
You can notice the vCenter Server. NSX-T Manager will initiate the task “Deploy OVF Template” to deploy the Edge VM in the vCenter Server. You can also notice the deployment under “Edge Transport nodes”. You could see “Deployment in Progress” under the Configuration state.
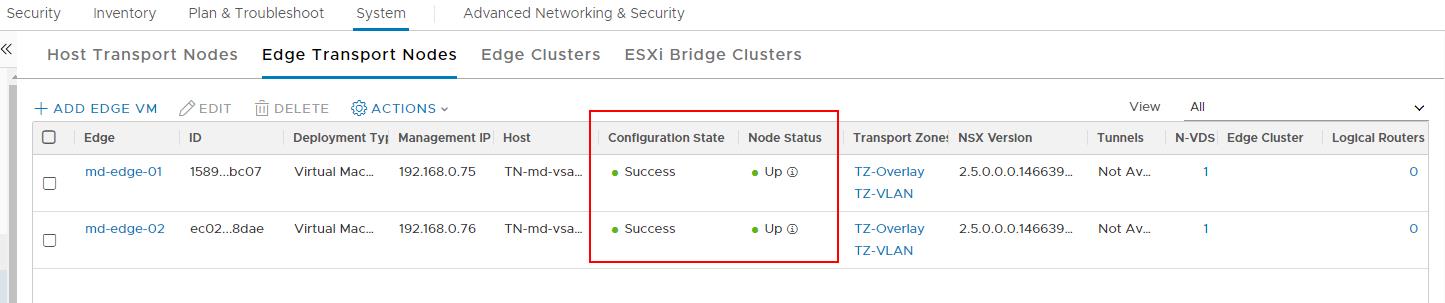
Only the NSX-T Edge VM deployment and configuration is done. You will see the status “Success” in the configuration state and “Up” in the Node status.

For NSX-T Edge high availability, you can deploy multiple NSX-T Edge nodes to form an NSX-T edge cluster. A maximum of 10 edge nodes is supported in the NSX-T Edge cluster. I have deployed an additional NSX-T edge node called “md-edge-02”.
That’s it. we have deployed the NSX-T Edge nodes. In the upcoming article, I will explain how to create an NSX-T Edge cluster using the deployed NSX-T Edge Node. I hope this article is informative for you. Thanks for Reading!!!. Be social and share it in social media, if you feel worth sharing it.