

As we discussed in the vSphere 7 Pre-upgrade tasks, It is very important to follow the Update sequence of vSphere 7 and other VMware products. Before we upgrade our VC to vCenter Server 7.0, VMware NSX-T needs to be upgraded to NSX-T 3.0 as per the update sequence. We will discuss in detail about how to Upgrade NSX-T to NSX-T 3.0 in this article. if you are not using the NSX-T in your infrastructure, you can proceed to upgrade the vCenter server 7.0.
NSX-T upgrade is a completely guided upgrade method with pre-checks included for all the components such as NSX-T edge, hosts and NSX-T managers. In the NSX-T upgrade process, the first step is to update the upgrade coordinator to initiate the upgrade process.
The upgrade coordinator runs in the NSX Manager. It is a self-contained web application that orchestrates the upgrade process of hosts, NSX Edge cluster, NSX Controller cluster, and Management plane. The upgrade coordinator guides you through the proper upgrade sequence. You can track the upgrade process and if necessary you can pause and resume the upgrade process from the user interface.
The upgrade coordinator allows you to upgrade groups in a serial or parallel order. It also provides the option of upgrading the upgrade units within that group in a serial or parallel order.
Upgrade NSX-T 2.5.x to NSX-T 3.0
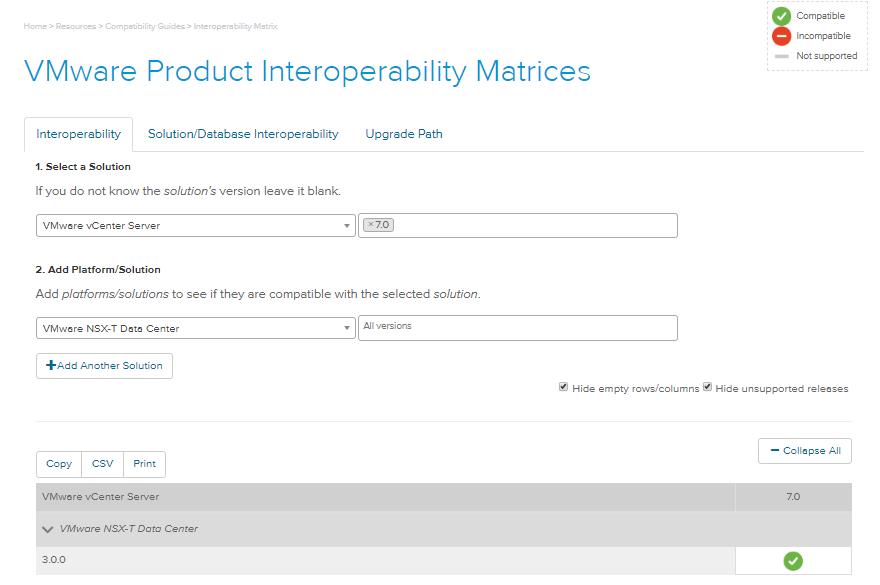
Before upgrading NSX-T to NSX-T 3.0, Validate the Product Interoperability with vCenter Server 7.0.
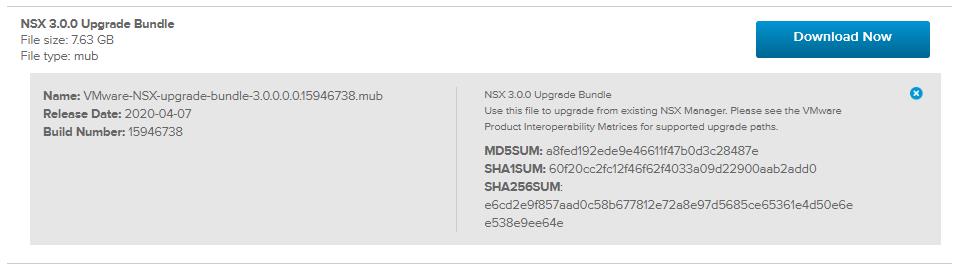
Download the NSX-T 3.0.0 Upgrade bundle from the VMware Website. NSX-T 3.0 Upgrade bundle will be in .mub format.
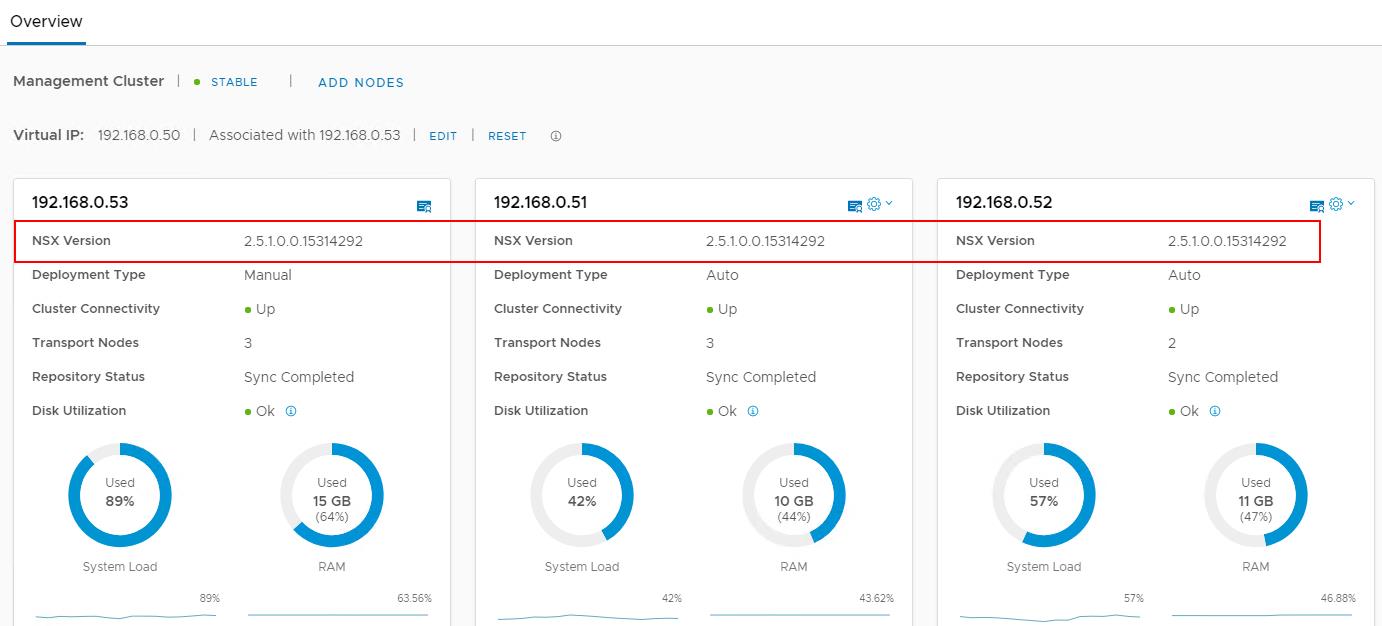
Validate the Current NSX-T environment health. I am running three nodes NSX-T Manager Management cluster with virtual IP configured. I am currently running NSX-T 2.5.1.
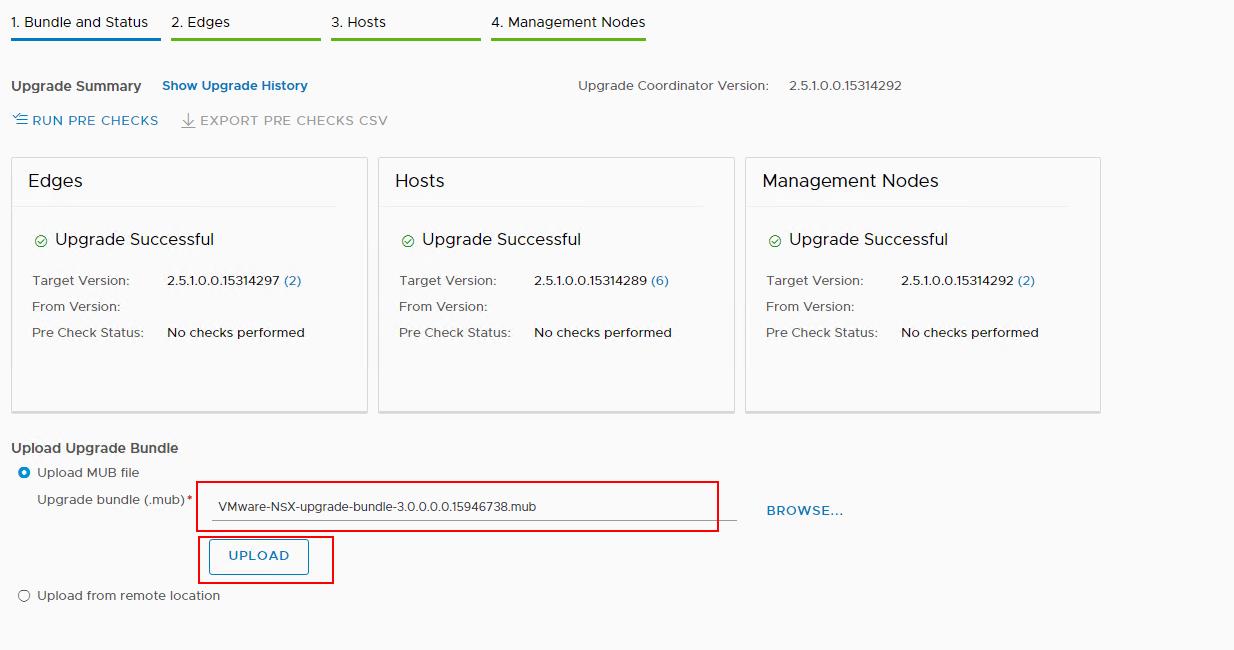
1.Upload NSX-T Upgrade bundle
Ensure that you do not use any type of NSX-T Virtual IP address to upgrade NSX-T Data Center. From your browser, log in as a local admin user to an NSX Manager at https://nsx-manager-ip-address/login.jsp?local=true.
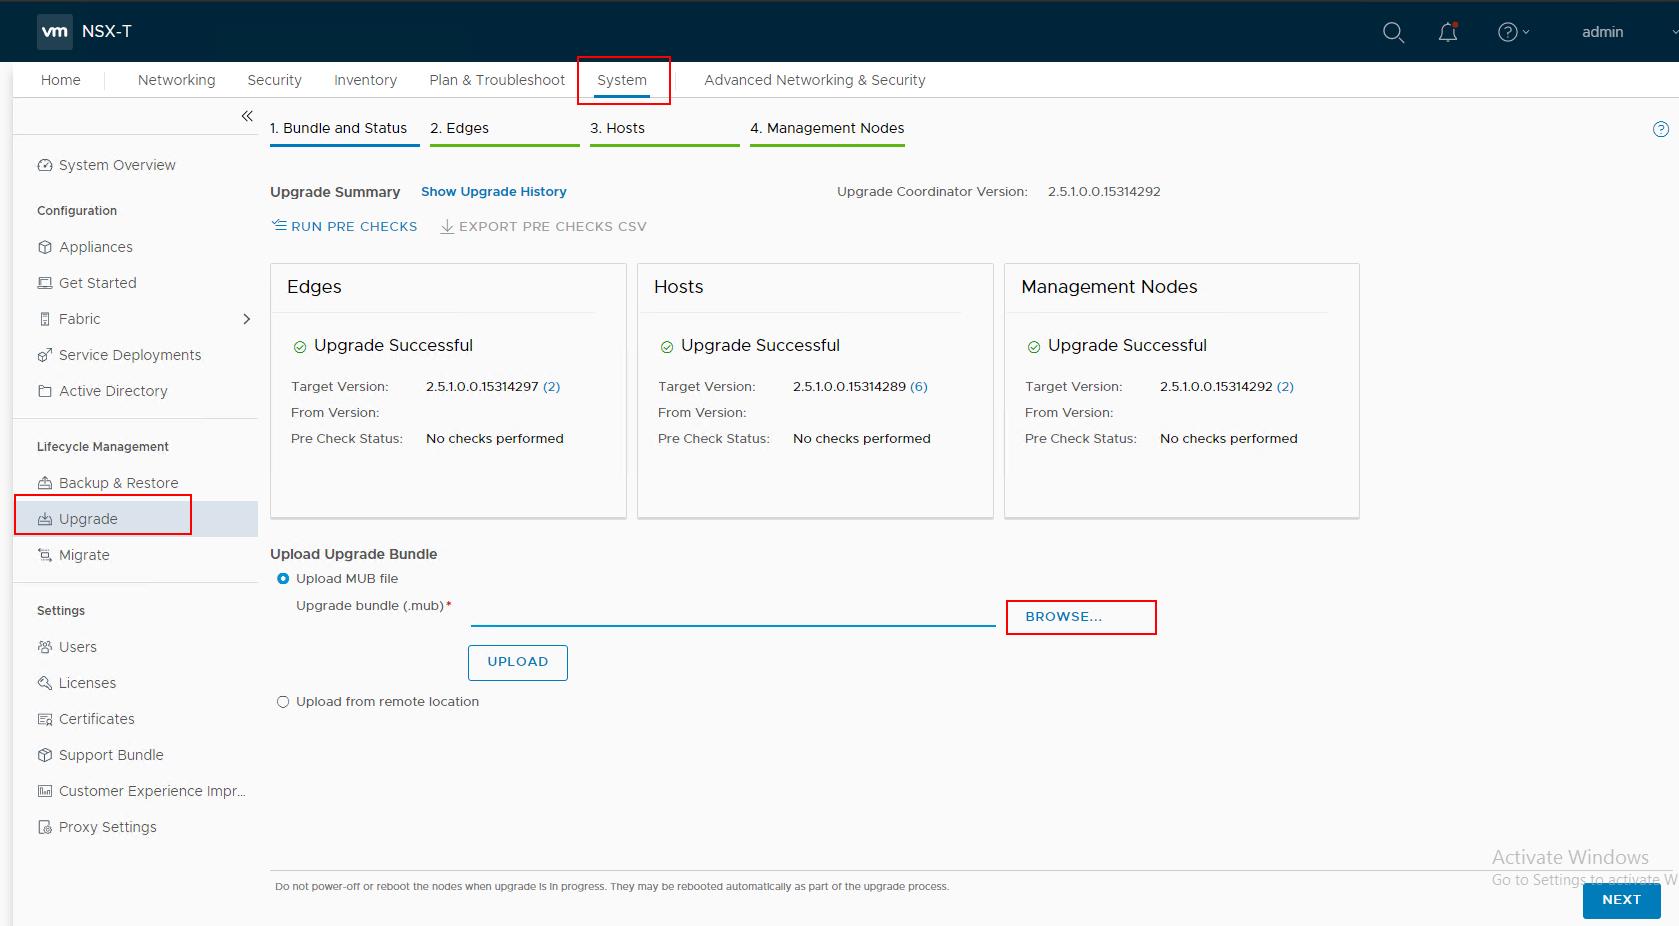
Select from the navigation panel. In the Upload Upgrade Bundle option -> Select Upload MUB file -> Click Browse
Select the downloaded NSX-T 3.0 upgrade bundle Mub file and click Upload
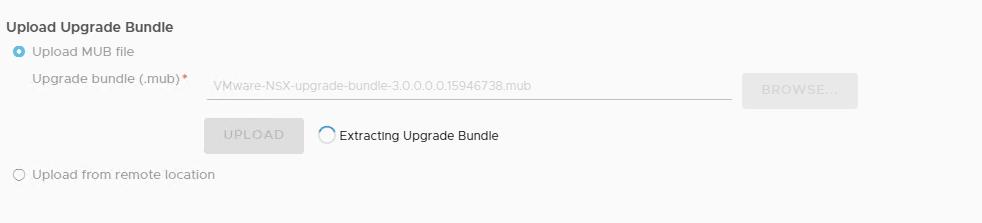
It will take a few minutes to upload and extract the NSX-T upgrade bundle.
2. Upgrade NSX-T Upgrade Coordinator
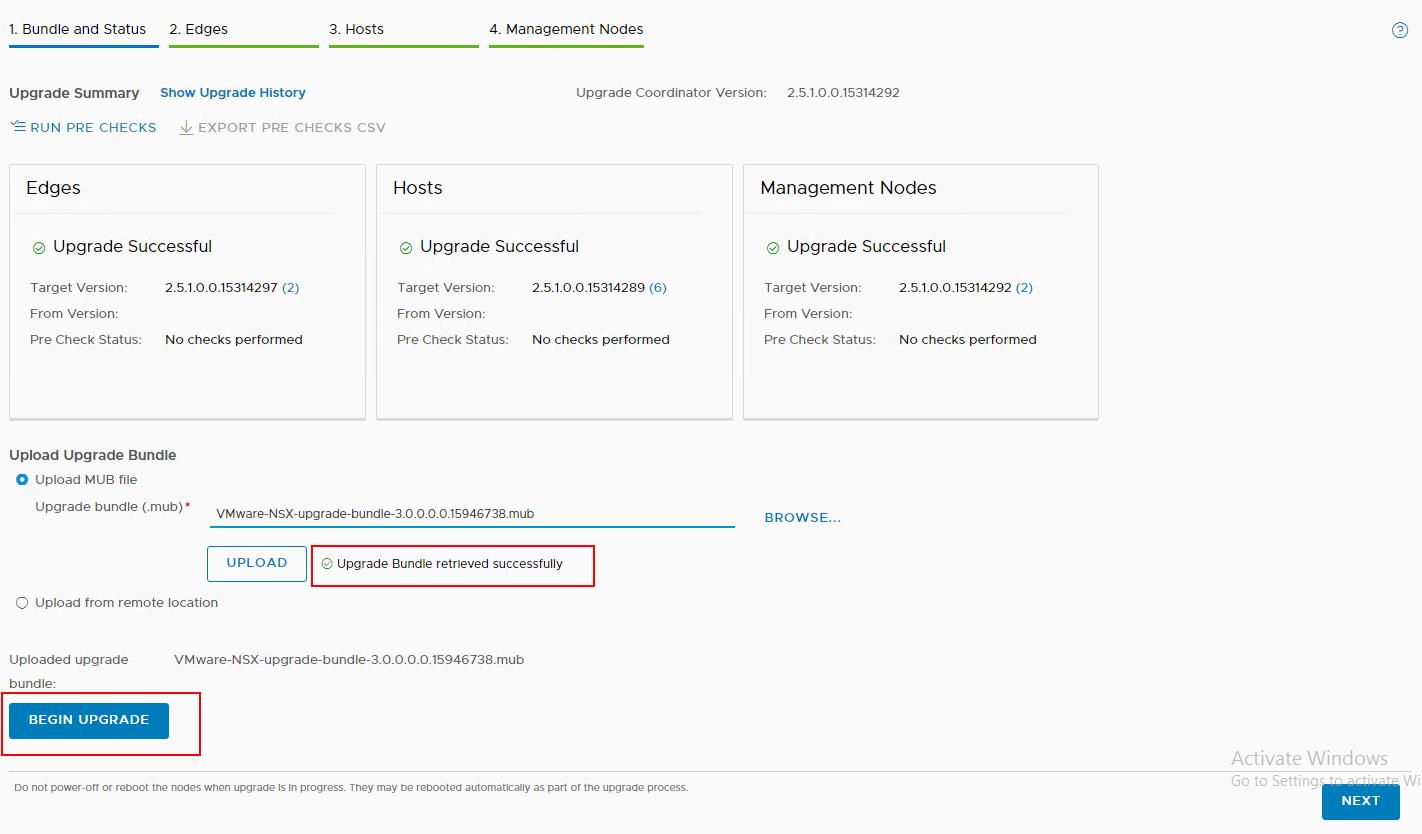
Once the uploaded Upgrade bundle is retrieved successfully, Click Begin Upgrade
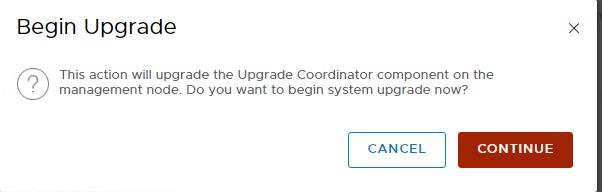
Click Continue to upgrade the upgrade coordinator component on the management node.
 Read and accept the EULA terms. Accept the notification to upgrade the upgrade coordinator.
3. Run NSX-T Upgrade Pre Checks
Once the Upgrade Coordinator is upgraded, Click Run Pre Checks to verify that all the NSX-T Data Center components are ready for the upgrade.
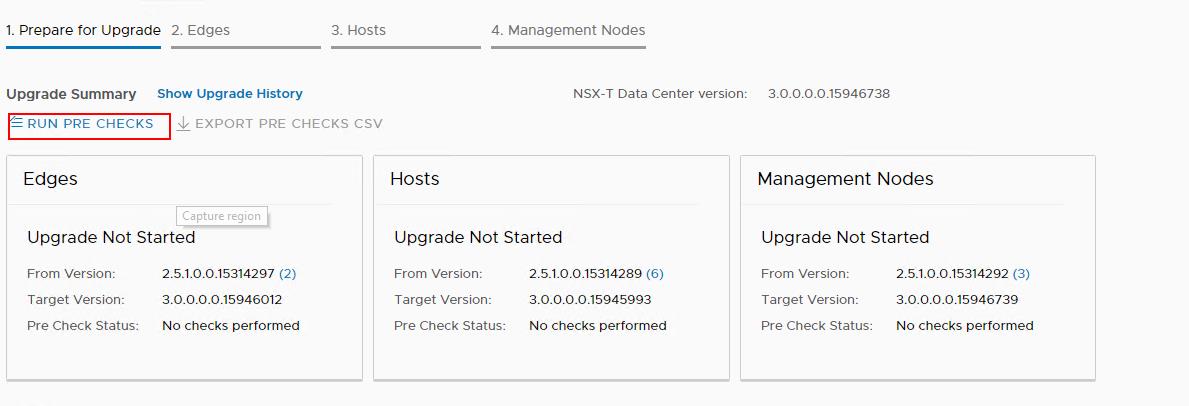
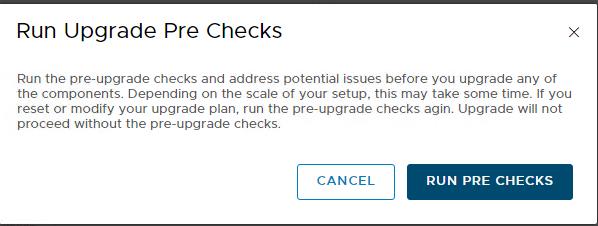
Click Run Pre Checks to start the Pre Checks. This will list the potential issues before you upgrade any of the NSX-T components.
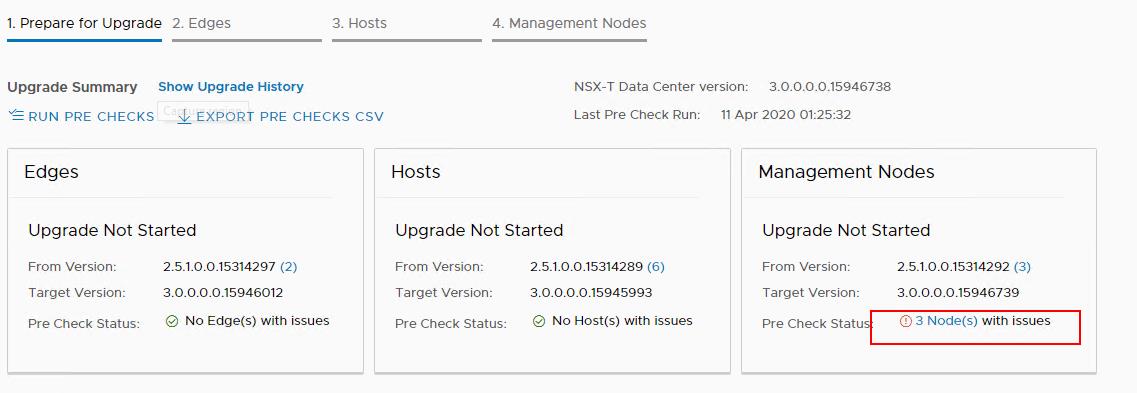
Pre-Checks it completed. Ensure that all the NSX-T components are listed with no issues (Green Tick Mark). If it throws any issues. Click on the Red information mark to review the errors for the respective components.
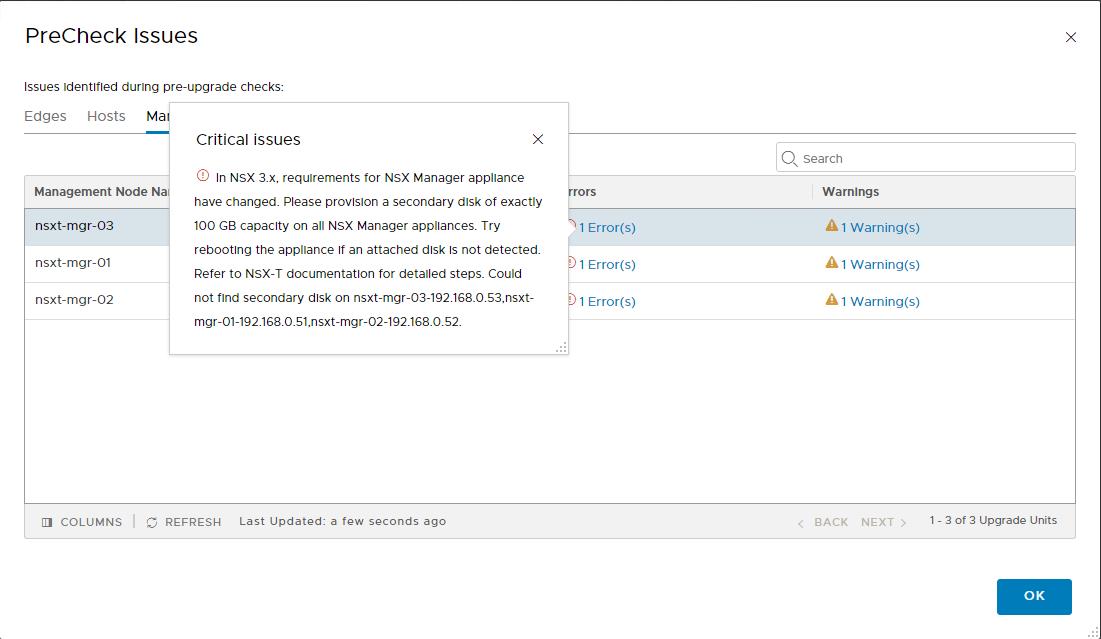
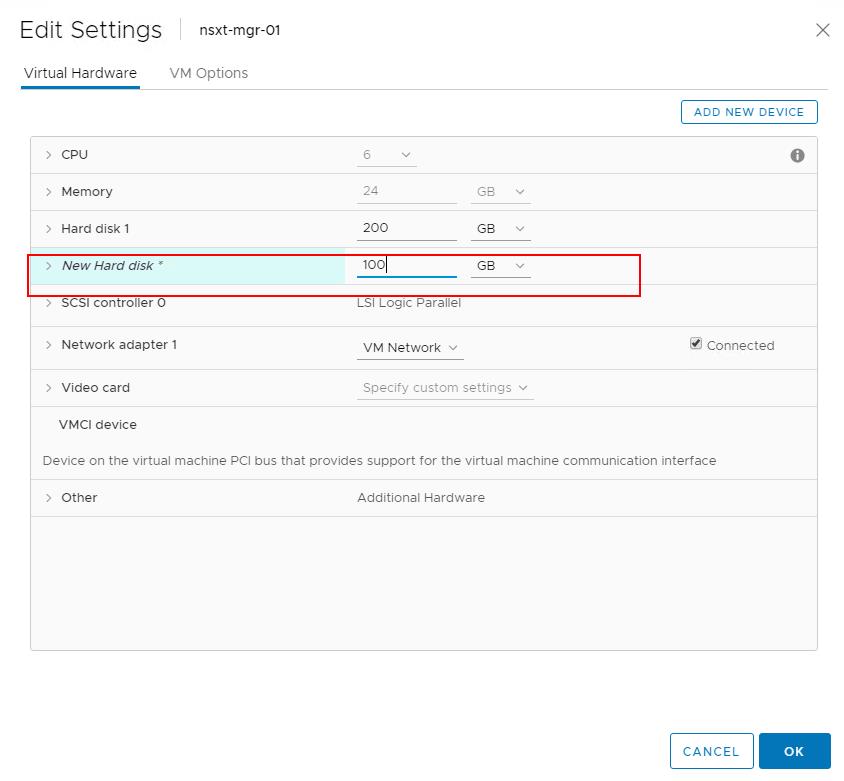
Error is related to NSX-T 3.0 requirements. It stated that “In NSX 3.x, requirements for NSX Manager appliance have changed. Please provision a secondary disk of exactly 100 GB capacity on all NSX Manager appliances. Try rebooting the appliance if an attached disk is not detected.”
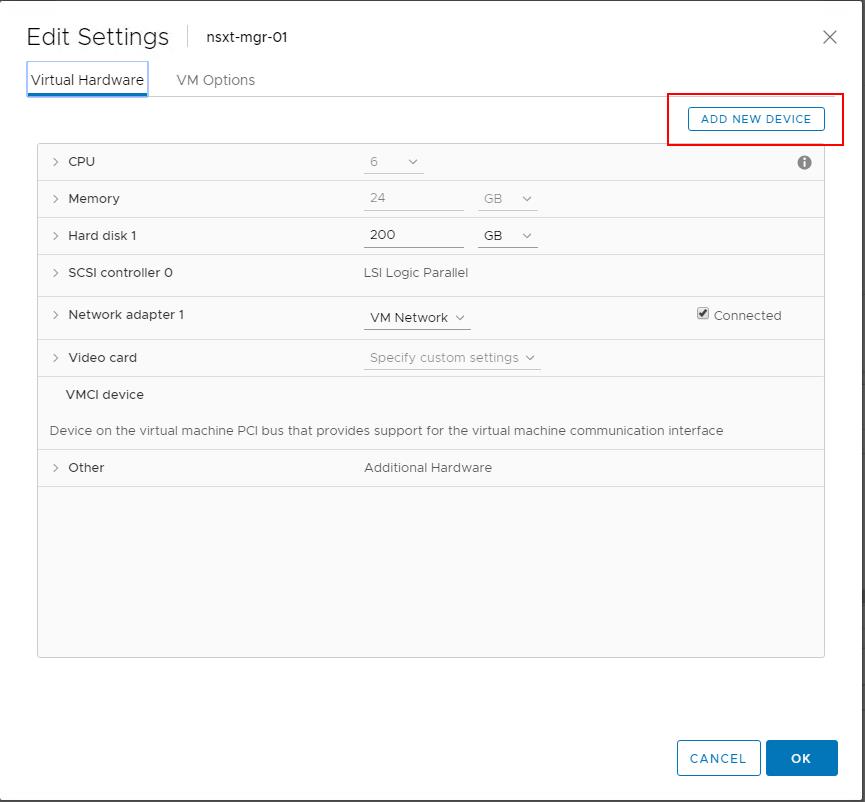
Log in to the vCenter server where the NSX-T manager VM’s are running. Right-click the VM -> edit settings -> Add New Device -> Select New Hard disk
Specify the size of 100 GB for the newly added secondary harddisk. Click OK. Repeat the same steps for all the three NSX-T Manager nodes.
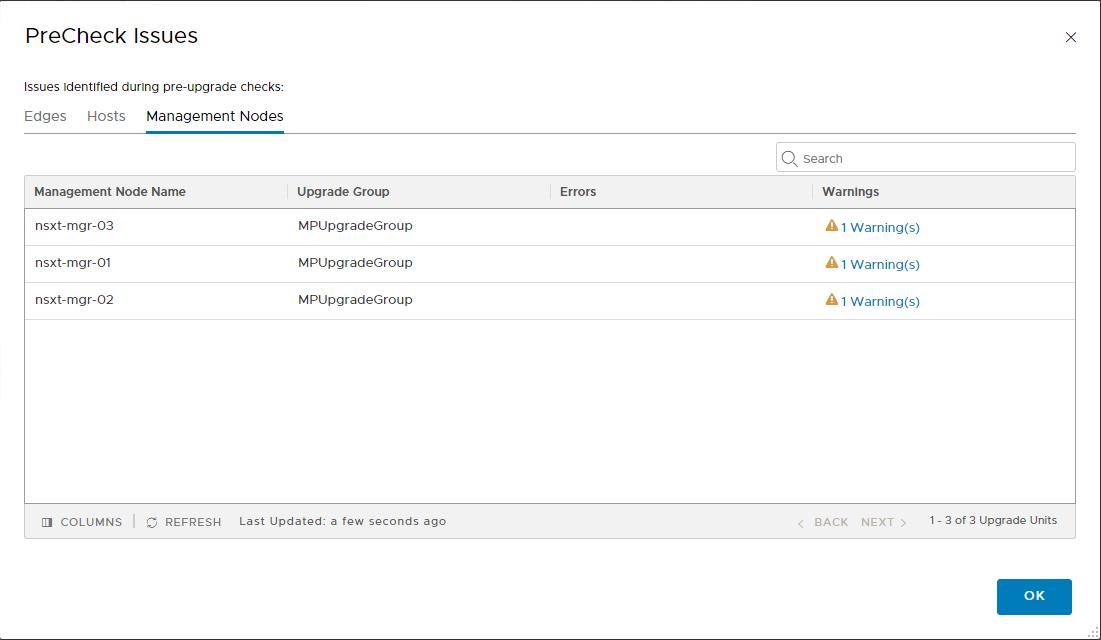
Re-run the Pre-checks after adding the additional disk of 100 GB on the NSX-T Managers. No errors are reported. It only lists 1 Warning.
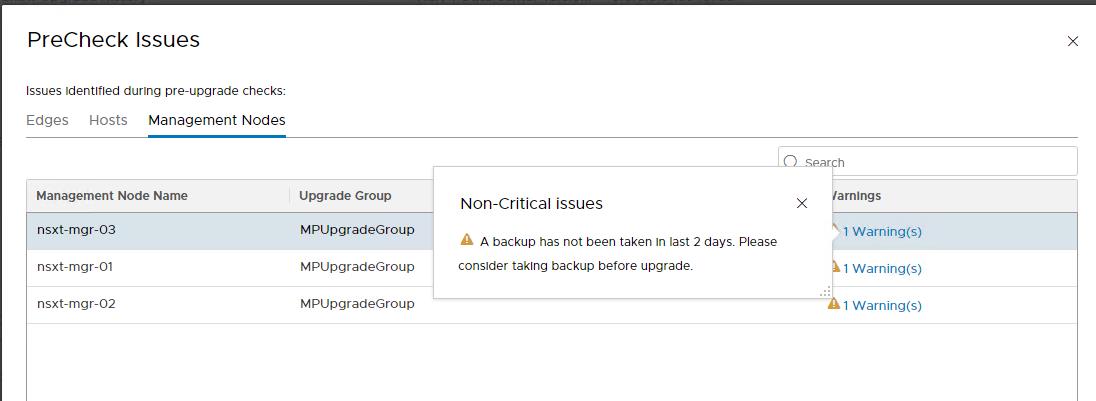
Warning is for the Backup has been taken for NSX-T manager in the last 2 days. Please consider taking the backup before the NSX-T Manager upgrade. Take a look at my article how to configure NSX-T Manager backup
Click Next to start the NSX-T Edge cluster Upgrade.
4.Upgrade NSX-T Edge Cluster
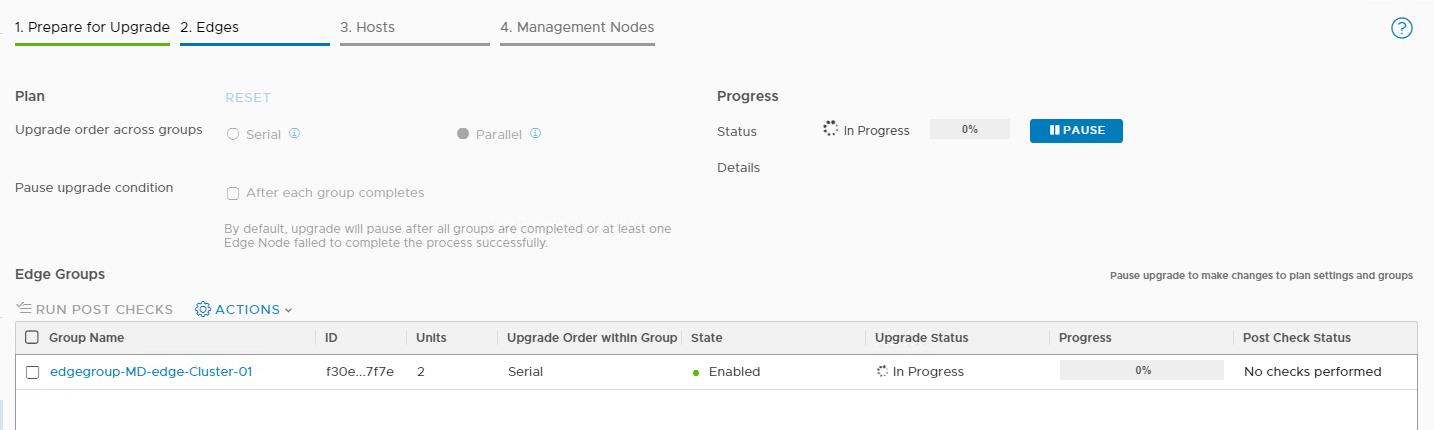
Edge upgrade unit groups consist of NSX Edge nodes that are part of the same NSX-T Edge cluster. You can reorder Edge upgrade unit groups and enable or disable an Edge upgrade unit group from the upgrade sequence. Click on Start to start the Upgrade on the NSX-T edge clusters.

When the Upgrade is started, you can see the status as “In Progress”
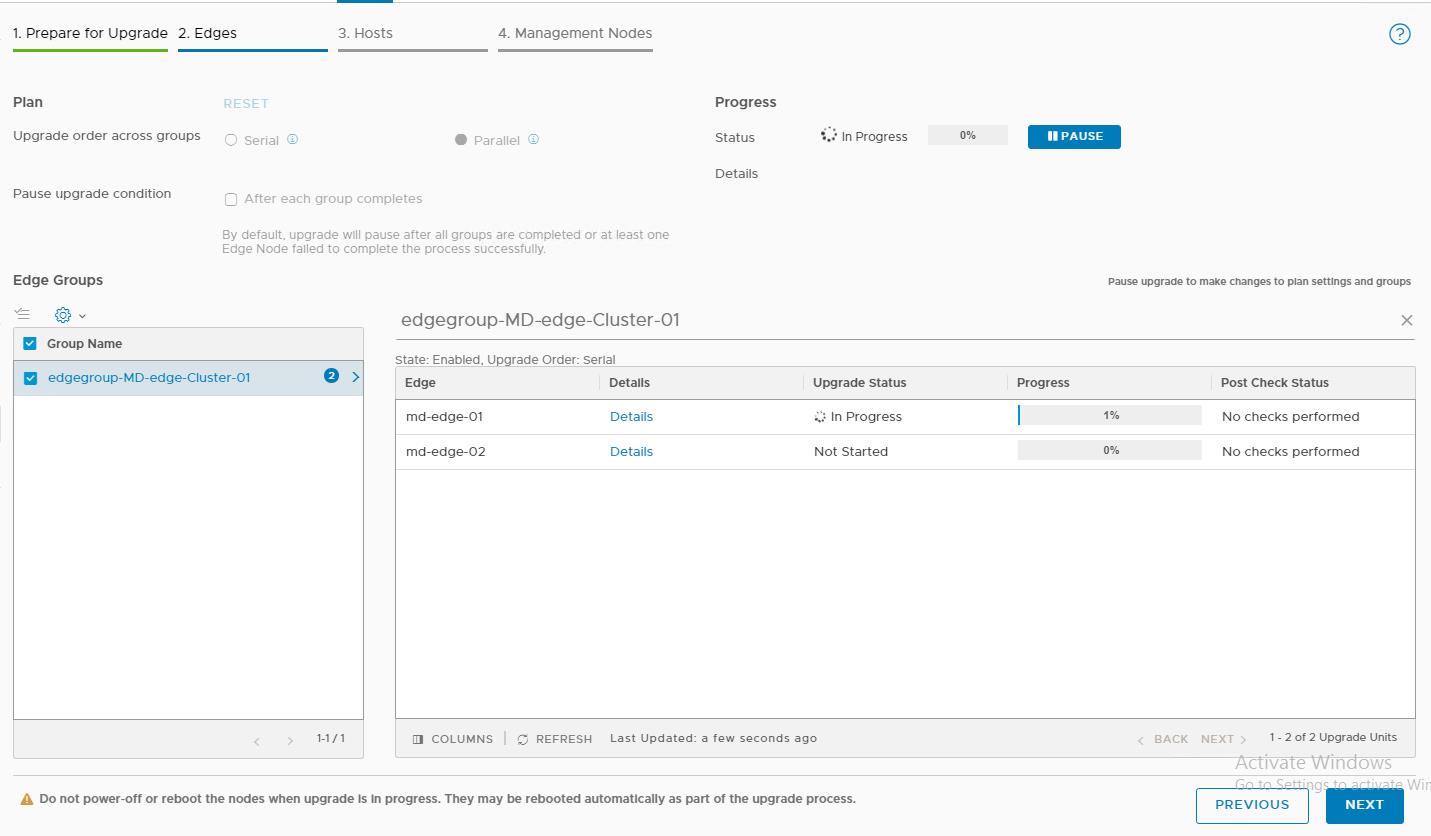
When you click on the Edge cluster group, you can see the detailed status of the edge nodes under the group. The NSX Edge nodes are upgraded in the serial mode so that when the upgrading node is down, the other nodes in the NSX Edge cluster remain active to continuously forward traffic.
In my case, Upgrade on the “md-edge-01” is started first to ensure the availability on the edge cluster.
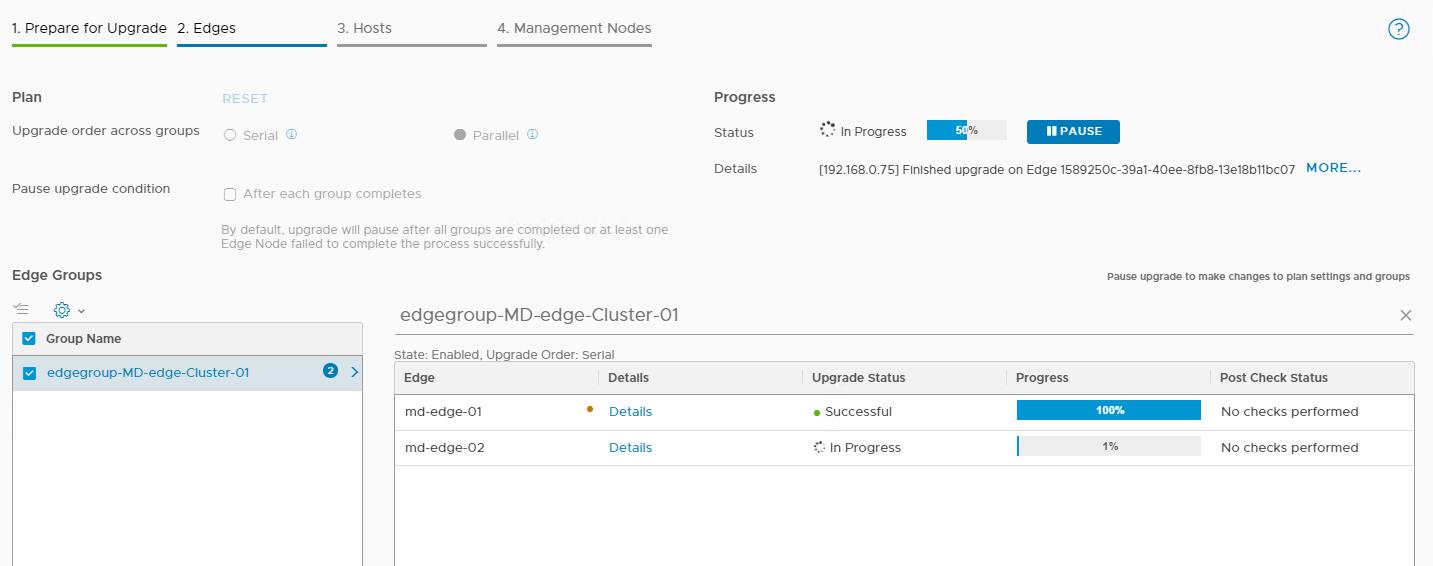
Once the first edge node “md-edge-01” is upgraded successfully. It will start the upgrade on the second edge node. You can click on “More” under the progress option to see the detailed information of all the activities performed during the upgrade.
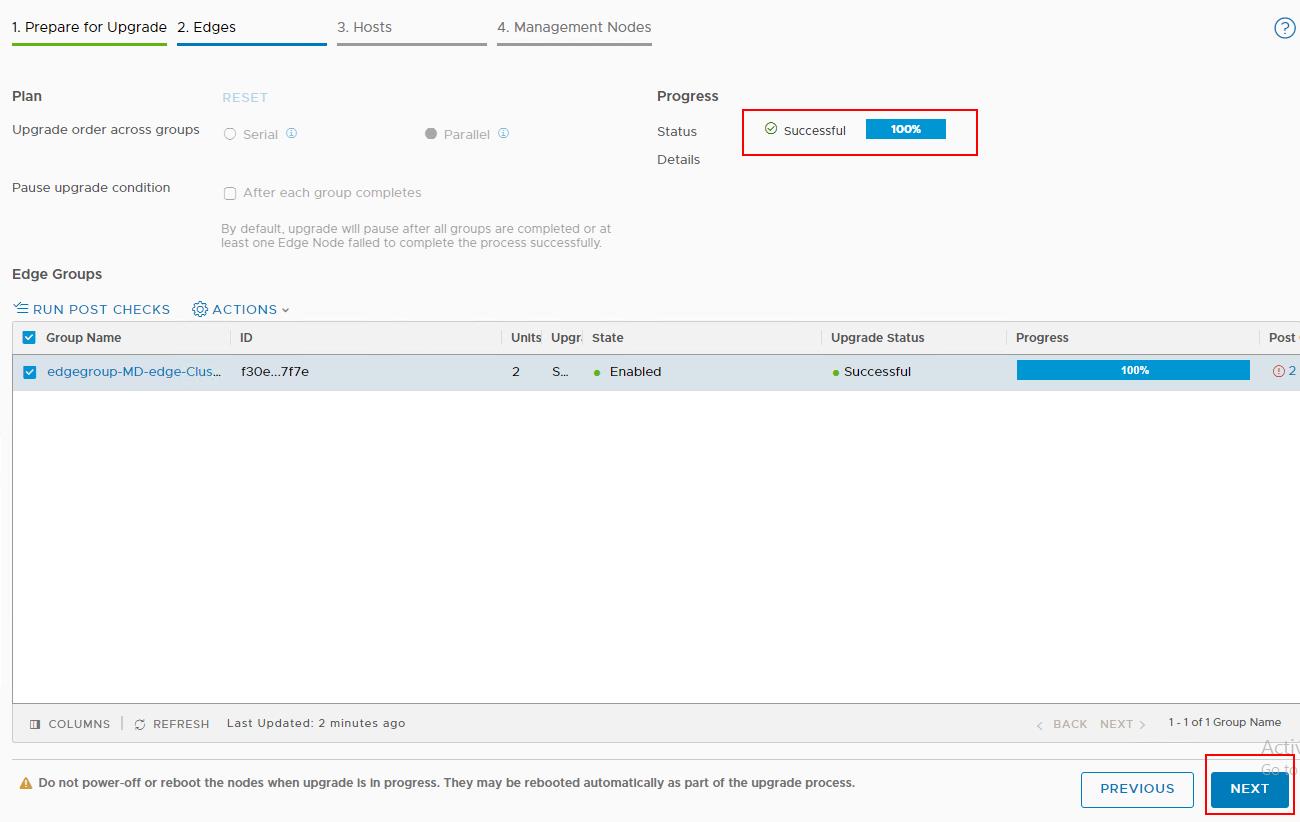
Once the Edge cluster upgrade is completed, it will show the status as “Succesful 100%”. You can also run the post-upgrade checks to validate that all the edge nodes are healthy after the upgrade by clicking on “RUN POST CHECKS”. Click Next to continue with the Host upgrades.
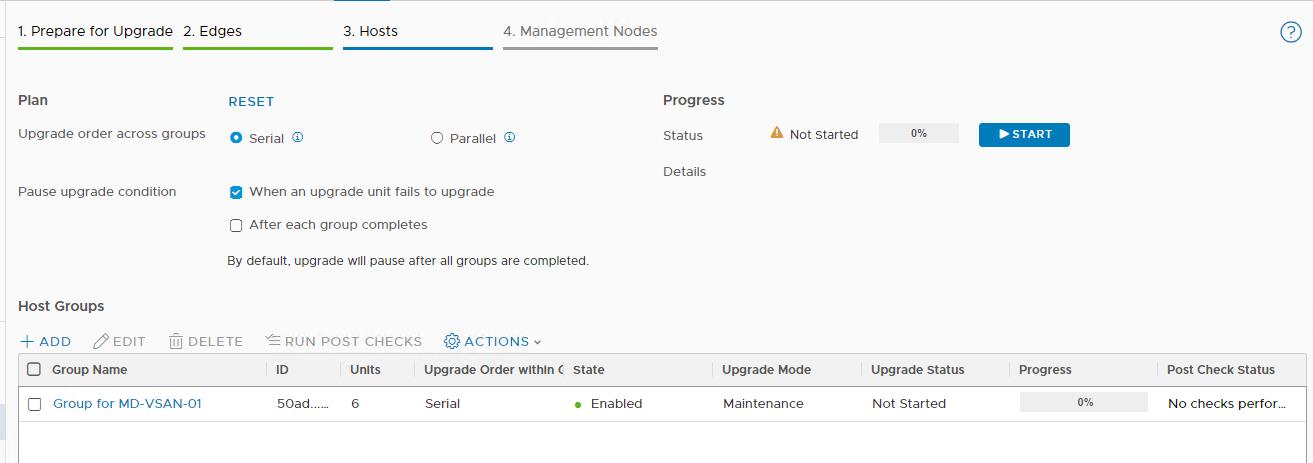
5.Upgrade ESXi Hosts
This process will upgrade the NSX-T VIBs on the ESXi host which are part of the NSX-T enabled cluster. For ESXi host, for an in-place upgrade you do not need to power off the VMs running on the ESXi host. For ESXi hosts that are part of a fully enabled DRS cluster, if the host is not in maintenance mode, the upgrade coordinator requests the host to be put in maintenance mode. vSphere DRS migrates the VMs to another host in the same cluster during the upgrade and places the host in maintenance mode. we don’t need to perform any of the tasks manually.
I have only one cluster as part of my vCenter. If you have multiple clusters, We can again determine if we want to upgrade the groups (clusters in this case) in parallel or serially. My ESXi cluster ” MD-VSAN-01″ consists of six hosts. This process will perform the upgrade on the hosts one by one by migrating off the VM’s from the host and placing the host into maintenance mode. Once the Upgrade is completed on the host, it will exit the host from maintenance mode, then proceed the same process on the other hosts in the cluster. Reboot of the ESXi is not needed for this host upgrade.
Click Start to start the Upgrade on the Hosts.
Click on the Group name to see the detailed status of the host upgrade. We can the upgrade status of each of the hosts. It will upgrade hosts one by one in the cluster.
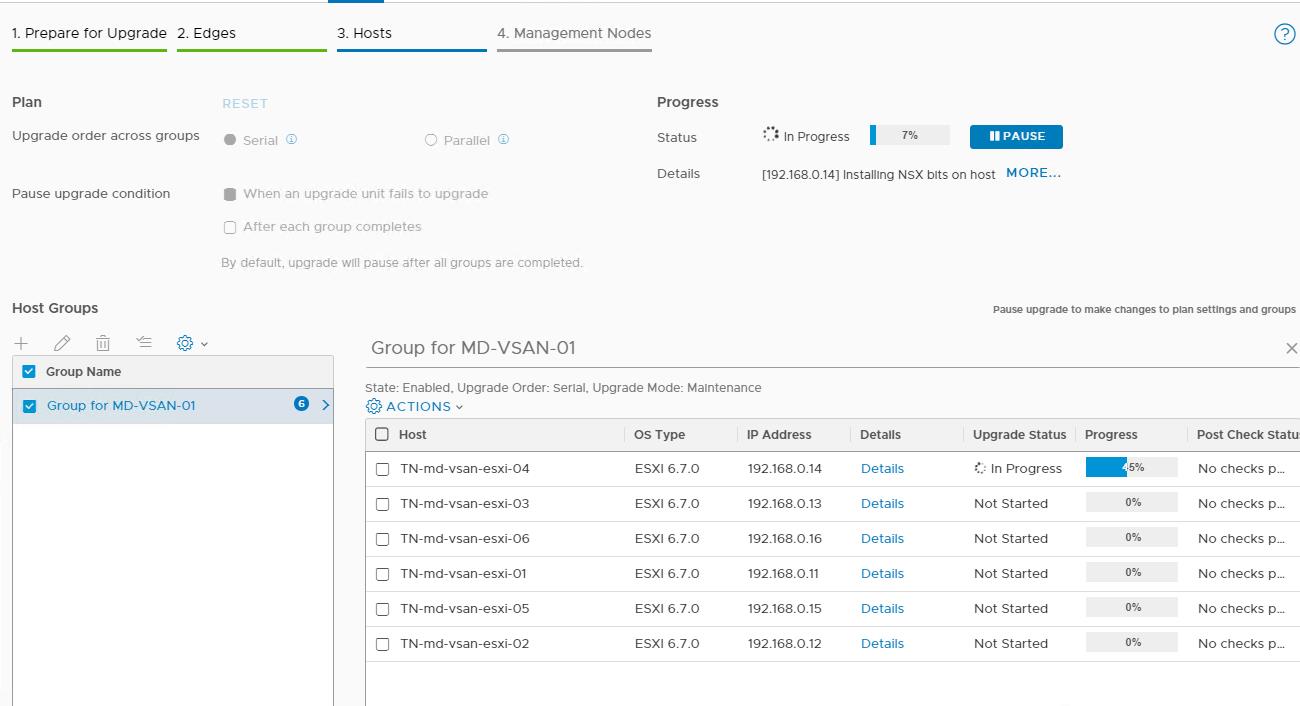
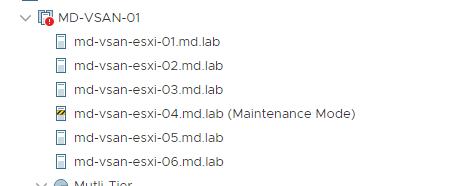
In the vCenter Server, you can notice the host “esxi-04” went into maintenance mode and NSX-T upgrade coordinator upgrading the NSX-T bits on the host and exit from maintenance mode, once it is done.
Once the host upgrade is completed on all the ESXi hosts in the cluster, We can see the Status as “Succesful 100%”.
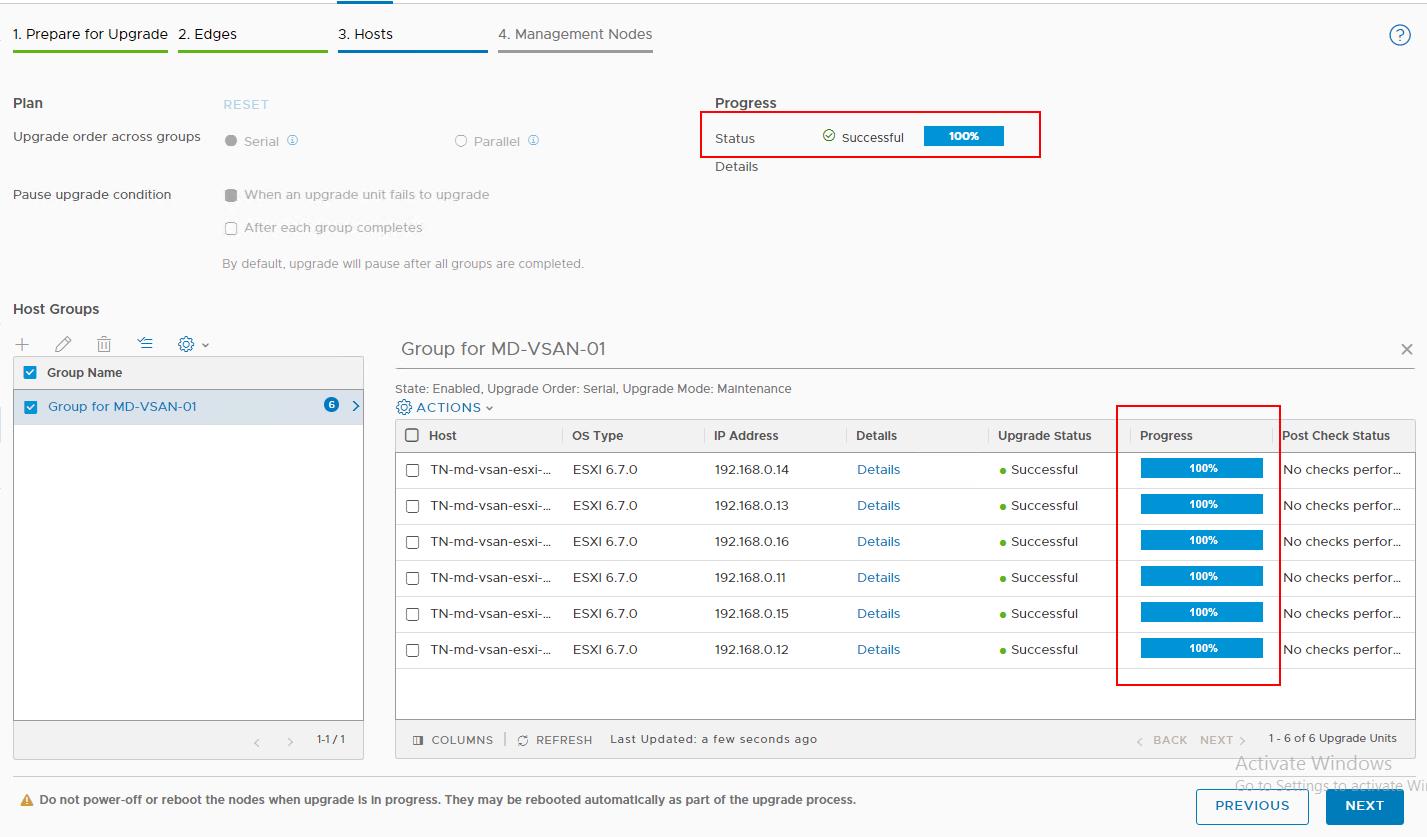
You can run POST CHECKS to validate the upgraded host. Click Next to start in the Management Nodes upgrade.

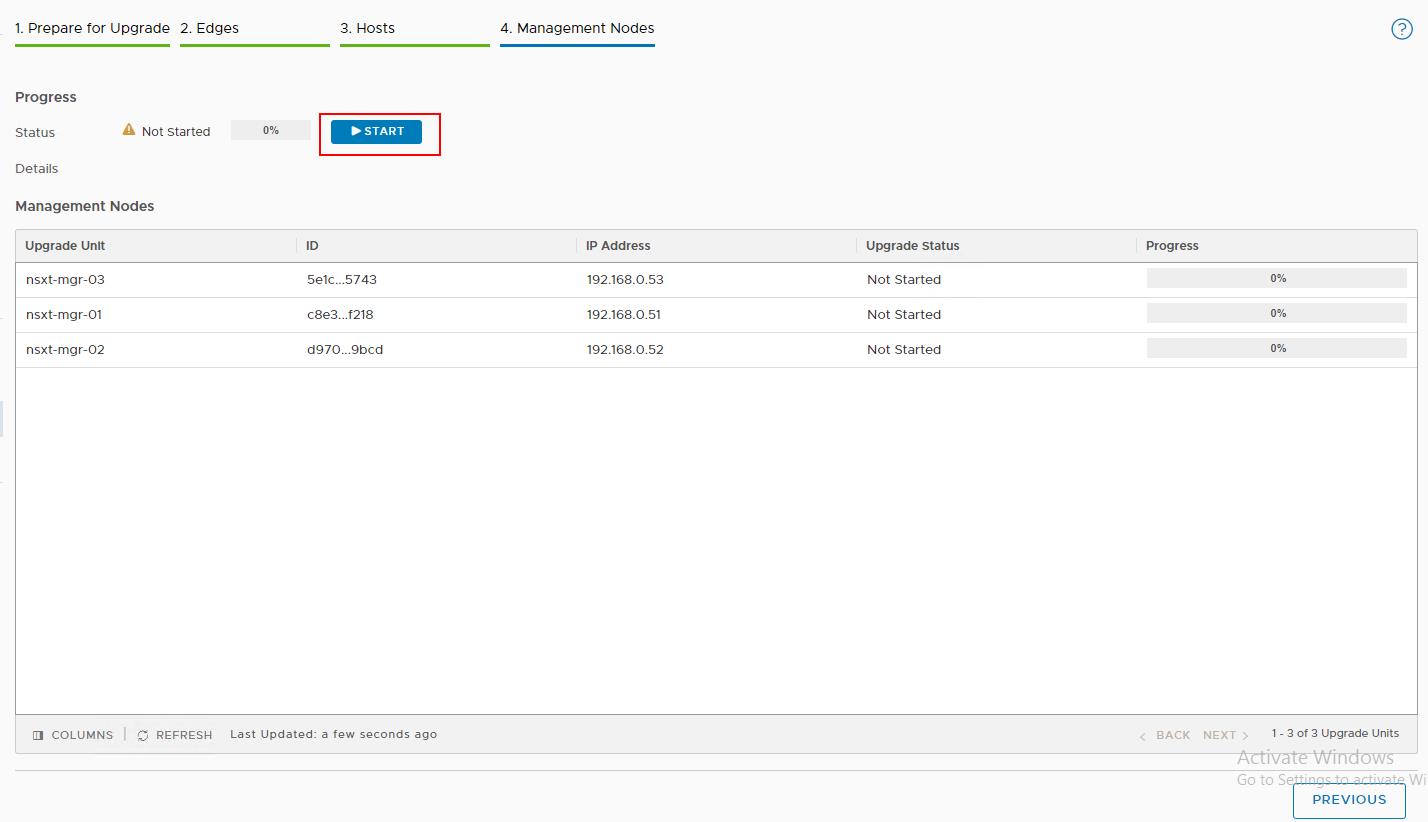
6.Upgrade NSX-T Management Nodes
This process will upgrade the NSX-T managers. The upgrade sequence upgrades the Management Plane at the end. When the Management Plane upgrade is in progress, avoid any configuration changes from any of the nodes.
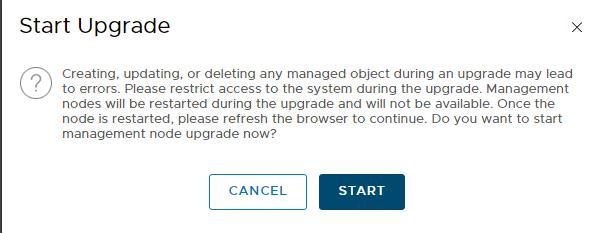
Note: After you initiate the upgrade, the NSX Manager user interface is briefly inaccessible. Then the NSX Manager user interface, API, and CLI are not accessible until the upgrade finishes and the Management plane is restarted.
Click Start to start the upgrade on the NSX-T Managers.
Click Start to start the upgrade on the NSX-T Management nodes.
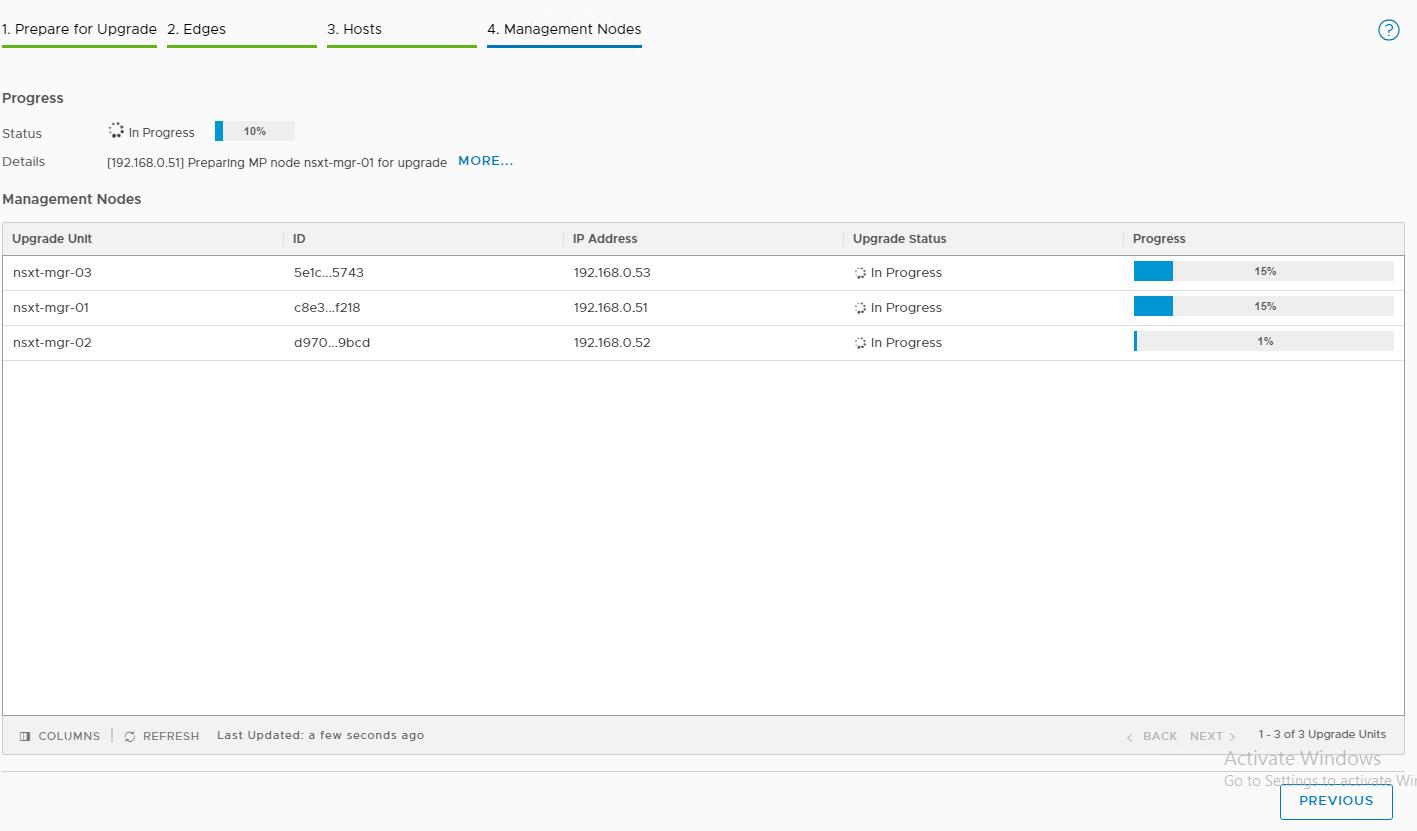
Upgrade is in progress on the NSX-T Manager nodes. Click More to see the detailed information about the process involved in the upgrade.
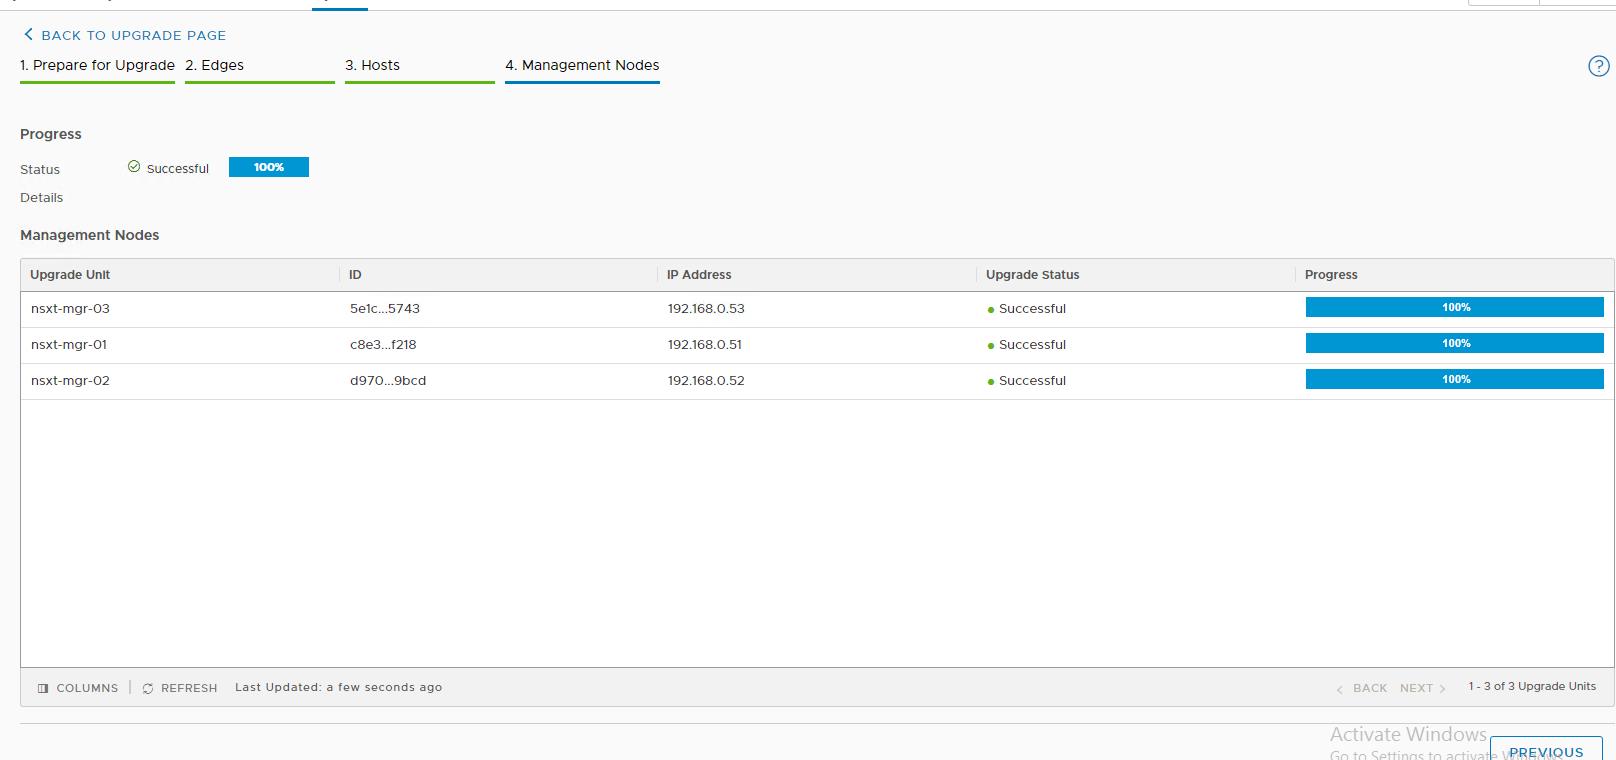
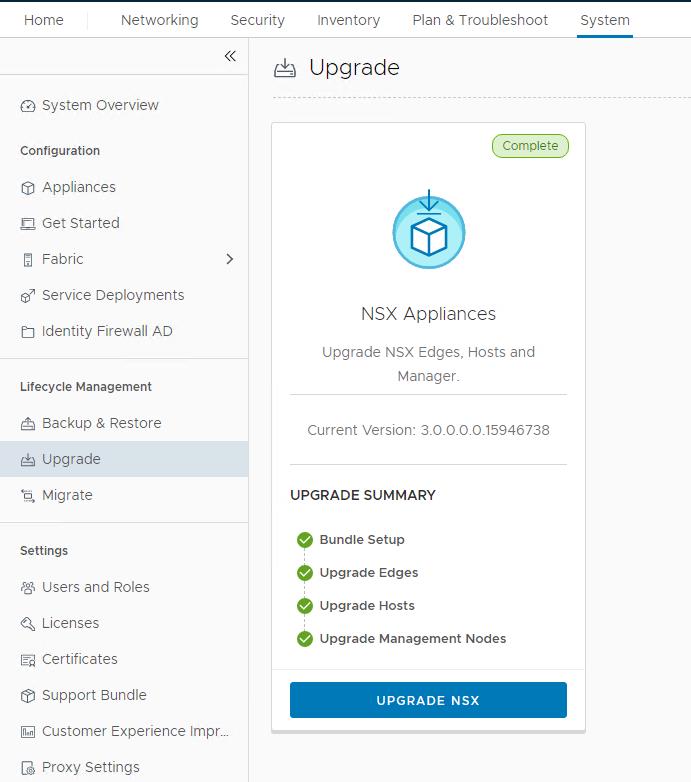
Upgrade is completed on all the three NSX-T Manager nodes. It shows the status of “Succesful 100%”. Click “Back to Upgrade Page” to see the main Upgrade page.
It shows the Upgrade status as “Completed” along with the upgrade summary. It also shows the current version of the NSX-T (NSX-T 3.0) after the upgrade.
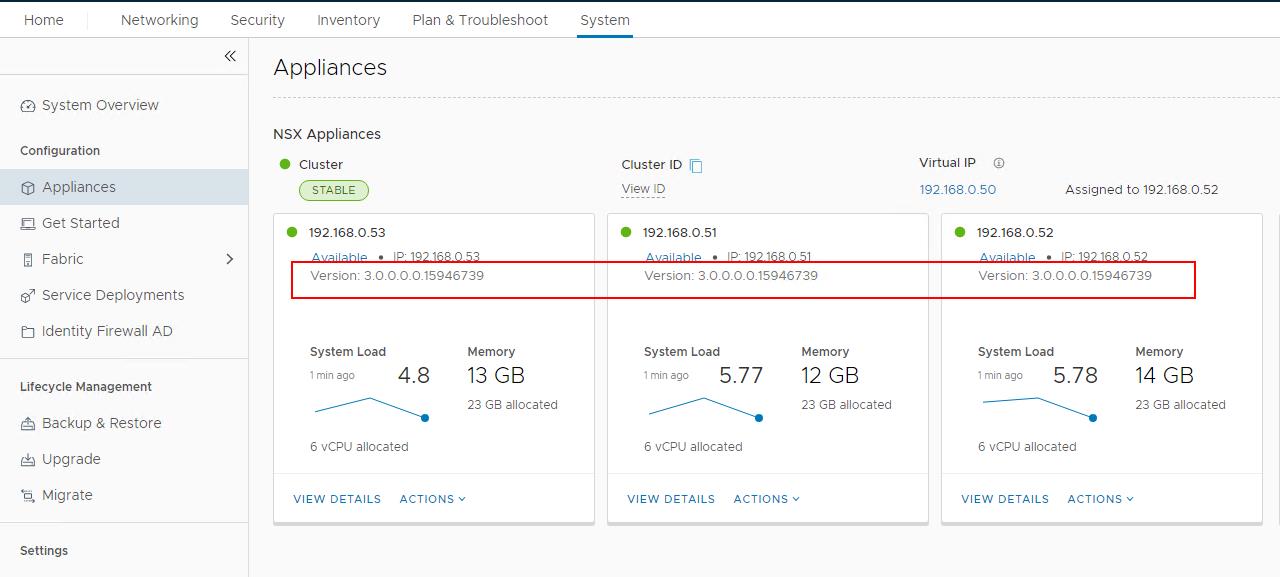
You can validate the NSX-T Manager version from System -> Appliances. Ensure that all the three NSX-T Manager nodes are upgraded to NSX-T 3.0.
That’s it. we are done with upgrading NSX-T 2.5 to NSX-T 3.0. I hope this detailed step by steps upgrade procedure is helpful for you. Thanks for Reading!!!. Be social and share it with social media, if you feel worth sharing it.